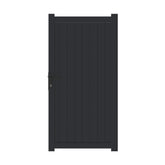
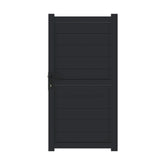
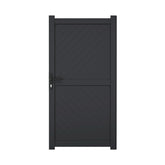
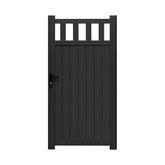
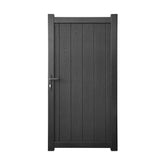
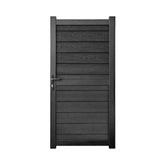
Garden Gate Installation: How To Install A Garden Gate Using 100mm or 150mm Aluminium Posts
Installing a garden gate with 100mm or 150mm aluminium posts is a simple and secure method for fitting your new aluminium or composite gate. Aluminium posts are strong, durable, and designed to create a long-lasting, rust-resistant installation suitable for all types of UK properties.
This step-by-step guide will walk you through the entire process, including post preparation, gate fitting, and alignment. It also covers how to determine the correct gate size, how much clearance is needed, and key tips for achieving a professional finish.
Tools & Equipment You’ll Need
-
Drill with metal or masonry bits (depending on mounting surface)
-
Tape measure
-
Spirit level
-
Pencil or marker
-
Spanners or socket set
-
Hammer
-
Rawl plugs, fixings & anchor bolts (supplied with your gate kit)
-
Suitable adhesive or concrete (if embedding posts)
👉 Looking for other installation options? Need posts? Check out our other installation guides:
-
Installing a Garden Gate with Surface Posts
Step 1
Check the Width of the Opening
Before starting, measure the total opening between the walls or points where your aluminium posts will be installed. Measure at the top, middle, and bottom to ensure the opening is even. Always work from the smallest measurement.

👉 How to calculate the correct gate size:
The correct gate size will depend on how many aluminium posts you are using and which size (100mm or 150mm). Use the examples below to calculate accurately:
If you are installing between a wall and one 100mm aluminium post:
Allow 130mm in total for hinge, lock keep receiver and post clearances.
Example: For a 1000mm opening:
-
10mm hinge clearance
-
870mm gate width
-
20mm lock keep receiver clearance
-
100mm aluminium post
-
= 1000mm total opening
If you are installing freestanding with two 100mm aluminium posts:
Allow 230mm in total for hinge, lock keep receiver and post clearances.
Example: For a 1000mm opening:
-
100mm aluminium post
-
10mm hinge clearance
-
770mm gate width
-
20mm lock keep receiver
-
100mm aluminium post
-
= 1000mm total opening
Using 150mm Aluminium Posts:
If you use 150mm posts instead of 100mm, simply add:
-
+50mm if using one post
-
+100mm if using two posts
⚠️ Important Height Requirement: Because the hinges are attached both above and below the gate, each requires 50mm of clearance. This means your hinge-side post or wall should be at least 100mm taller than the gate height.
📌 For full technical diagrams, see each product page under “Specification.”
Step 2 - 7
Position and Fix Your Aluminium Posts
You can install aluminium posts in several ways depending on your layout:

Option 1: Bolting Posts to a Hard Surface
If you’re fitting posts on top of a concrete base or patio:
-
Position the aluminium posts in place according to your gate width.
-
Use a spirit level to ensure they are perfectly upright.
-
Mark and drill fixing holes using a masonry bit.
👉 Tip: Aluminium posts can be trimmed down (if required) to achieve your preferred height. Since the gate’s hinges are attached both above and below the gate, each requires 50mm of clearance, meaning the posts should be at least 100mm taller than the gate height.
-
Secure each post with anchor bolts and rawl plugs.


Option 2: Embedding Posts into the Ground
If you’re installing posts directly into the ground:
-
Dig holes at least 500mm deep (depending on gate size and soil type).
-
Insert the aluminium posts and use a spirit level to ensure they are upright.
👉 Tip: Aluminium posts can be trimmed down before embedding (if required) to achieve your desired height. Ensure that after trimming, the posts still remain at least 100mm taller than the gate height to allow for hinge clearance above and below the gate.
-
Fill the holes with postcrete or concrete, ensuring posts remain level until the concrete sets.


Step 8 - 10
Attach the Lower Hinge Bracket
First, mark the positions for the bracket on the ground. Drill a pilot hole at each marked point to ensure accurate placement, then enlarge each hole to the final size needed for the anchor bolts. Make sure each hole is deep enough to securely hold the fixings. Insert anchor bolts supplied with the kit. Secure the floor-mounted hinge bracket tightly so it can take the weight of the gate.


Important Information About Hinges
Each garden gate includes a floor-mounted hinge within the accessory box, which comes as standard and is included in the gate price. The gates also include two wall-mounted hinges, which can be attached to the aluminium posts if preferred.
The installation guide demonstrates the use of the floor-mounted hinge, as you cannot access inside the aluminium post to secure fixings when attempting to use a wall-mounted hinge at the bottom of the gate. However, if you prefer to use the wall-mounted hinge instead, we supply special fixings known as Thin Wall Bolts.
We highly recommend only using this alternative installation method if the aluminium posts are concreted into the ground. The process is straightforward:
-
Drill a hole into the post.
-
Insert the Thin Wall Bolt.
-
Tighten the head using an Allen key.
You will need two Thin Wall Bolts for this installation method, as each wall-mounted hinge requires two fixing points.
Step 11 - 13
Fit the Upper Hinge Bracket
Position the upper hinge bracket in line with the lower bracket. Mark the fixing points, drill, and secure with bolts. Check alignment with a spirit level - the hinges must be perfectly vertical.


Step 15 - 25
Fit the Lock & Handle Mechanism
Install the lock body and handle set provided. Mark the positions for the handle screws, then drill a pilot hole at each mark to ensure accurate alignment. Enlarge the pilot holes as needed for the final fitting. Insert the spindle bar through the lock mechanism and attach the handles on both sides. Secure with handle screws. Fit the euro cylinder lock and test that the key turns freely.
Install the Latch/Receiver
Close the gate and mark where the latch meets the opposite wall or post. For accurate drilling, use a pencil to mark a small cross at the exact point where the latch will be installed. Drill and fix the lock keep channel and cover strip. Ensure the gate latches securely without resistance.


Test & Secure All Fixings
Open and close the gate several times to ensure smooth movement and secure latching. Tighten all hinge nuts, washers, and screws. Make final adjustments so the gate is straight and aligned.

Maintenance Tips
-
Oil hinges and lock mechanism once or twice per year
-
Wash aluminium/composite surfaces with warm soapy water
-
Check fixings annually and re-tighten if needed
-
No painting or staining is required
-
Regular maintenance helps keep your gate protected from weather and environmental damage, ensuring long-lasting durability
Installation Scenarios Covered
This method works for:
-
Between walls using one aluminium post
-
Between wall and open space using one post
-
Freestanding installations using two aluminium posts
👉 Looking for other installation options? Need posts? Check out our other installation guides:
-
Installing a Garden Gate with Surface Posts
Why Choose Aluminium Posts from Residential Gates?
Our 100mm and 150mm aluminium posts are engineered for strength and durability. They are powder-coated to match your gate’s finish and come pre-fitted with hinge and latch fixing points for straightforward installation.
✅ Compatible with all aluminium and composite garden gates
✅ Available in Jet Black (RAL 9005) and Anthracite Grey (RAL 7016)
✅ Option for bespoke RAL colours
✅ Designed for both bolted and concreted installations
✅ 5-year manufacturer’s guarantee
✅ Free mainland UK delivery on all orders
Final Thoughts
Installing a garden gate using 100mm or 150mm aluminium posts provides the most versatile and durable solution for your home. Whether bolted to concrete, fixed between walls, or installed freestanding, aluminium posts ensure a professional and long-lasting finish.
By following these simple steps and ensuring accurate measurements, your new garden gate will provide years of smooth, reliable use with minimal maintenance.

