


Garden Gate Installation: How to Install a Garden Gate Between Walls or Existing Posts

Installing a garden gate (only – no posts) doesn’t need to be complicated. Whether you’re fitting a new aluminium or composite gate between two walls, between a wall and an existing post, or even between two existing posts, the process is straightforward with the right tools and preparation.
This step-by-step guide will walk you through the wall-to-wall fitting method, which is also suitable for wall-to-post and post-to-post installations. At the end, we’ll also cover key tips to ensure your gate is aligned, secure, and long-lasting.
See our complete full pdf step-by-step Garden Gate Installation Guide.
👉 Looking for other installation options? Need posts? Check out our other installation guides:
-
***Installing a Garden Gate with Surface Posts***
-
Installing a Garden Gate with 100mm or 150mm Aluminium Posts
Introduction to Gate Installation
Installing a new garden gate is a fantastic way to boost both the security and appearance of your property. Whether you’re looking to create easy access to your garden, enhance your home’s curb appeal, or simply replace an old gate, careful planning and the right approach are key to a successful installation. Gates come in a wide range of styles and materials, from classic wooden gates to modern metal or composite options, each offering unique benefits for your property. In this guide, we’ll walk you through the essential steps of garden gate installation, helping you plan, install, and enjoy a new gate that’s both functional and stylish. Whether you’re a seasoned DIYer or tackling your first installation, you’ll find all the information you need to get started and achieve a professional result.
Preparation and Planning
Before you begin installing your new gate, it’s crucial to prepare the site and plan each step of the process. Start by measuring the space where your gate will be fitted, paying close attention to the width between gate posts and the level of the ground. Use a spirit level to check that both the ground and posts are flat and even—this will help ensure your gate hangs correctly and operates smoothly. If you’re installing a wooden gate, consider using pressure treated timber for added durability and protection against the elements. Gather all necessary tools and fittings, such as hinges, a latch, and any specialized hardware required for your chosen gate style. By taking the time to plan and prepare, you’ll set the stage for a smooth installation and a long-lasting, secure gate.
Gate Selection
Choosing the right gate for your property is an important decision that can affect both the security and appearance of your home. Wooden gates are a popular choice for their classic look and natural charm, while metal gates offer enhanced strength and security. When selecting your new gate, consider the style that best complements your property, as well as the level of security you require. Don’t forget to factor in the necessary fittings, such as sturdy hinges and a reliable ring latch, to ensure your gate functions properly and stands up to daily use. Take measurements carefully and choose a gate size that fits your opening, allowing for any required clearance. By comparing different options and considering your specific needs, you’ll find a gate that not only looks great but also provides the security and access you need.
Tools & Equipment You’ll Need
-
Drill with masonry bits
-
Spirit level
-
Tape measure
-
Pencil/marker
-
Spanners or socket set
-
Rawl plugs & anchor bolts (supplied)
-
Hammer
-
Screwdriver
Safety Precautions
Safety should always be a top priority when installing a new gate. Before you start, make sure the installation site is clear of any obstacles, debris, or uneven ground that could pose a hazard. Wear appropriate protective gear, such as gloves and safety glasses, to protect yourself while working with tools and materials. When attaching your gate, always drill pilot holes before inserting screws to prevent splitting the wood or damaging the fittings. Take care when lifting and positioning the gate, especially if it’s heavy or awkward to handle. By following these safety precautions, you’ll help ensure a smooth, accident-free installation and enjoy peace of mind as you complete your project.
Permits and Regulations
Before installing your new gate, it’s important to check with your local authorities to see if any permits or regulations apply to your project. Some areas may require a building permit or have specific zoning rules that affect where and how a gate can be installed on your property. If you live in a community with a homeowners’ association, review their guidelines to ensure your new gate complies with any restrictions. Be mindful of property lines, easements, and environmental regulations that could impact your installation. Taking the time to research and follow all relevant rules will help you avoid potential fines or complications, ensuring your gate is installed legally and without issue.
Watch the full installation video (step-by-step visual guide)
Step 1
Check the Width of the Opening
Before starting, measure the opening between your walls or posts. Measure at the top, middle, and bottom to ensure the space is square. Always work with the smallest measurement. Keep in mind that the required gate size can vary depending on whether you are using existing posts, starting from scratch, or moving posts.
👉 How to calculate the correct gate size: Take the smallest opening measurement and subtract 30mm. This ensures enough space for hinges and the lock keep receiver. For most installations, you can expect this clearance to provide a proper fit, but always check your specific situation.
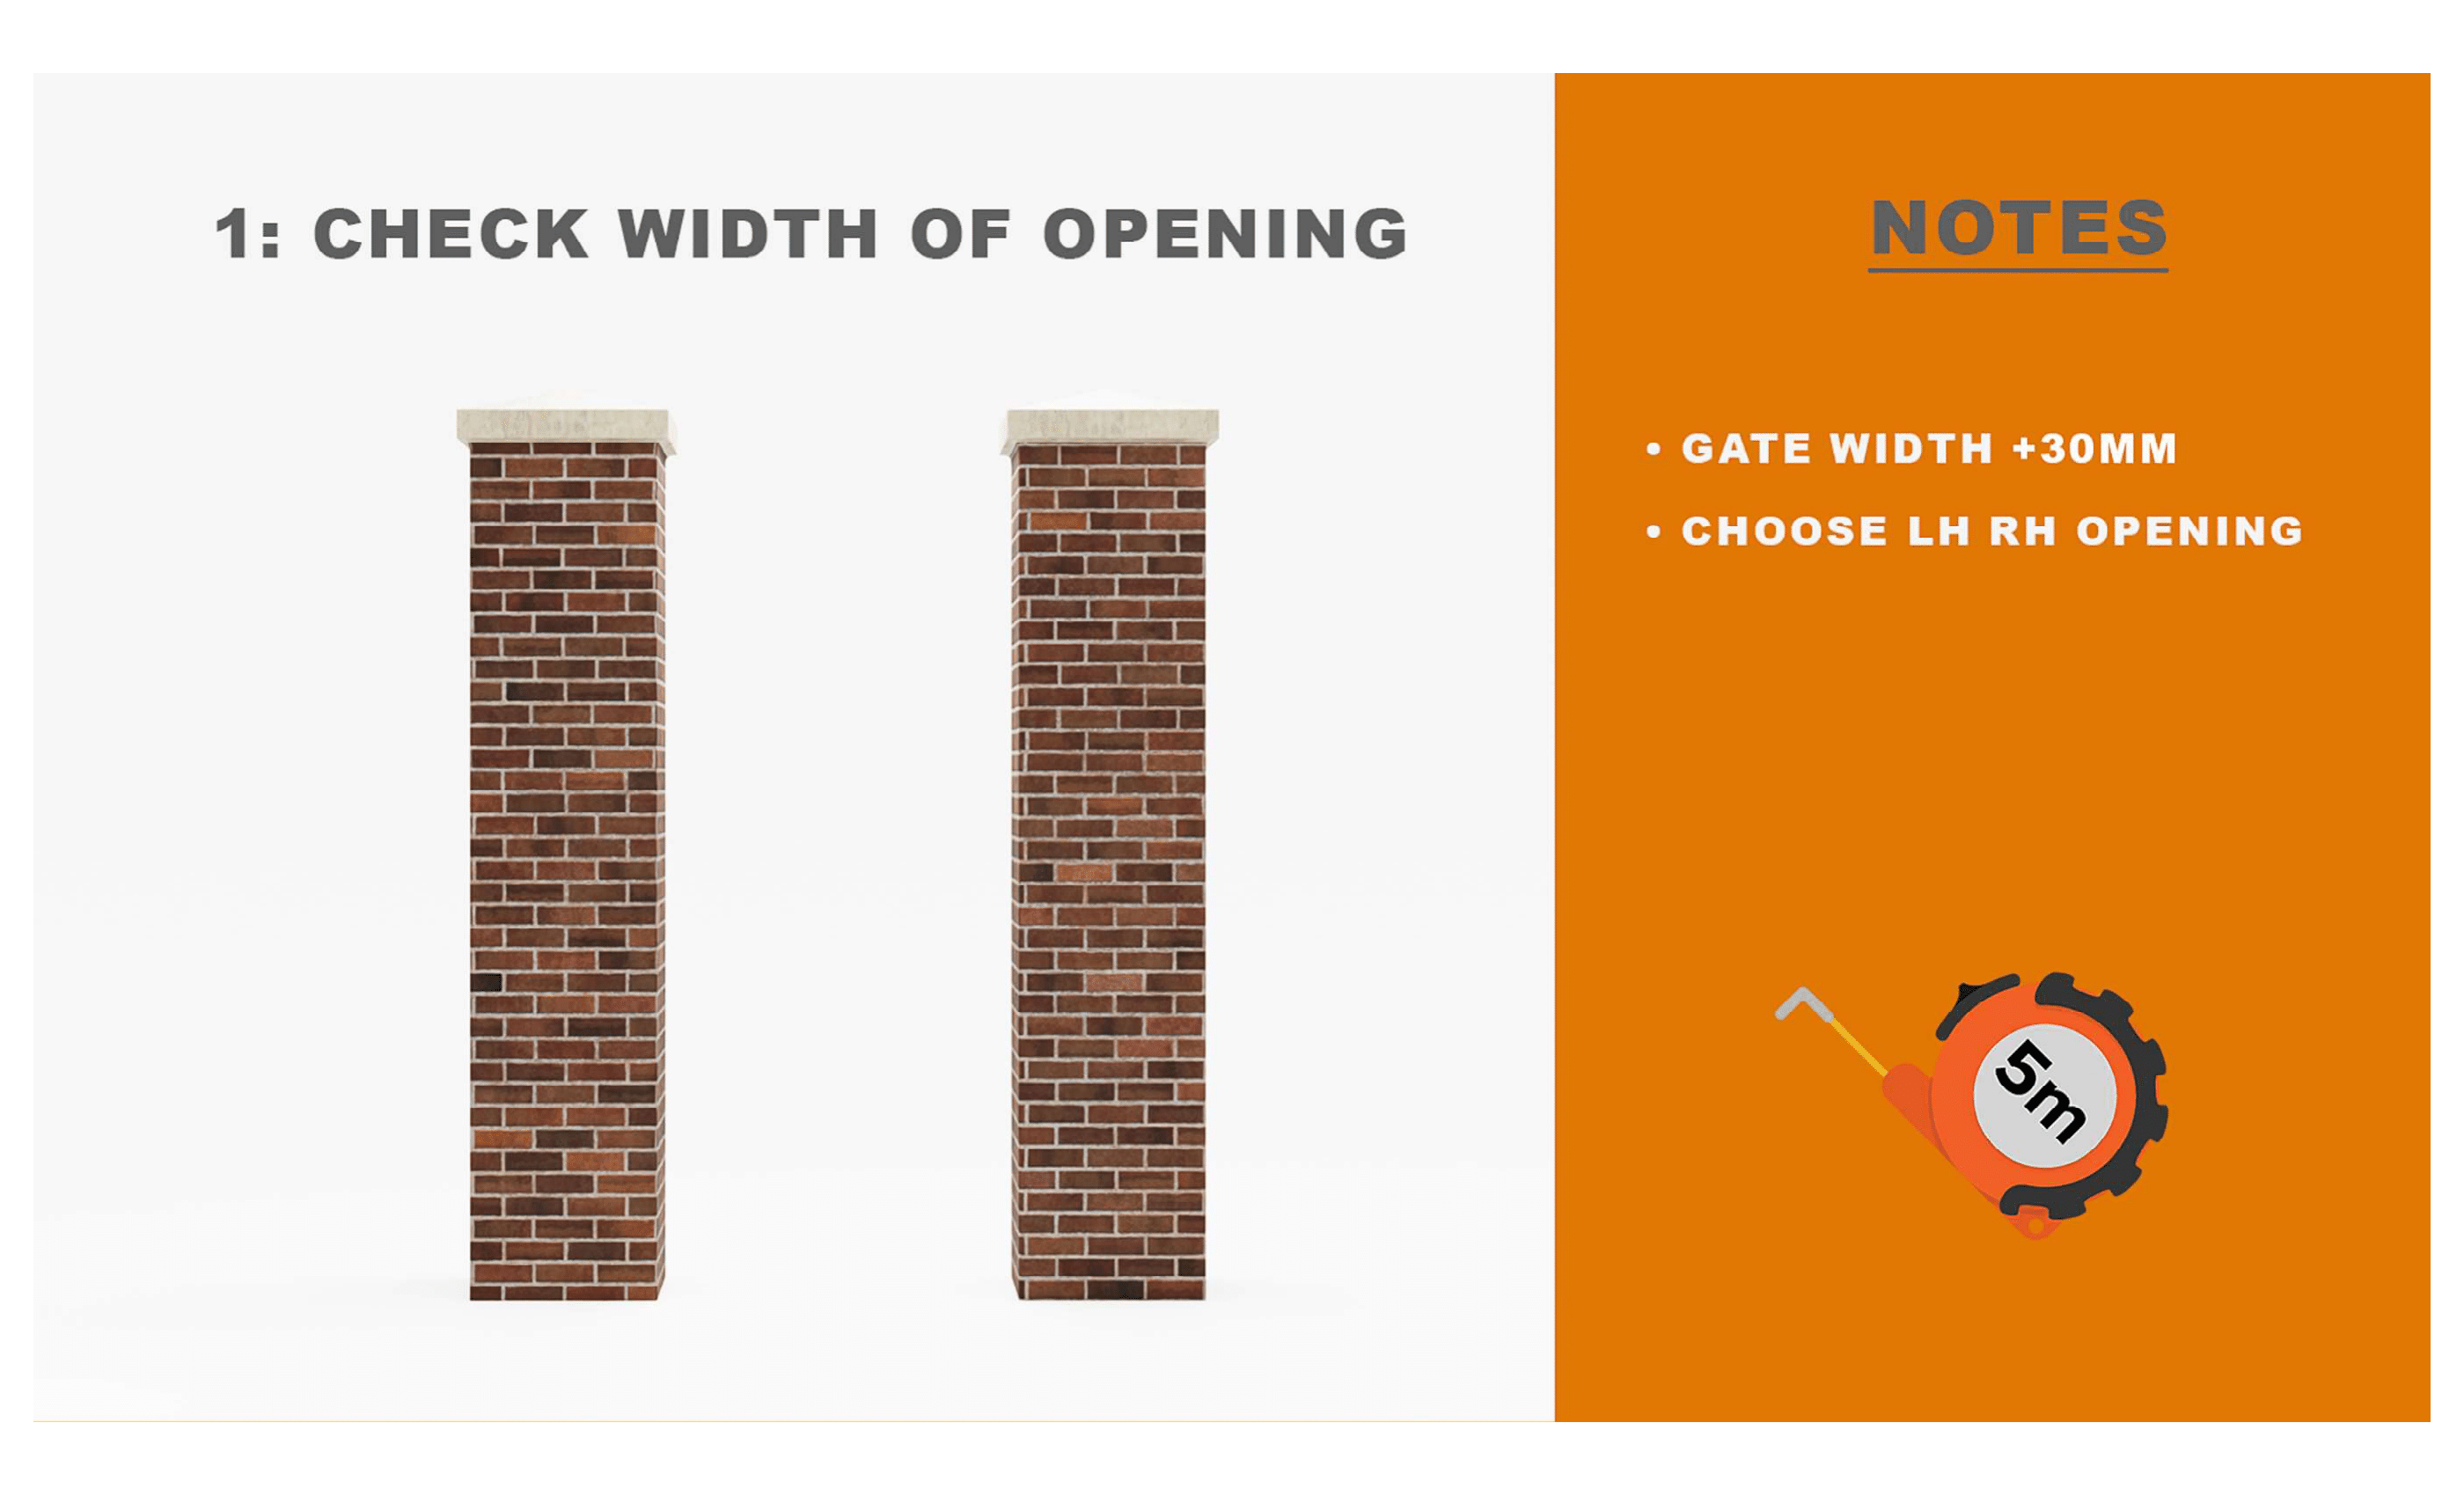
Example: If the minimum wall-to-wall, wall to existing post, or existing post to existing post opening is 1000mm:
-
10mm (hinge clearance)
-
970mm (gate width)
-
20mm (lock keep receiver clearance)
- Total = 1000mm total opening
⚠️ Note: If the opening is slightly wider in some areas, you can pack out behind the hinge or lock keep receiver to achieve a snug fit.
The direction your gate opens is also important. Our garden gates are universal allowing you the flexibility to decide whether the gate should open inwards or open outwards. If your gate is adjacent to a path or public right of way, it is usually best for the gate to swing inward to avoid blocking the path and to maintain safety and aesthetics.
⚠️ Important height requirement: As the gate’s hinges are attached both above and below the gate, each requires 50mm of clearance. This means the overall height on the hinge-side wall should be at least 100mm taller than the standard gate height.
📌 Detailed diagrams can be found on each product page within the dropdown menu “Specification”.
Steps 2 - 6
Mark the Lower Hinge Bracket
Position the gate at the desired height within the opening. Using a spirit level to keep it upright, mark the location of the lower hinge bracket on the wall or post. This will determine the base level of your gate.
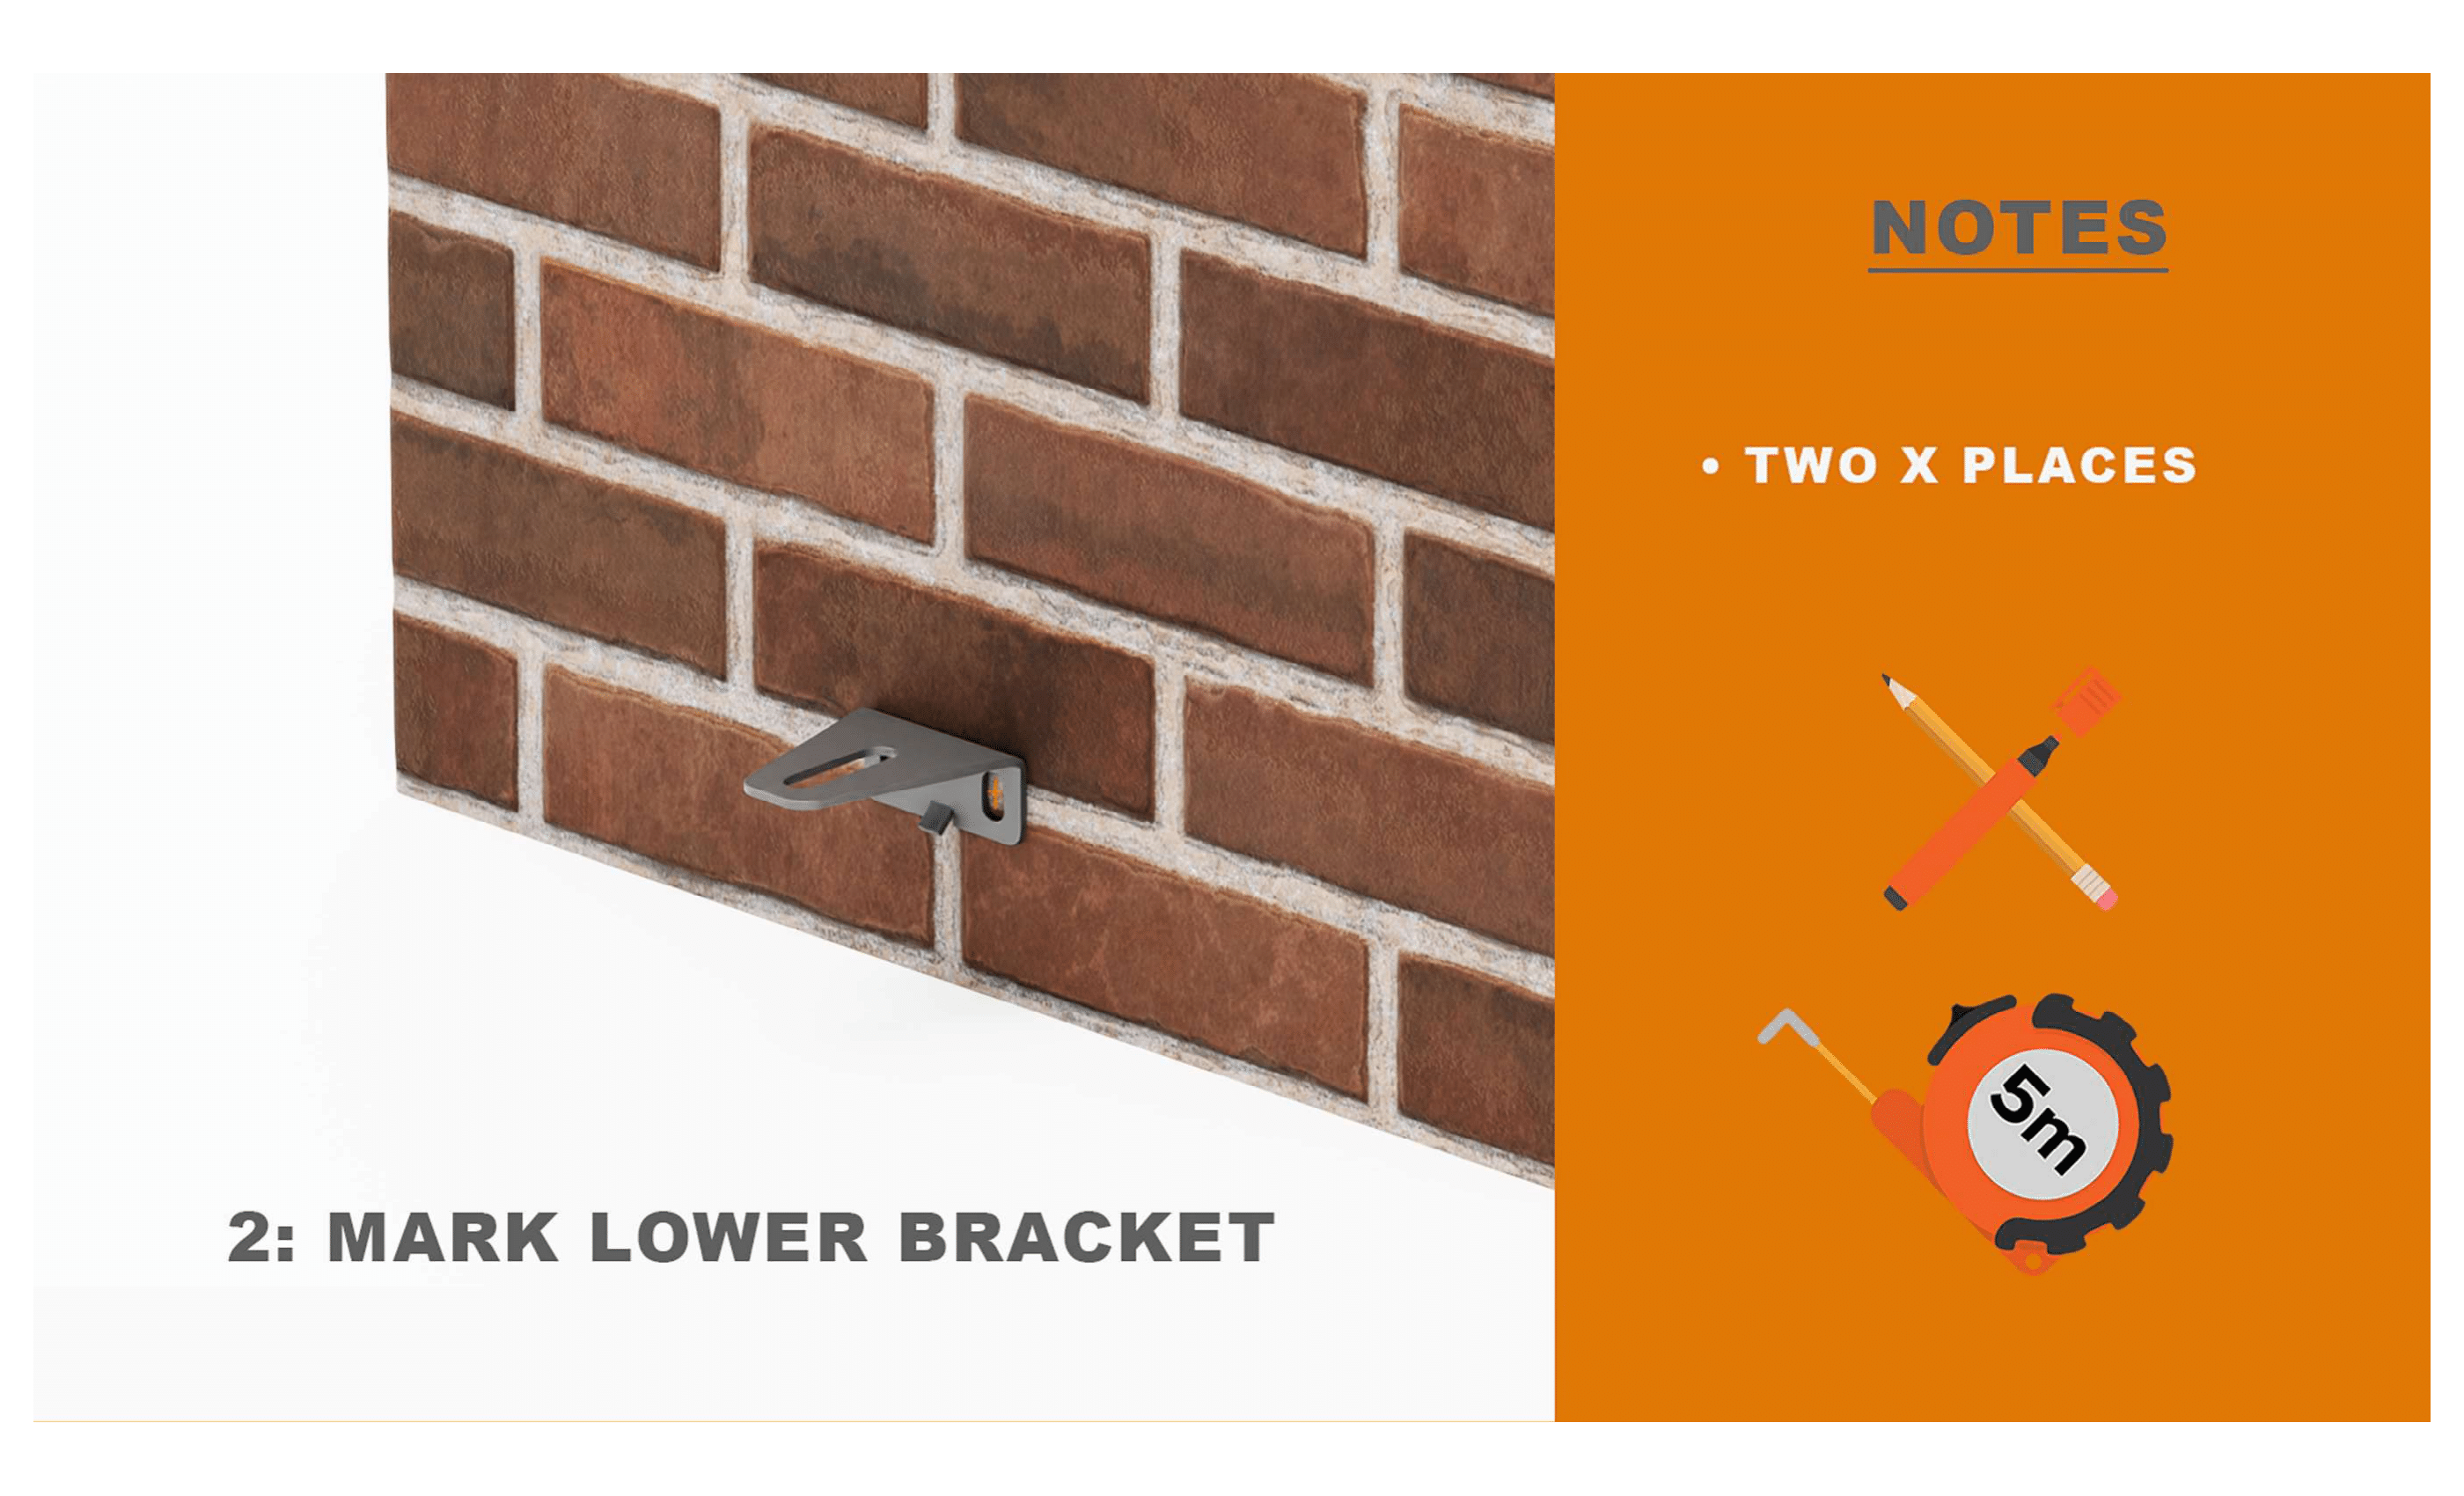
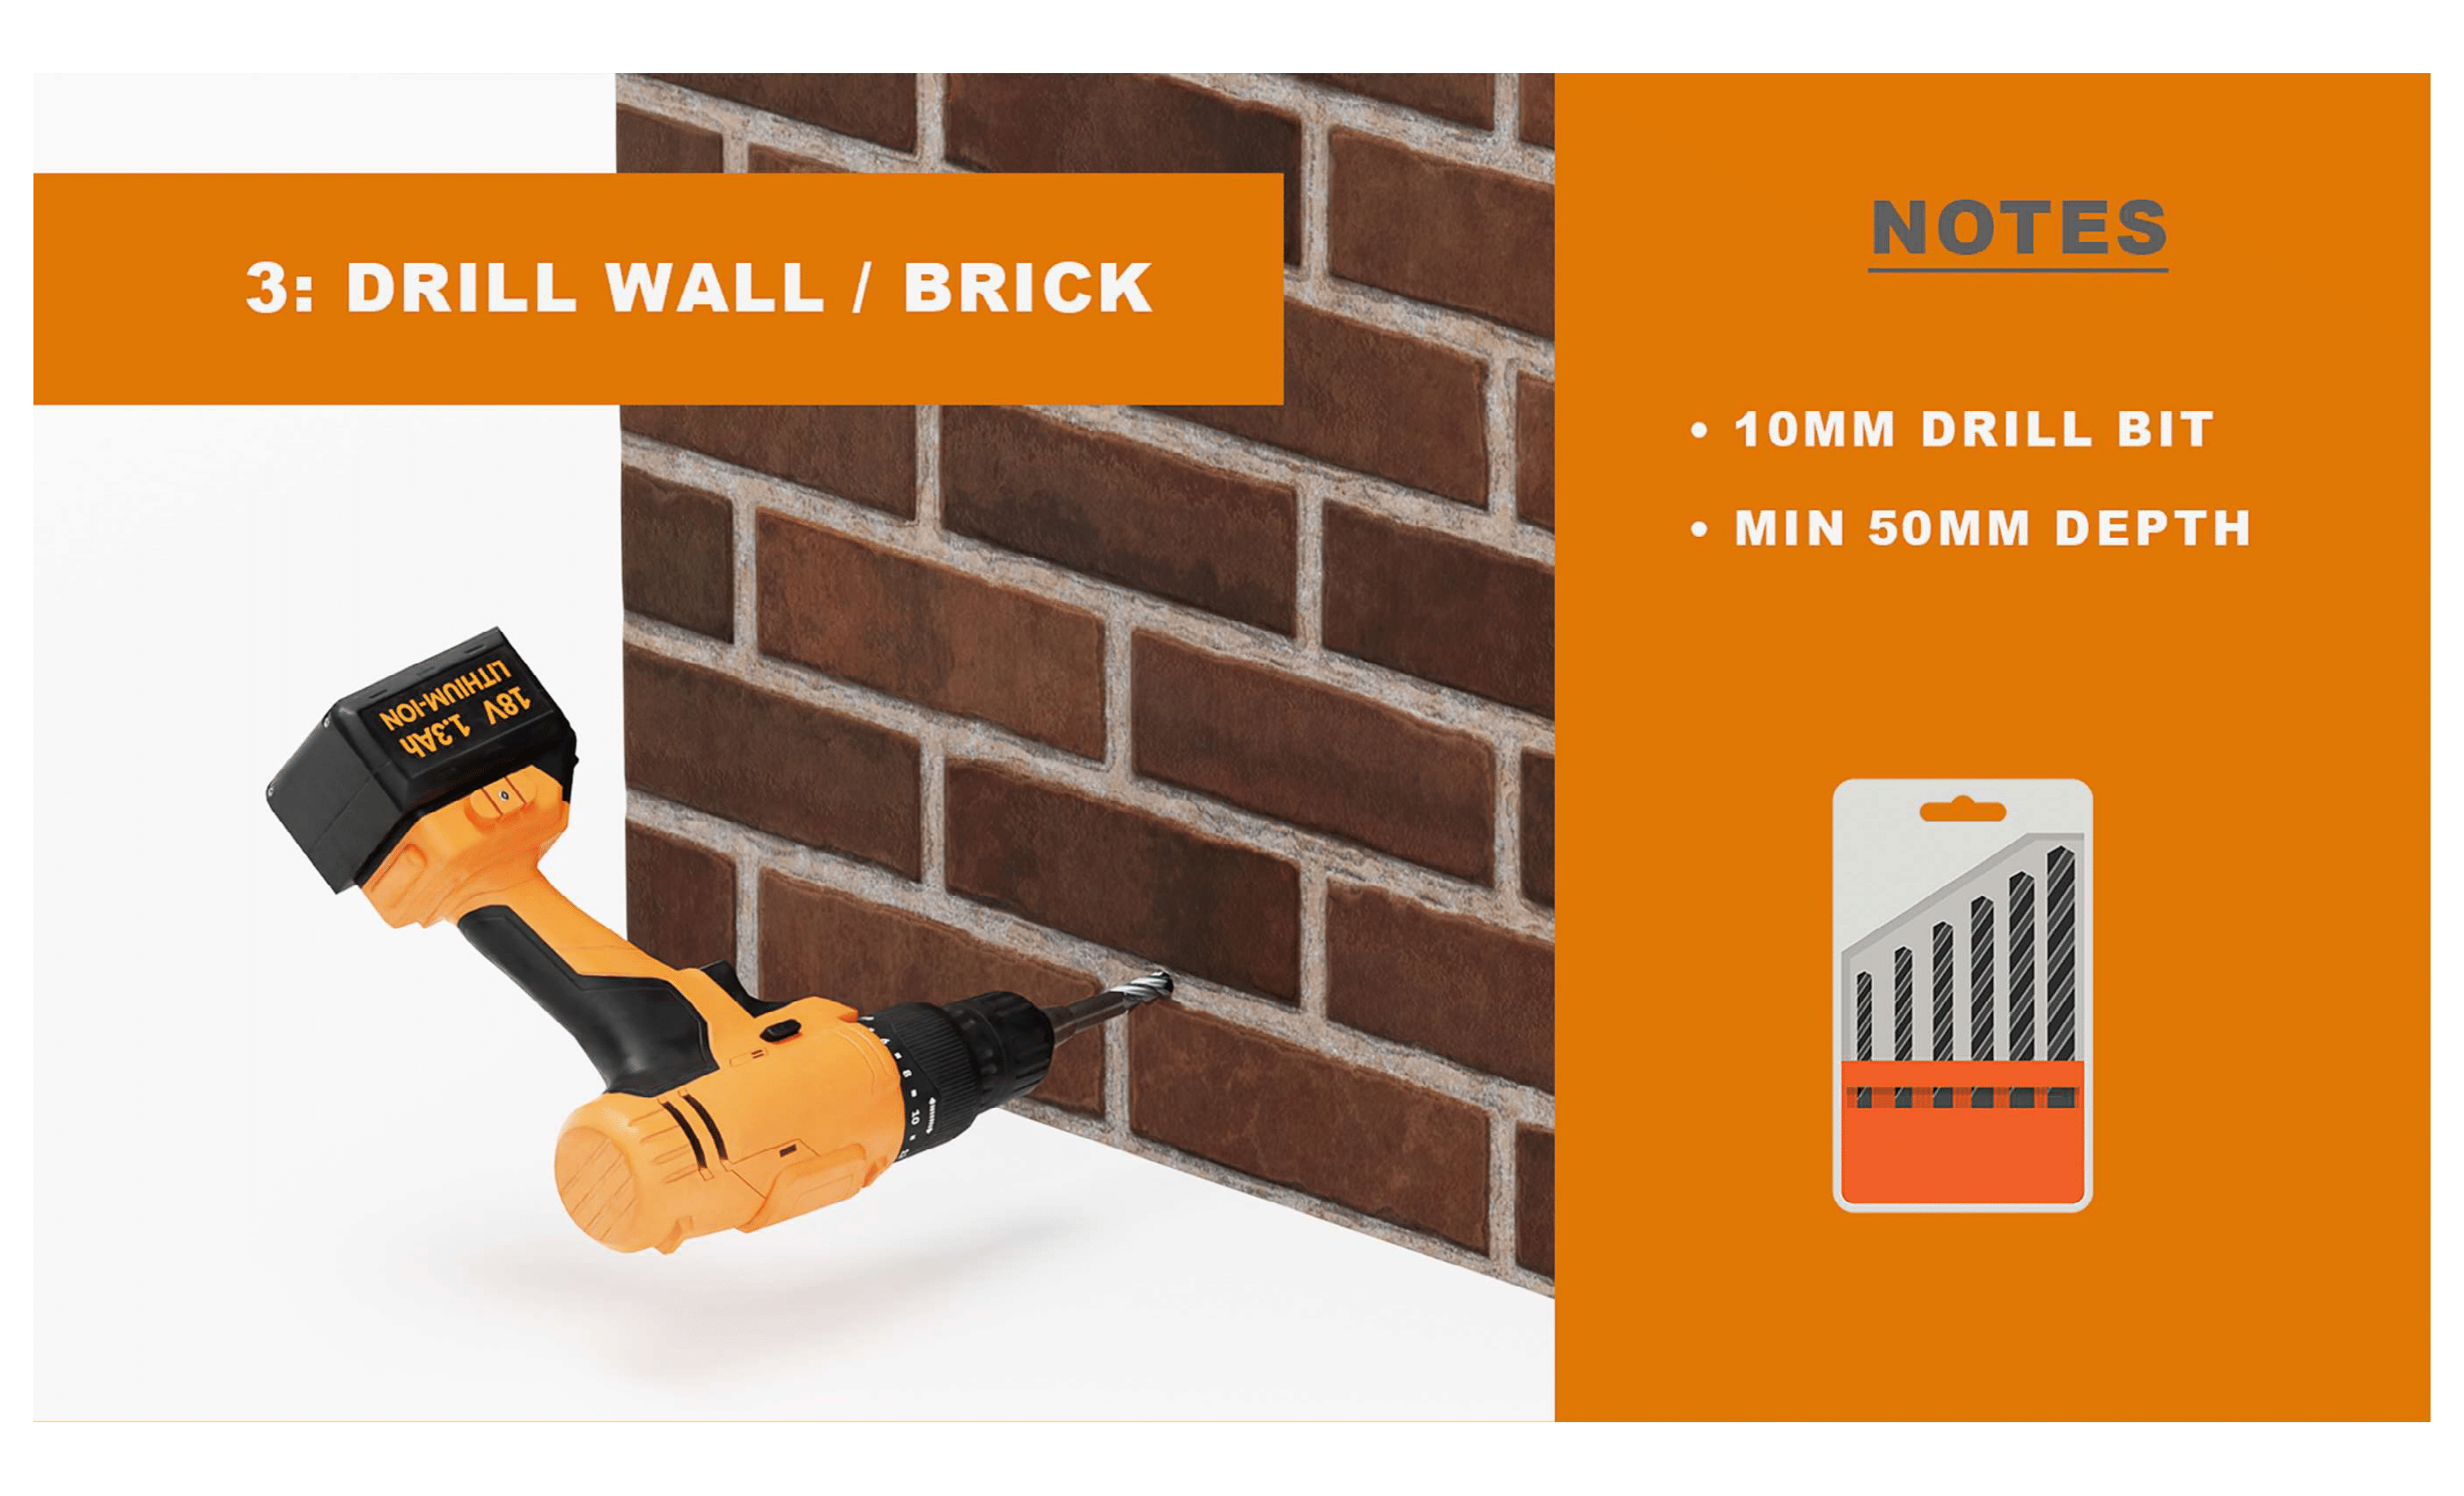
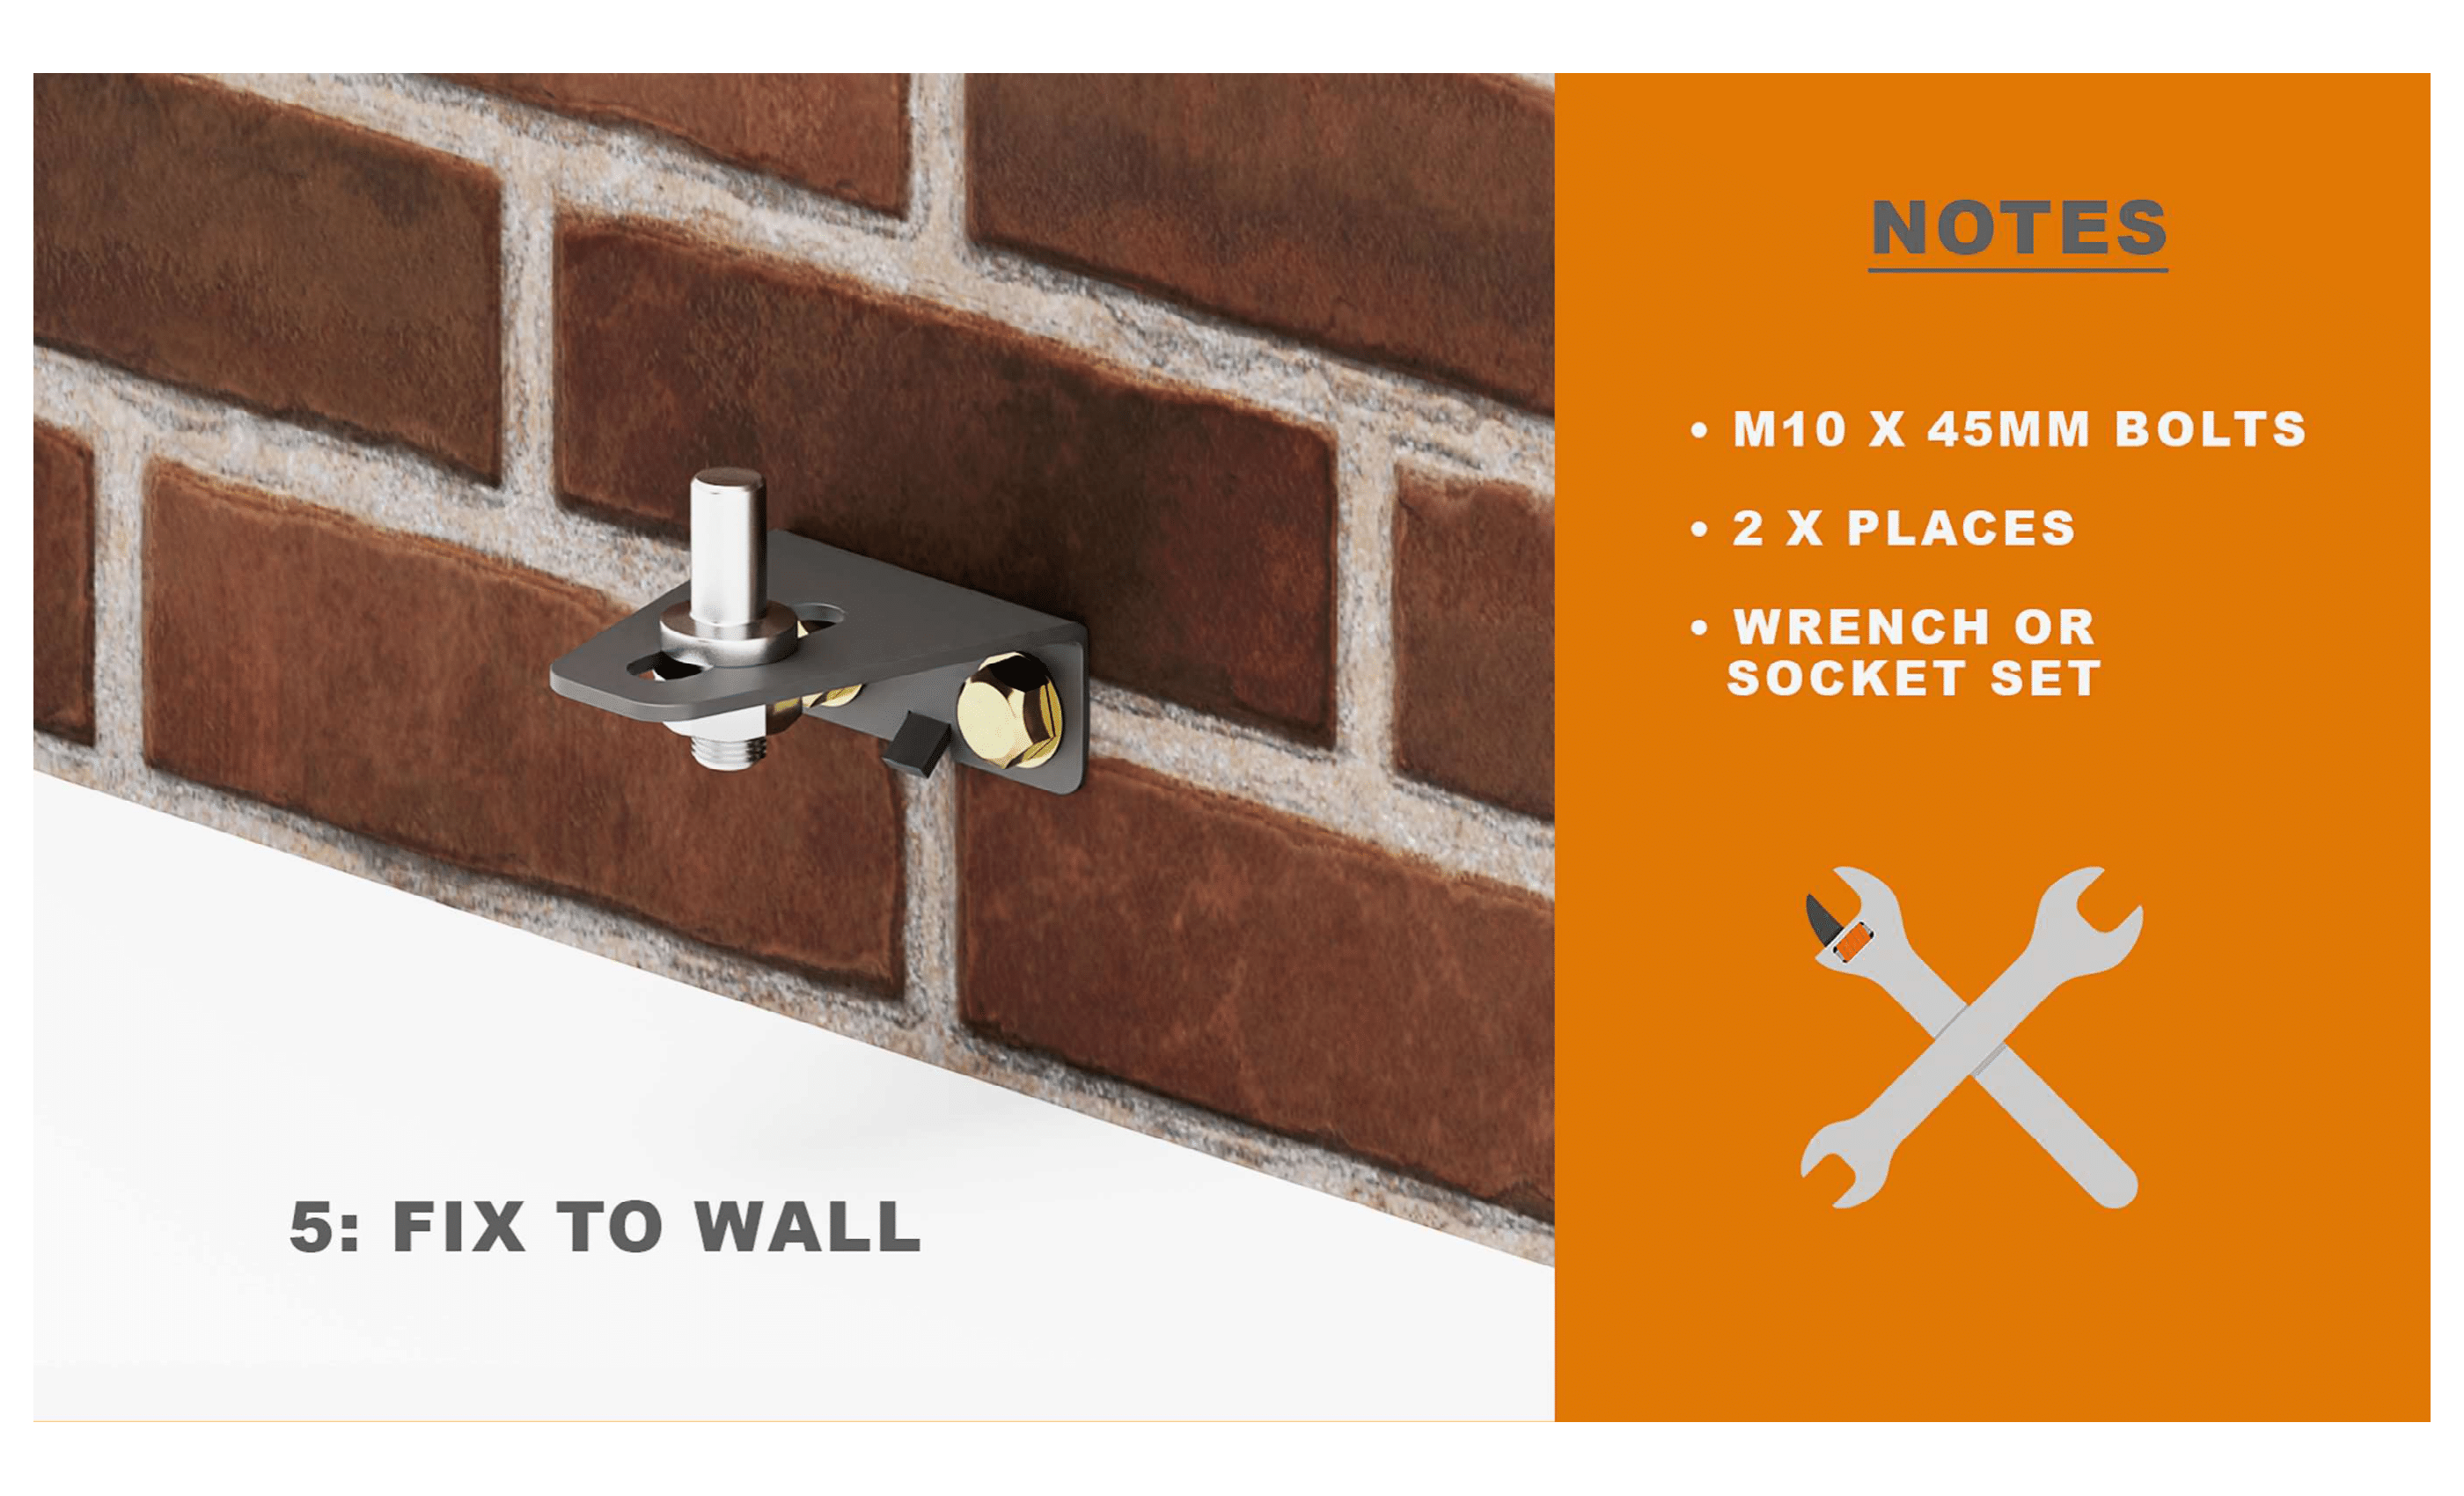
Drill & Fix the Lower Bracket
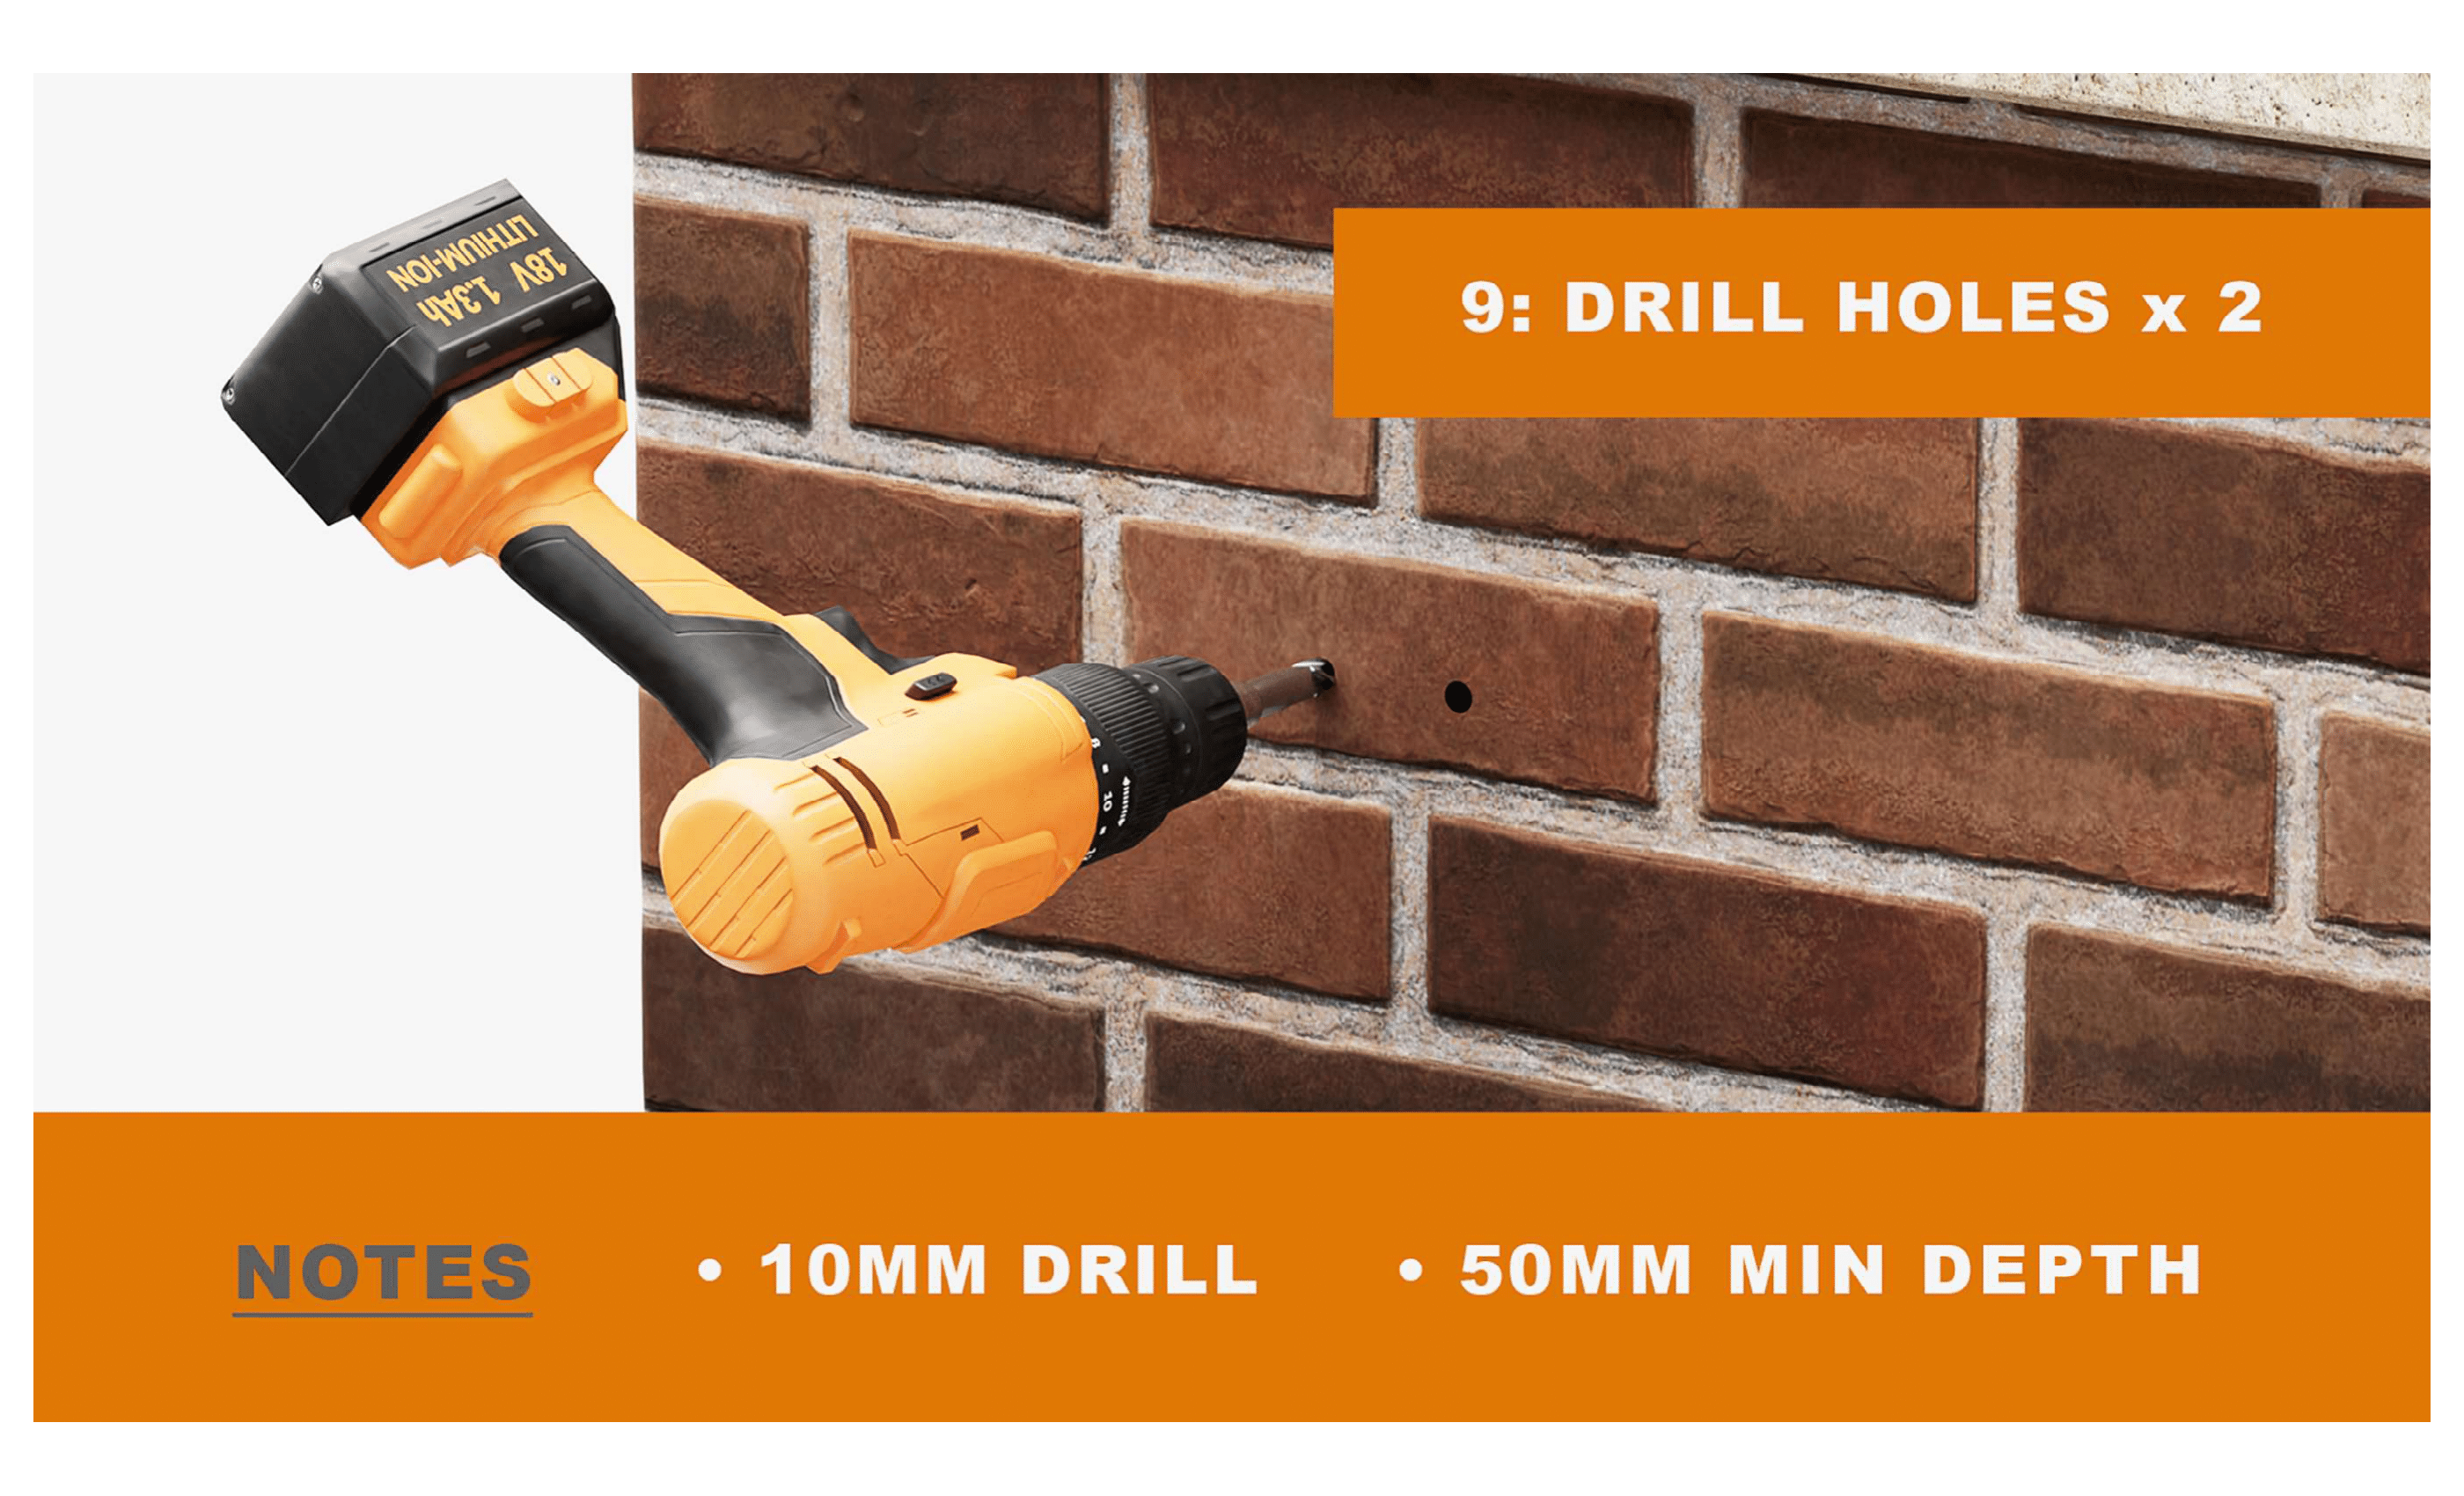
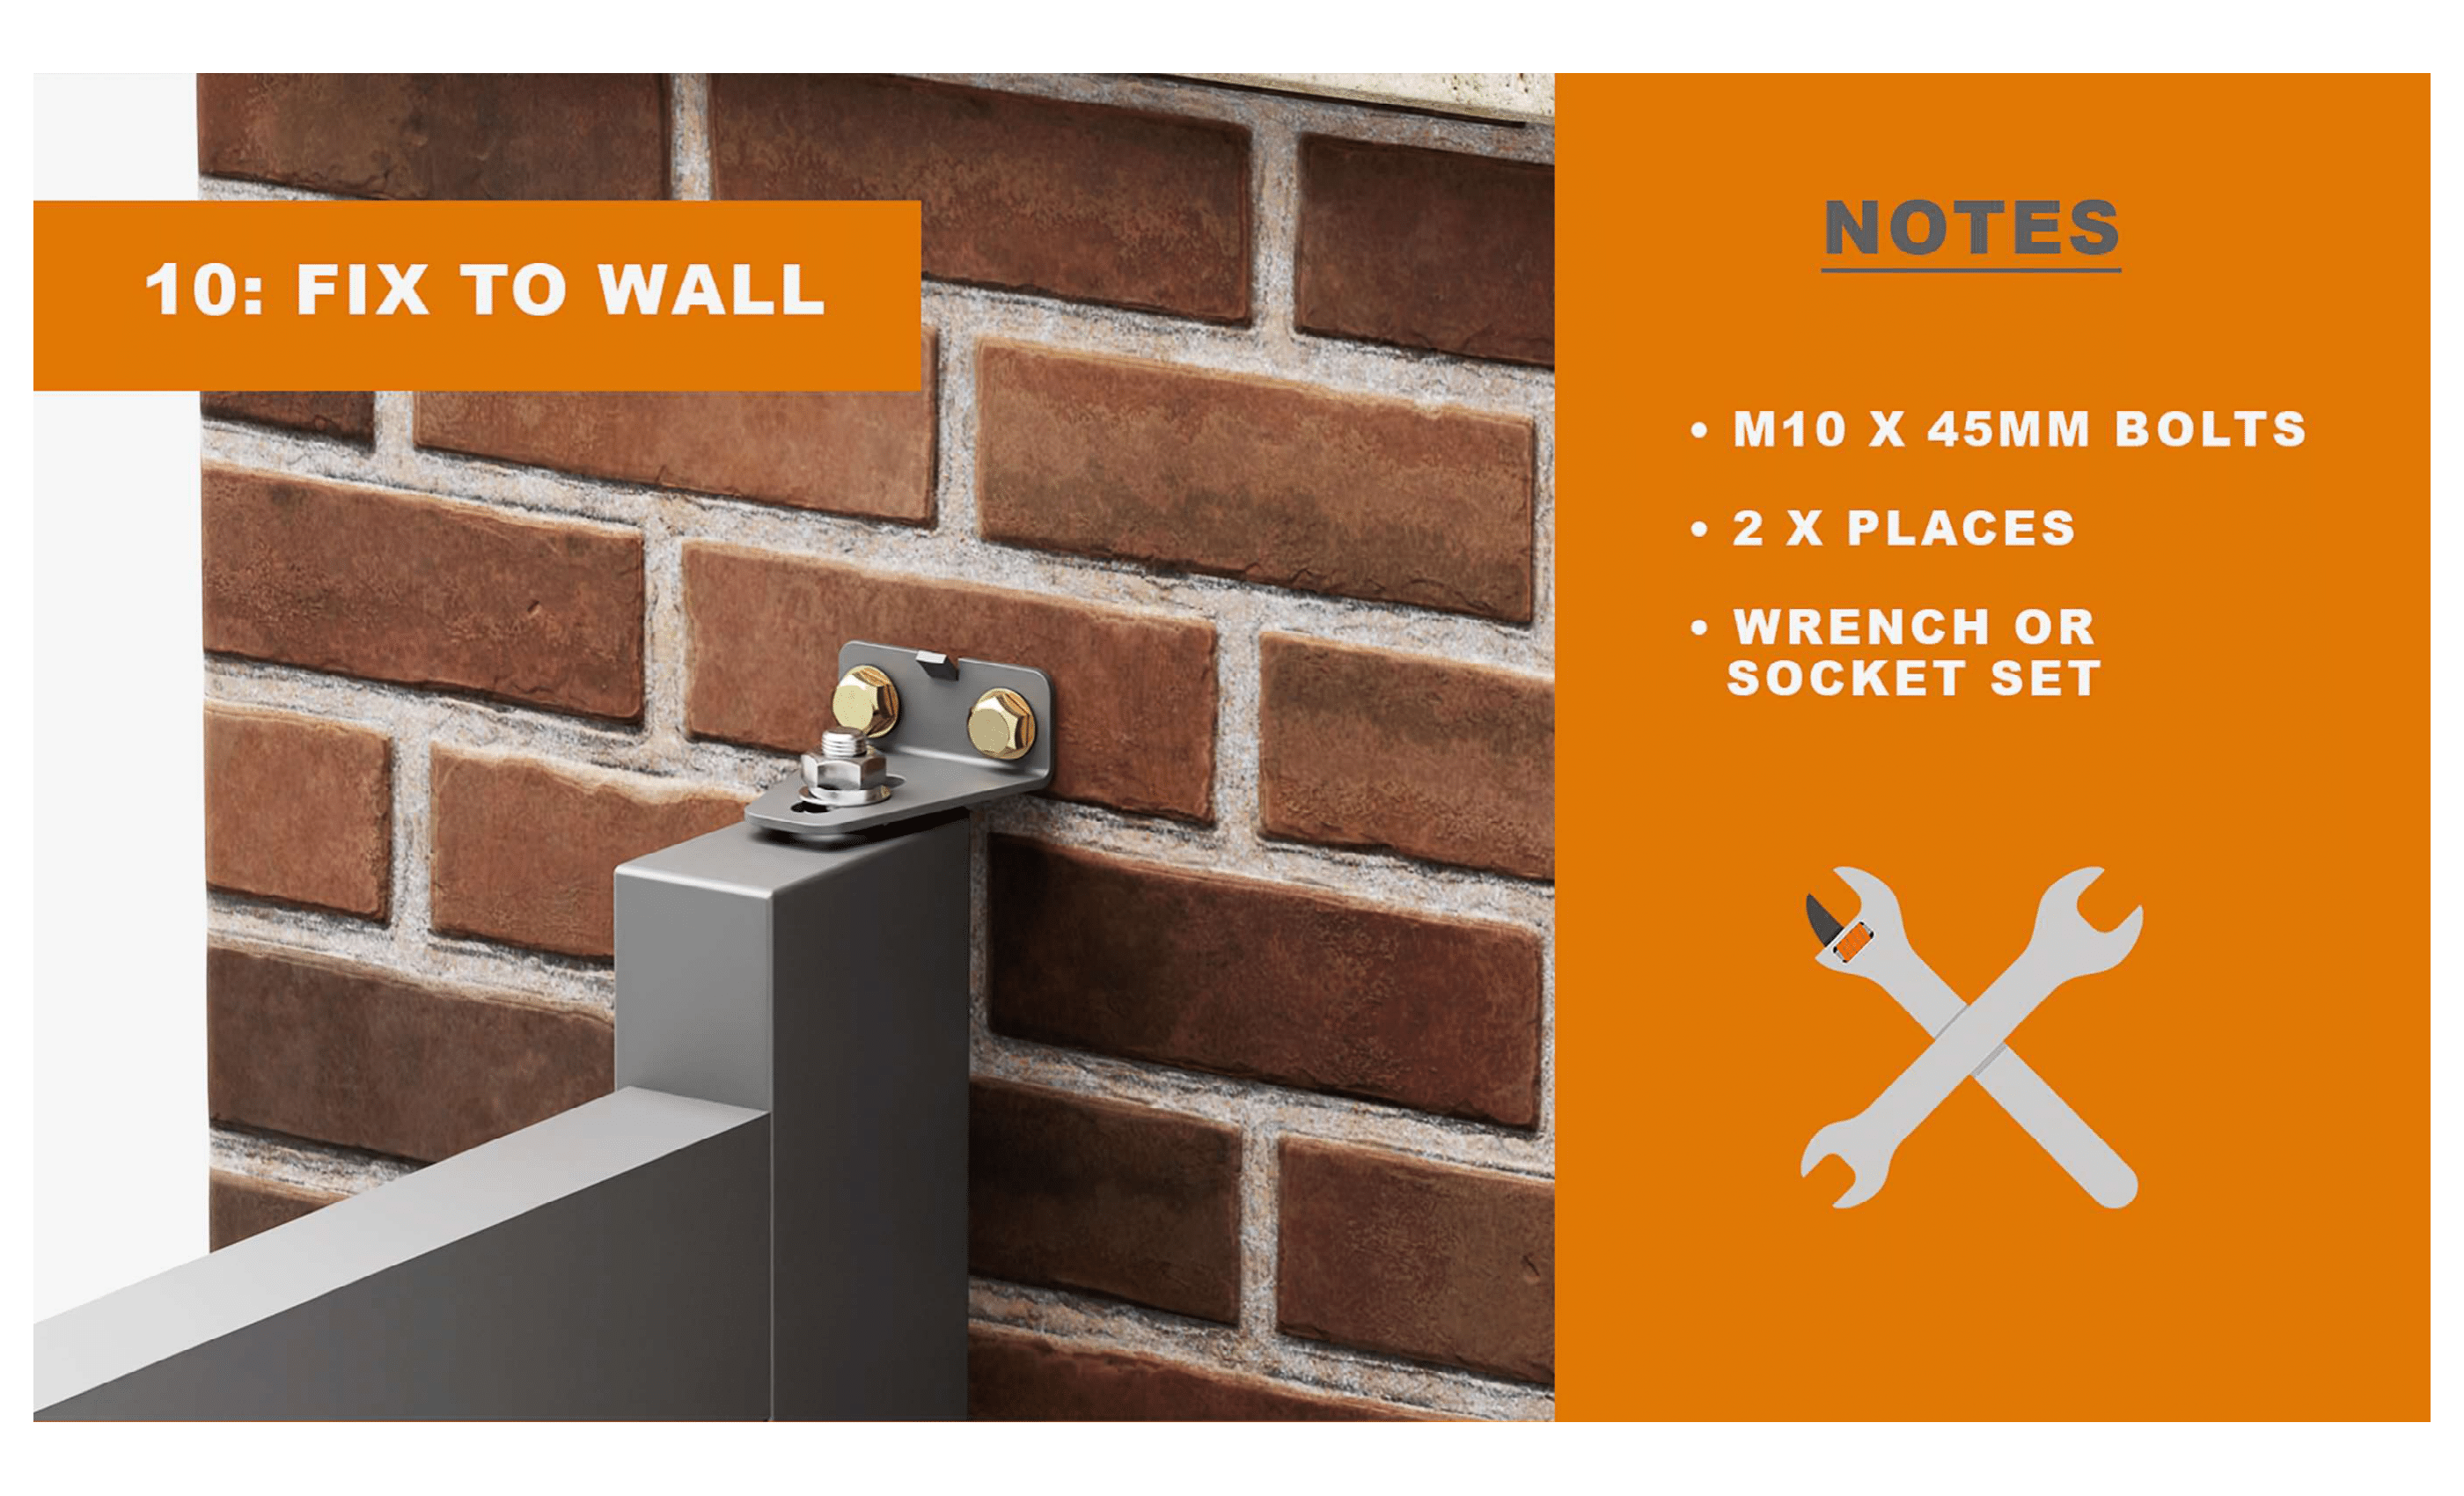
First, mark the positions for the bracket on the wall or post. Drill a pilot hole at each marked point to ensure accurate placement, then enlarge each hole to the final size needed for the anchor bolts. Make sure each hole is deep enough to securely hold the fixings. Insert rawl plugs and anchor bolts supplied with the kit. Secure the lower hinge bracket tightly so it can take the weight of the gate.
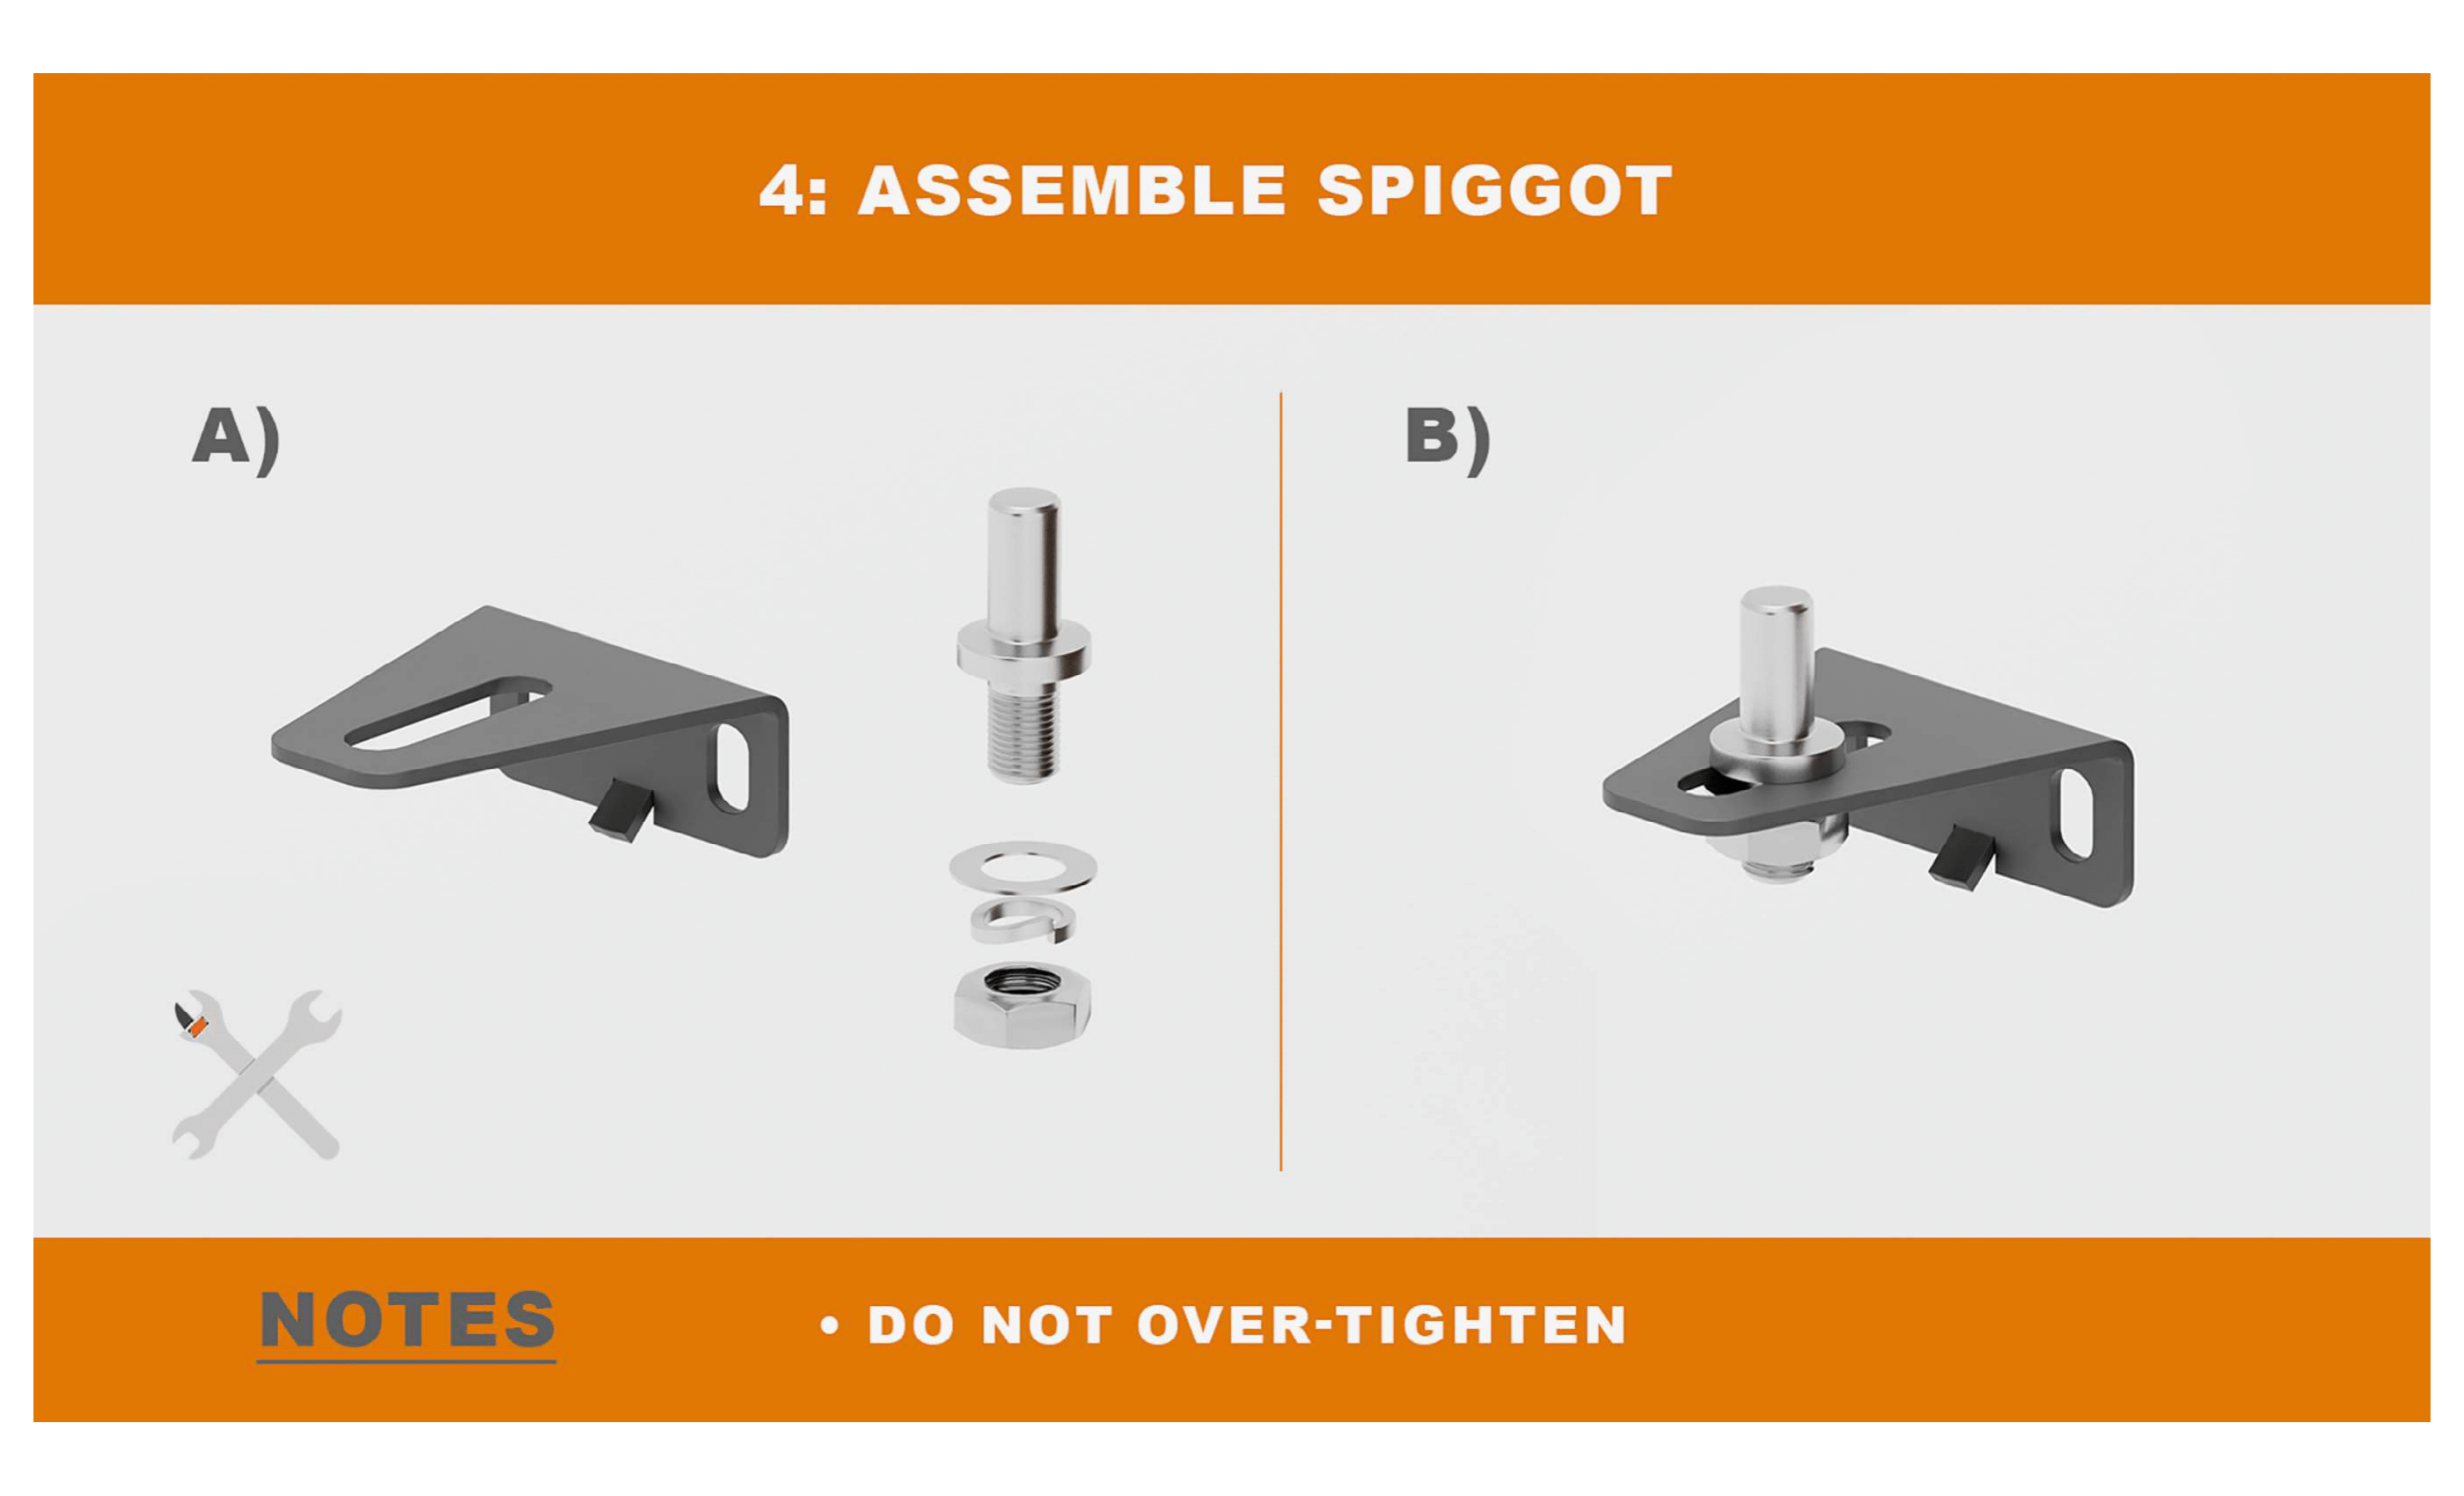
Step 7 - 10
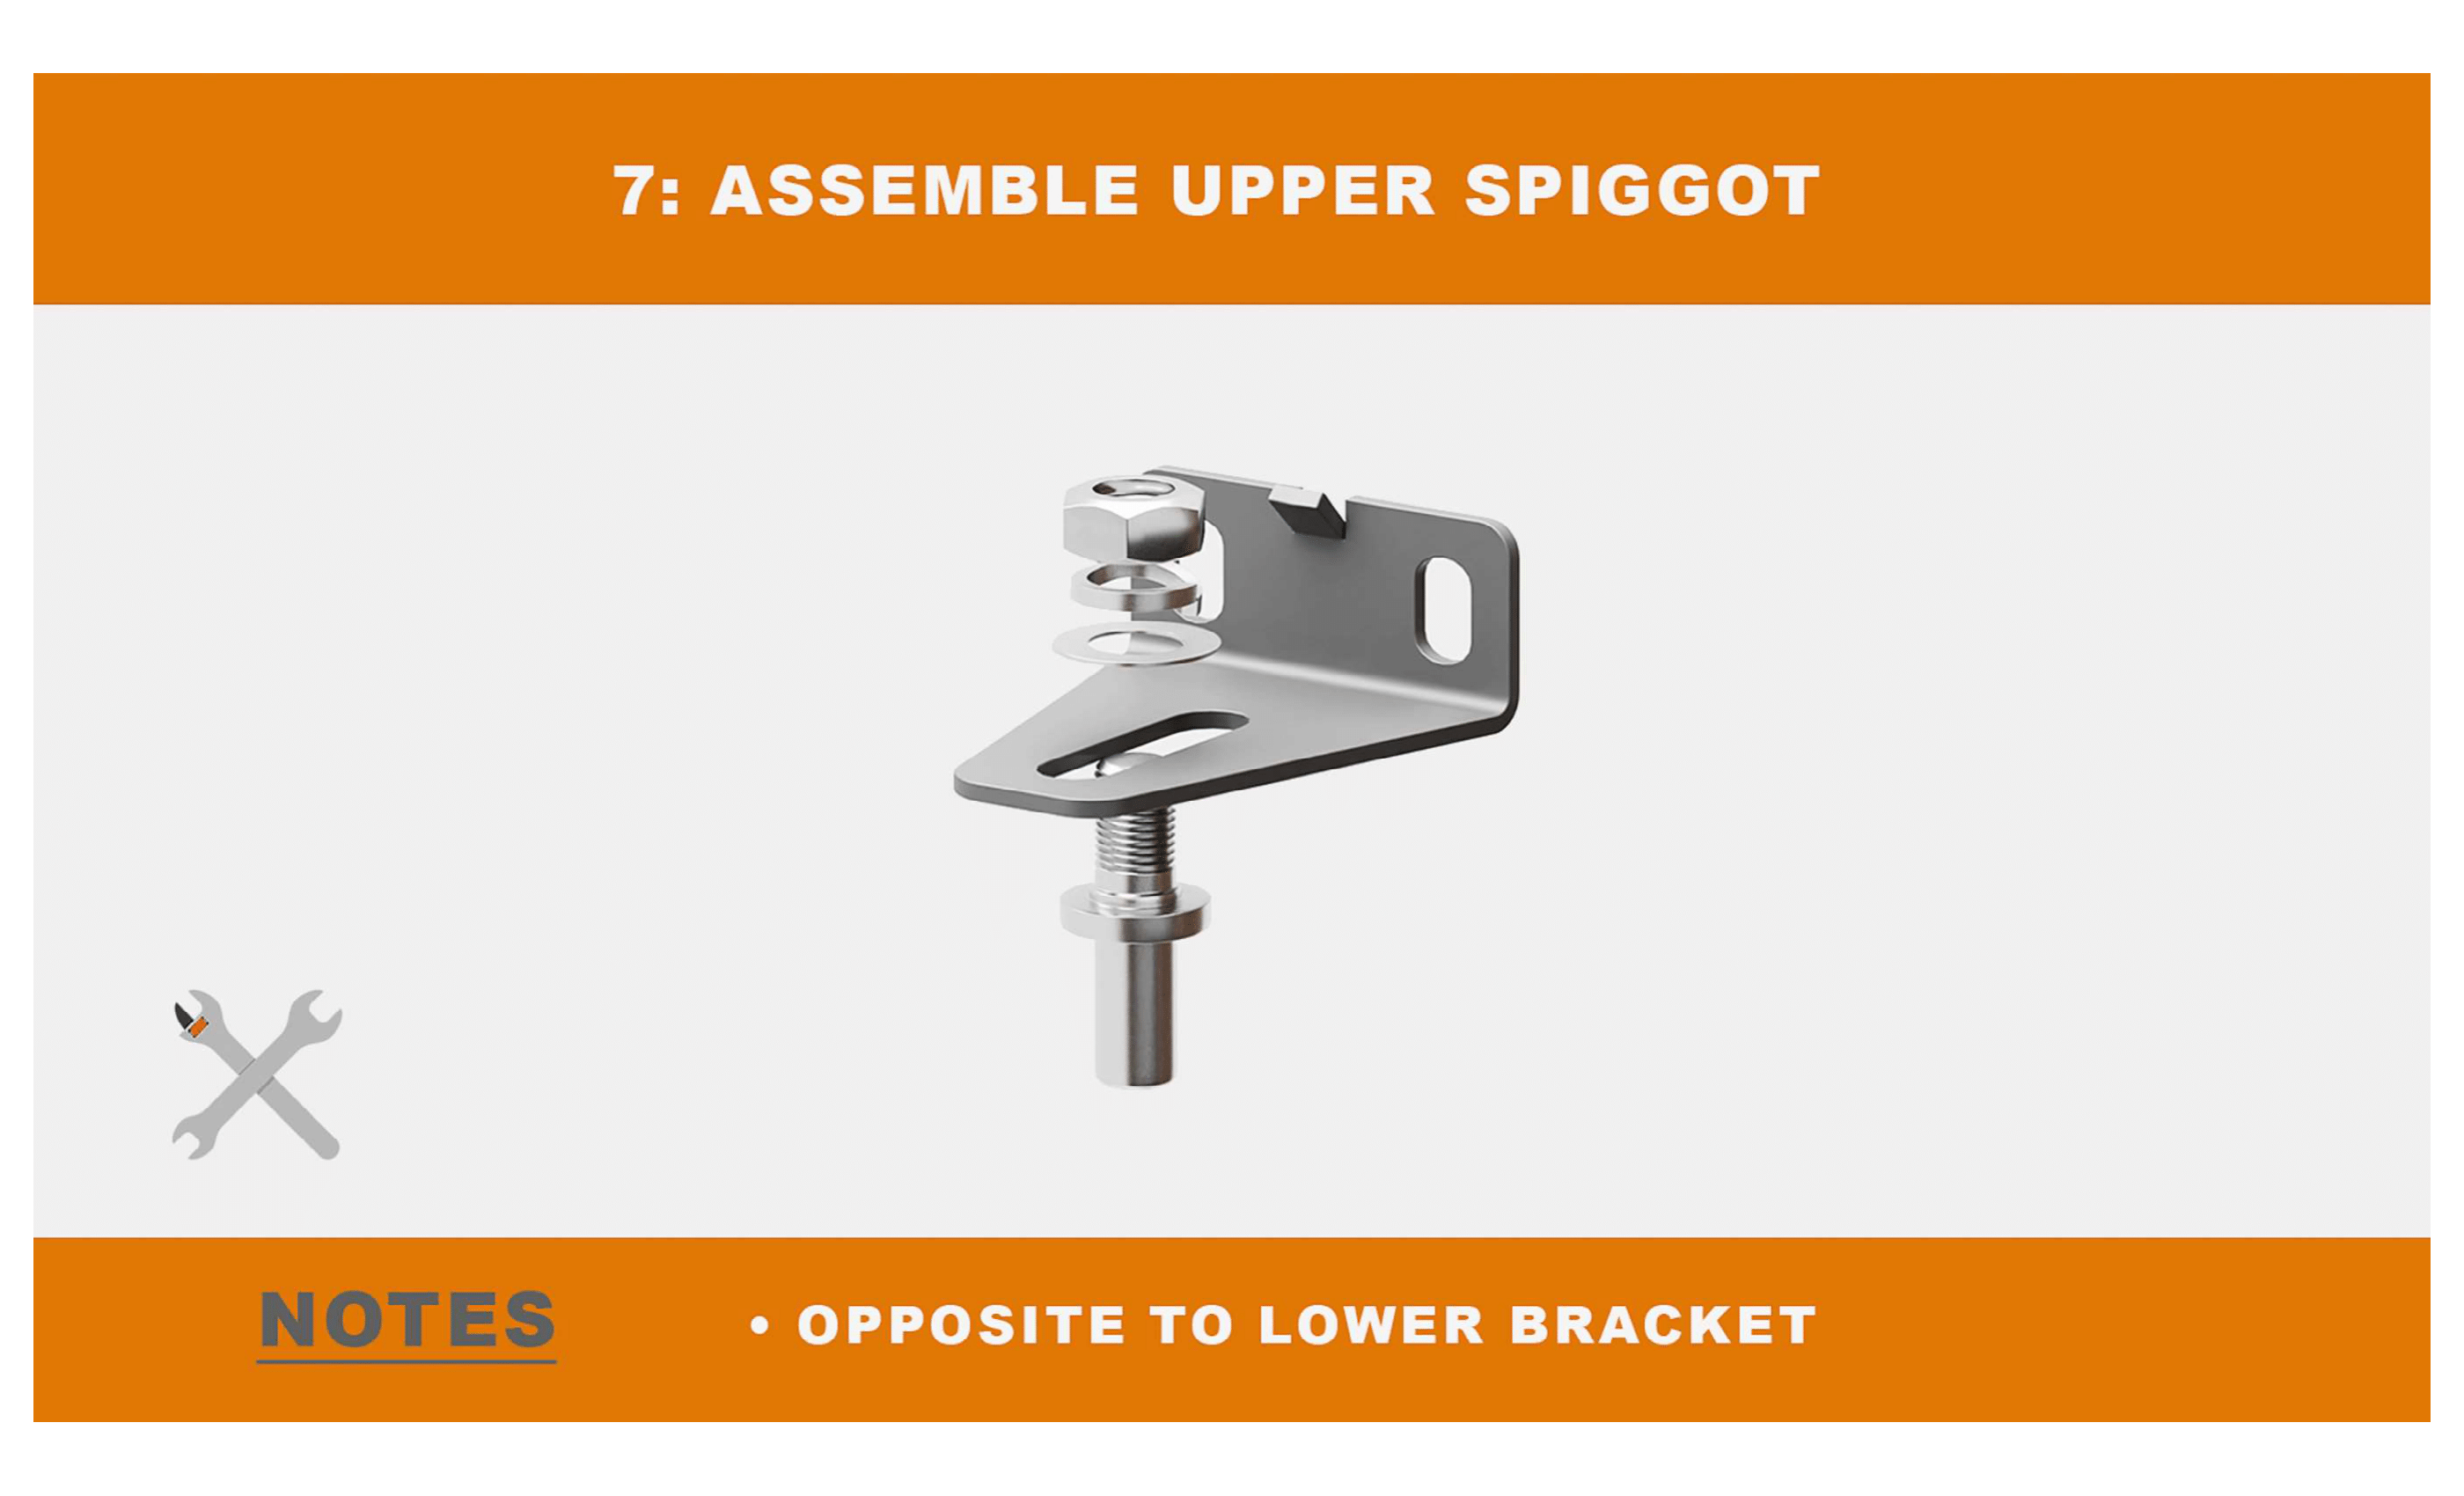
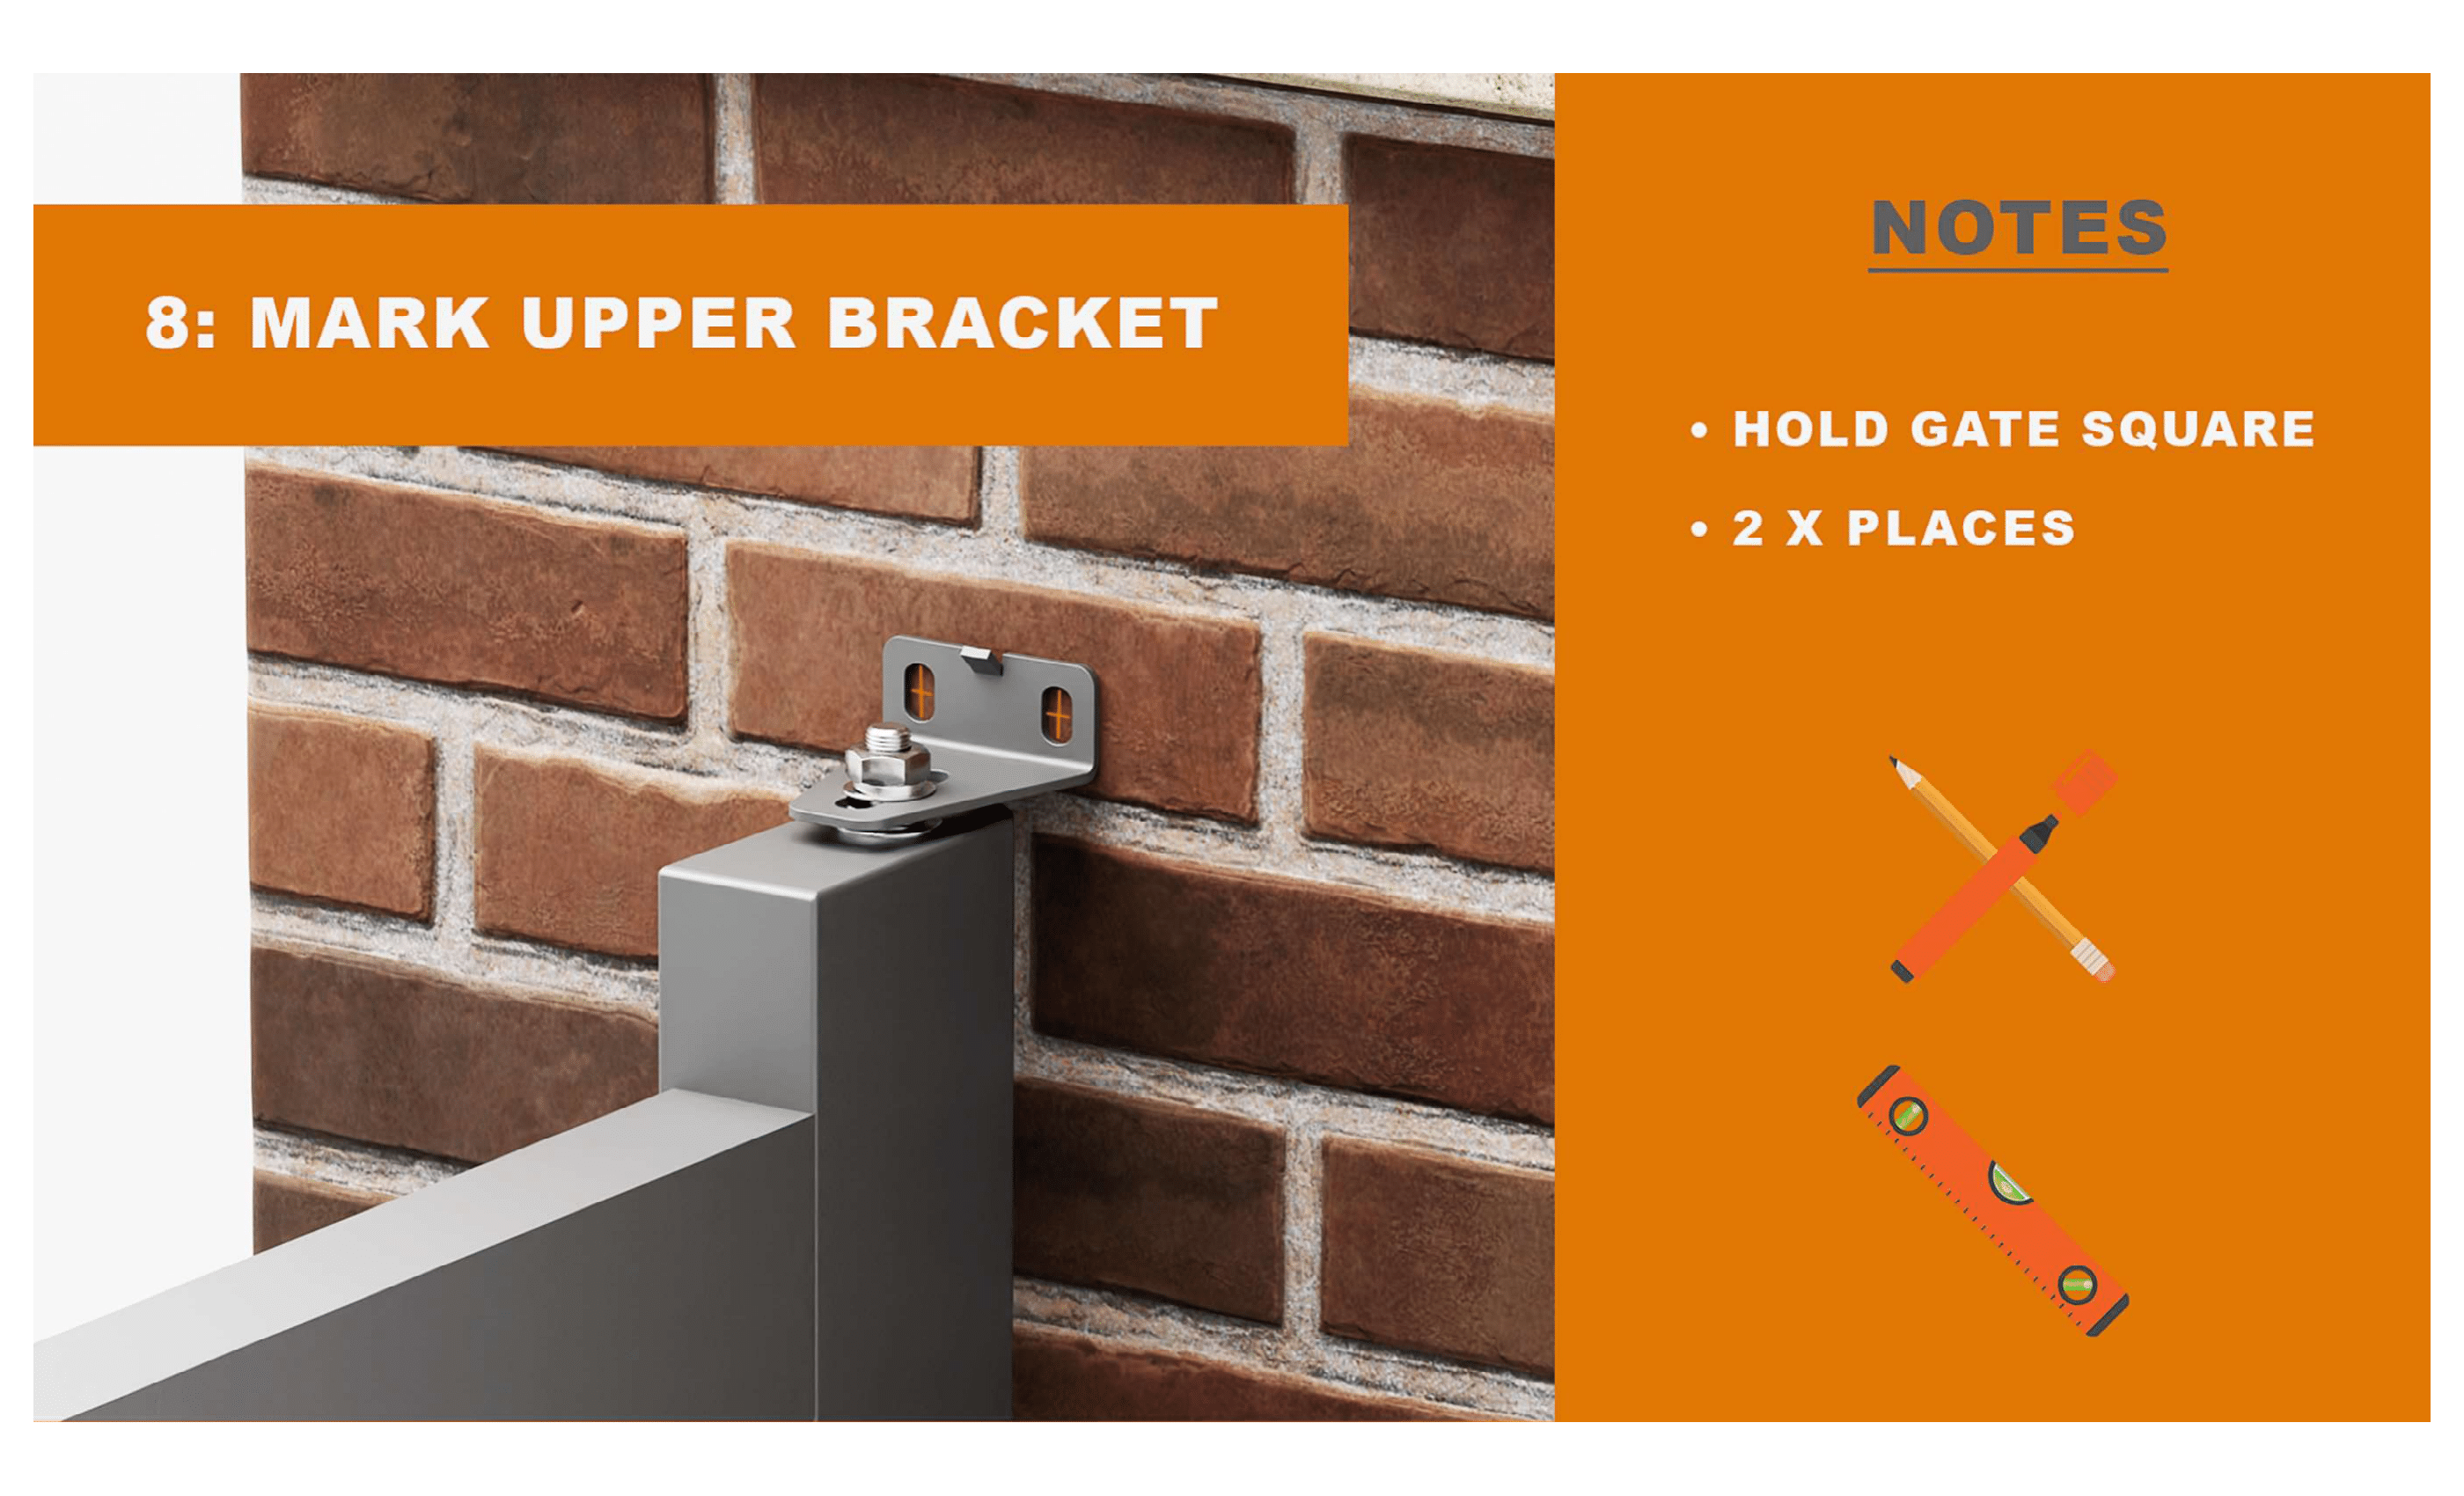
Fit the Upper Hinge Bracket
Position the upper hinge bracket in line with the lower bracket. Mark the fixing points, drill, and secure with bolts. Check alignment with a spirit level - the hinges must be perfectly vertical.
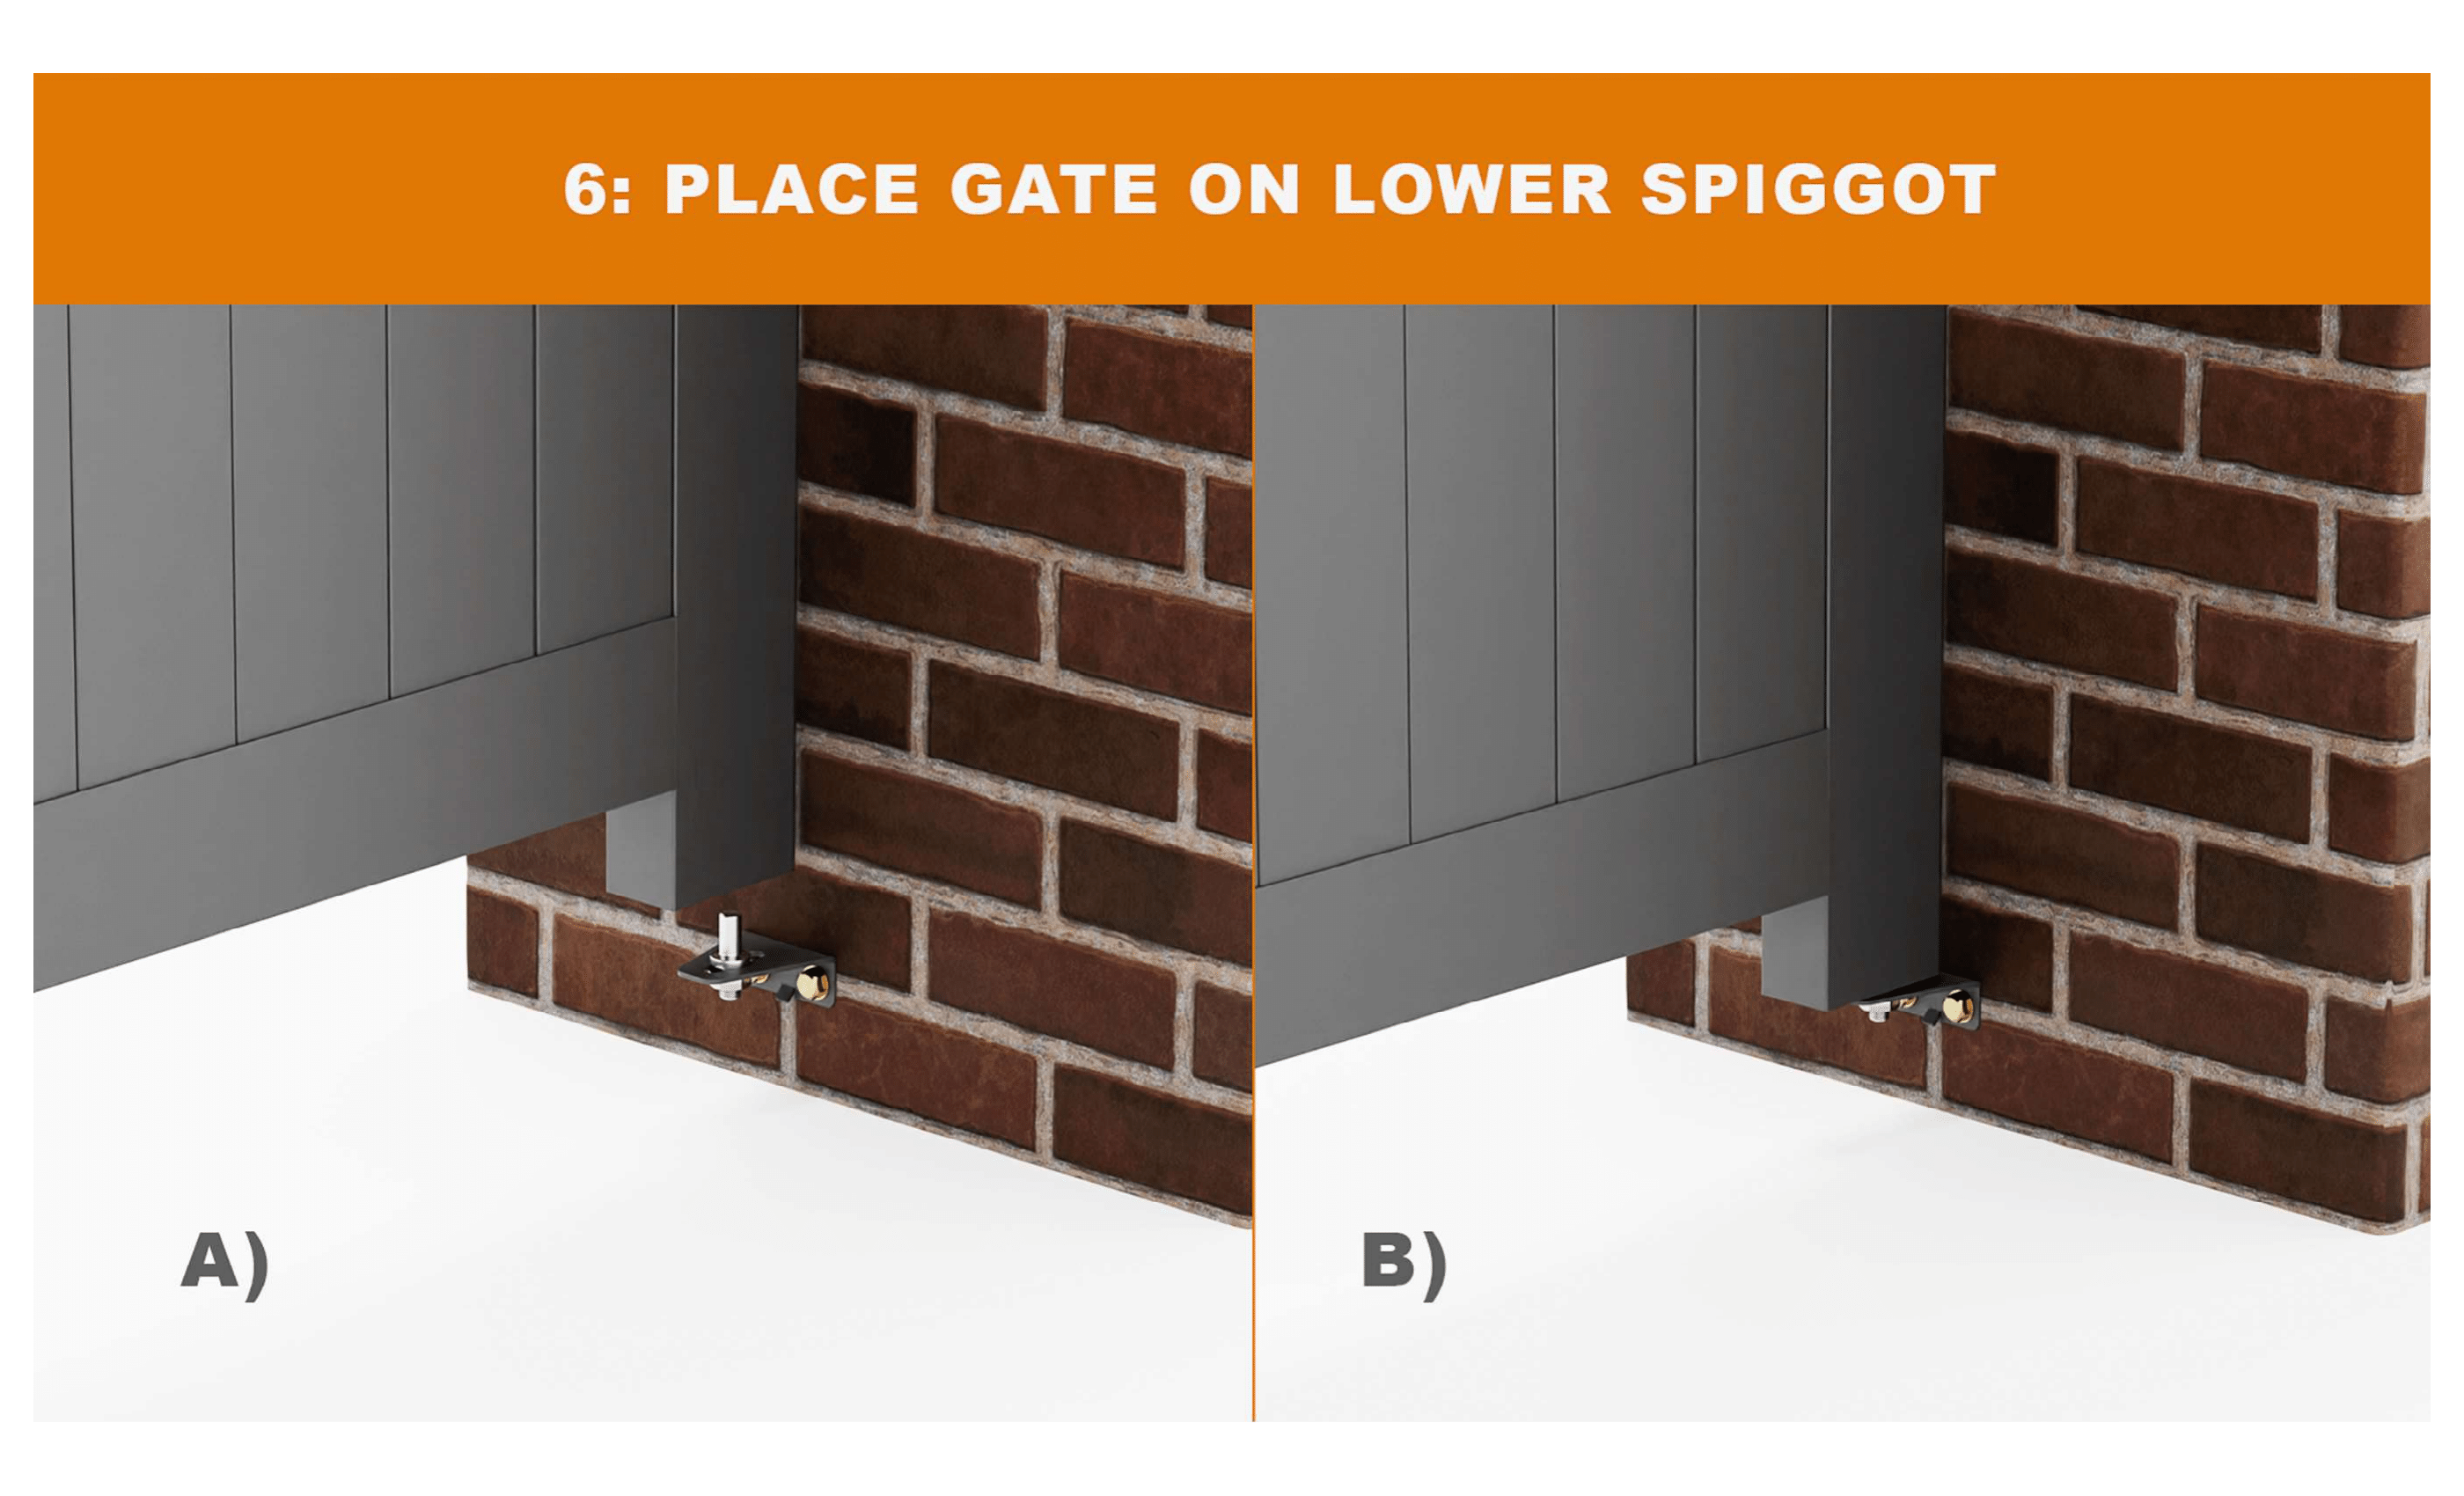
Insert Hinge Spigots & Hang the Gate
Insert the hinge spigots into the brackets. Carefully lift the gate and hang it onto the spigots. Gates can be right or left hand hung, depending on which side the hinges are installed. At this stage, the gate should swing, but you may need to make small adjustments.
Align and Adjust the Gate
Check the swing of the gate. It should open and close smoothly without rubbing against the ground or posts. Adjust the hinge nuts, washers, and bolts to achieve correct spacing and smooth movement.
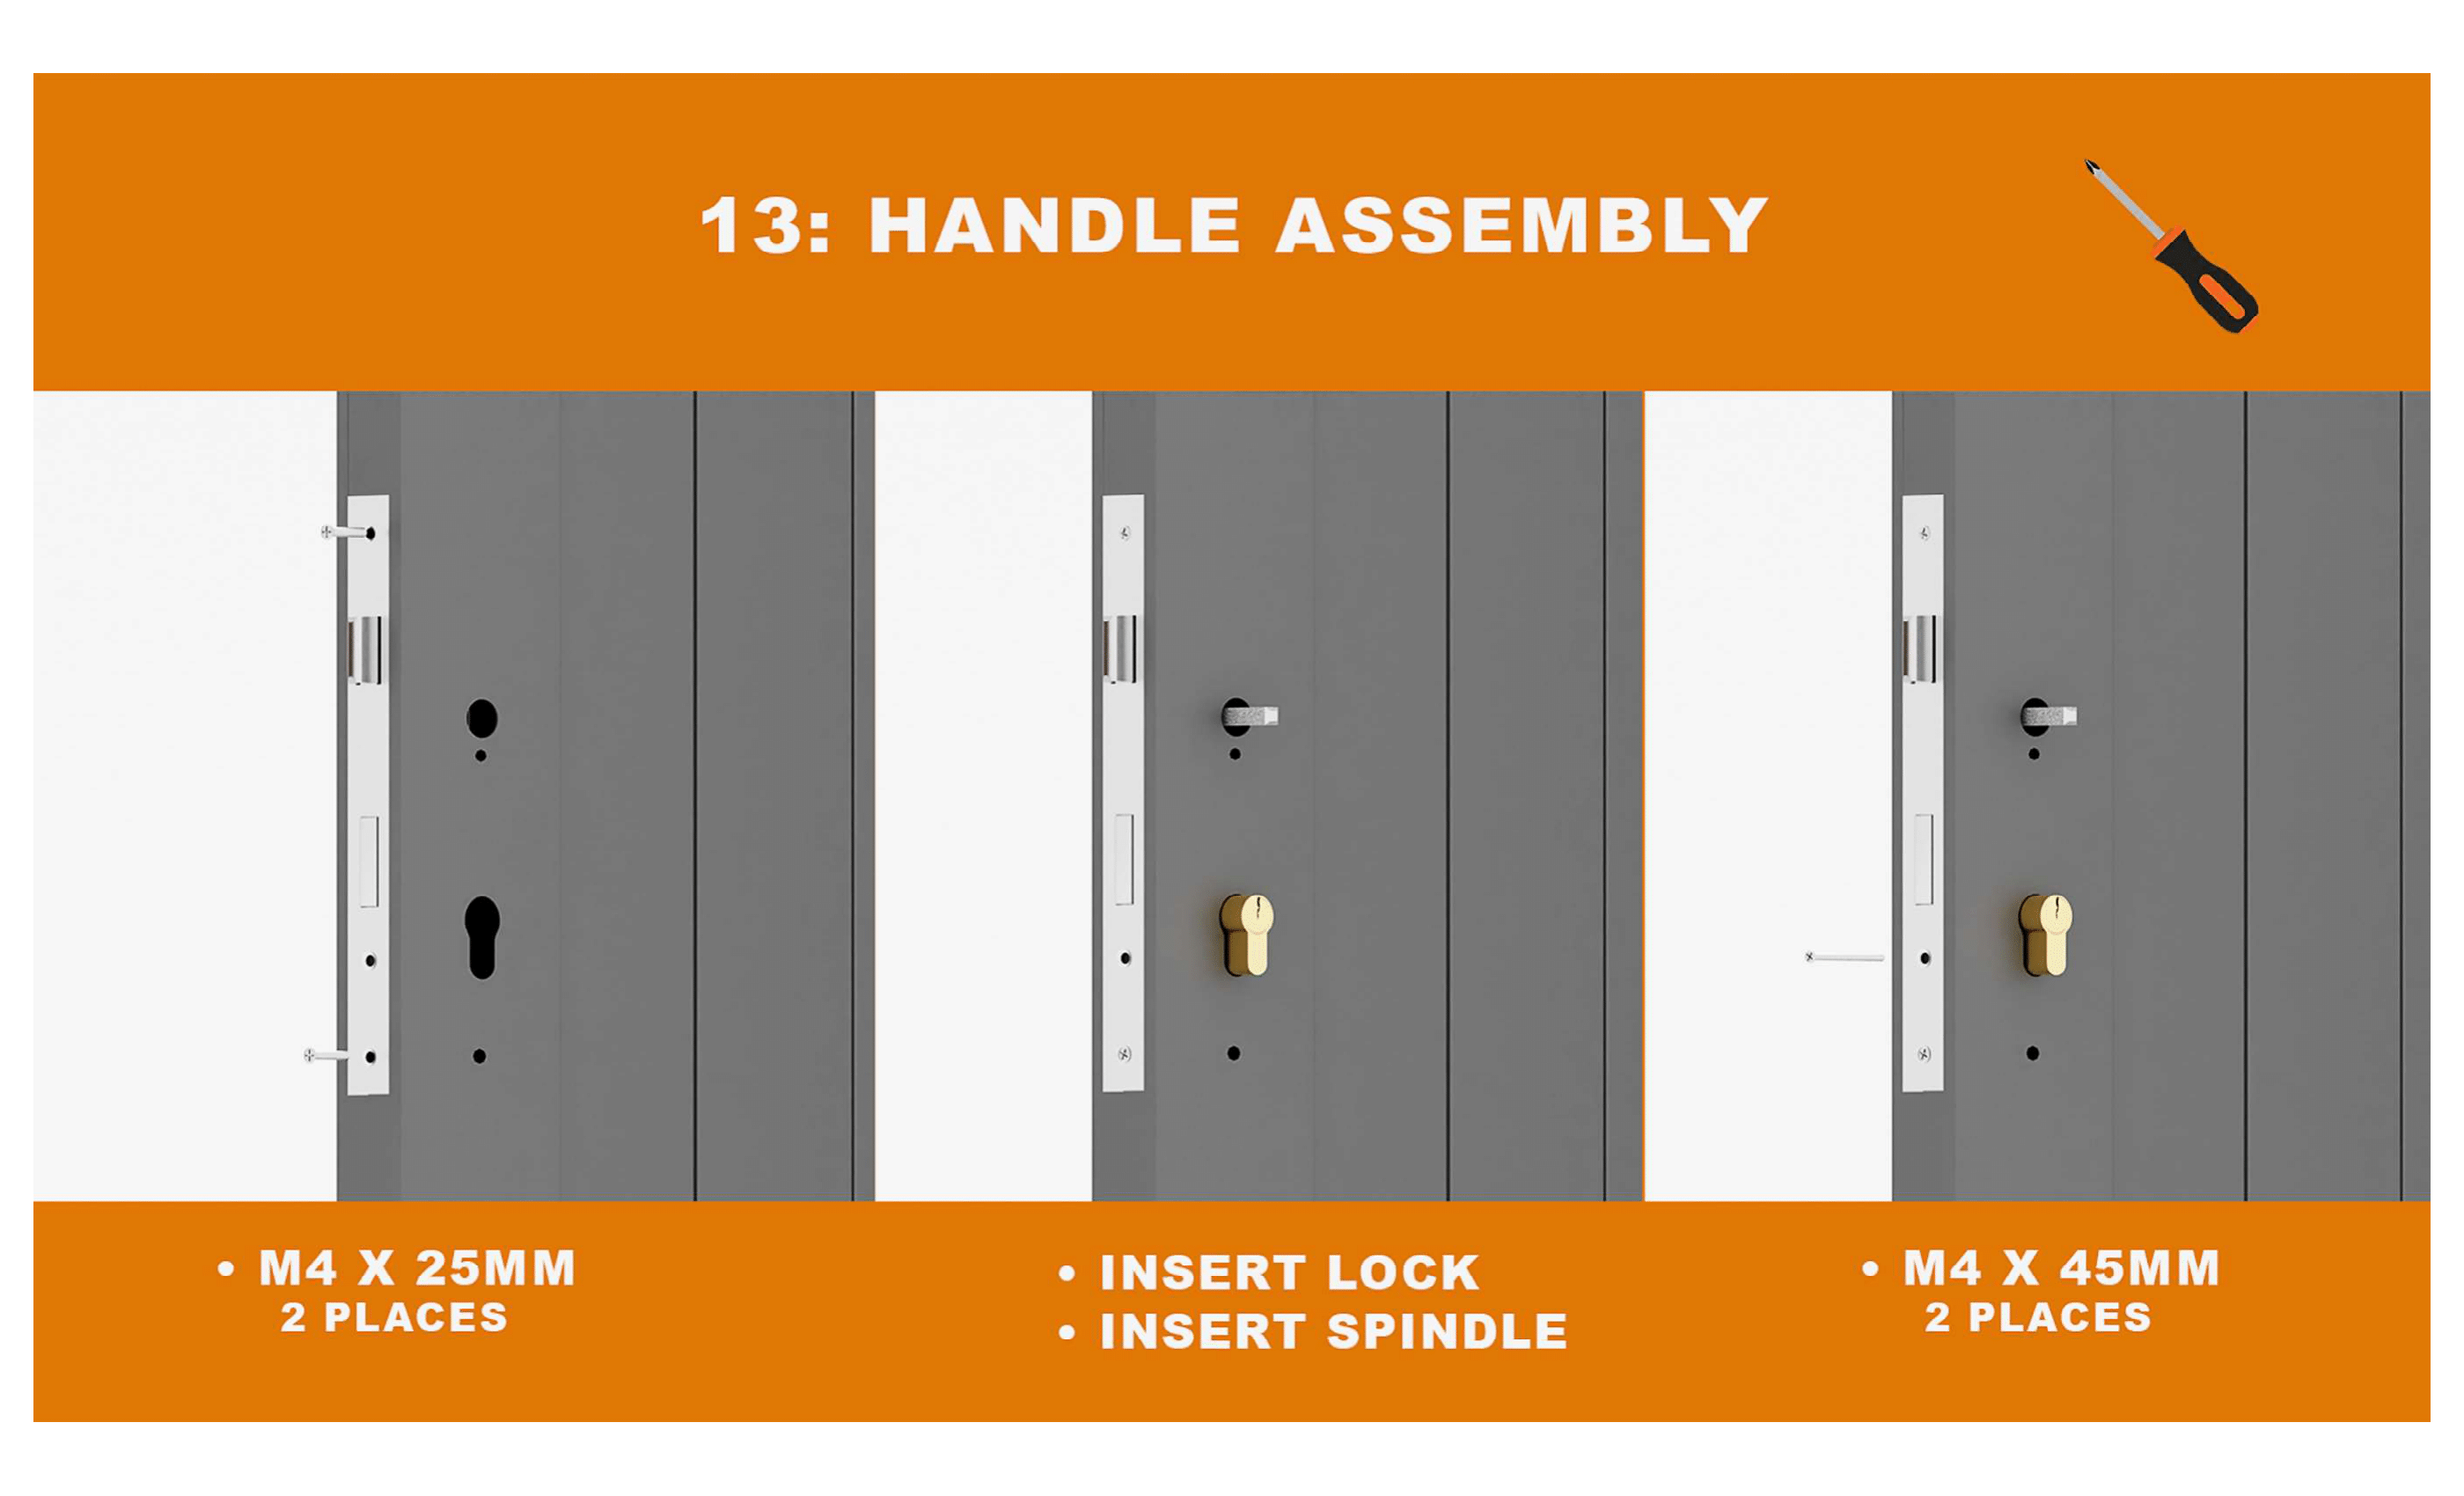
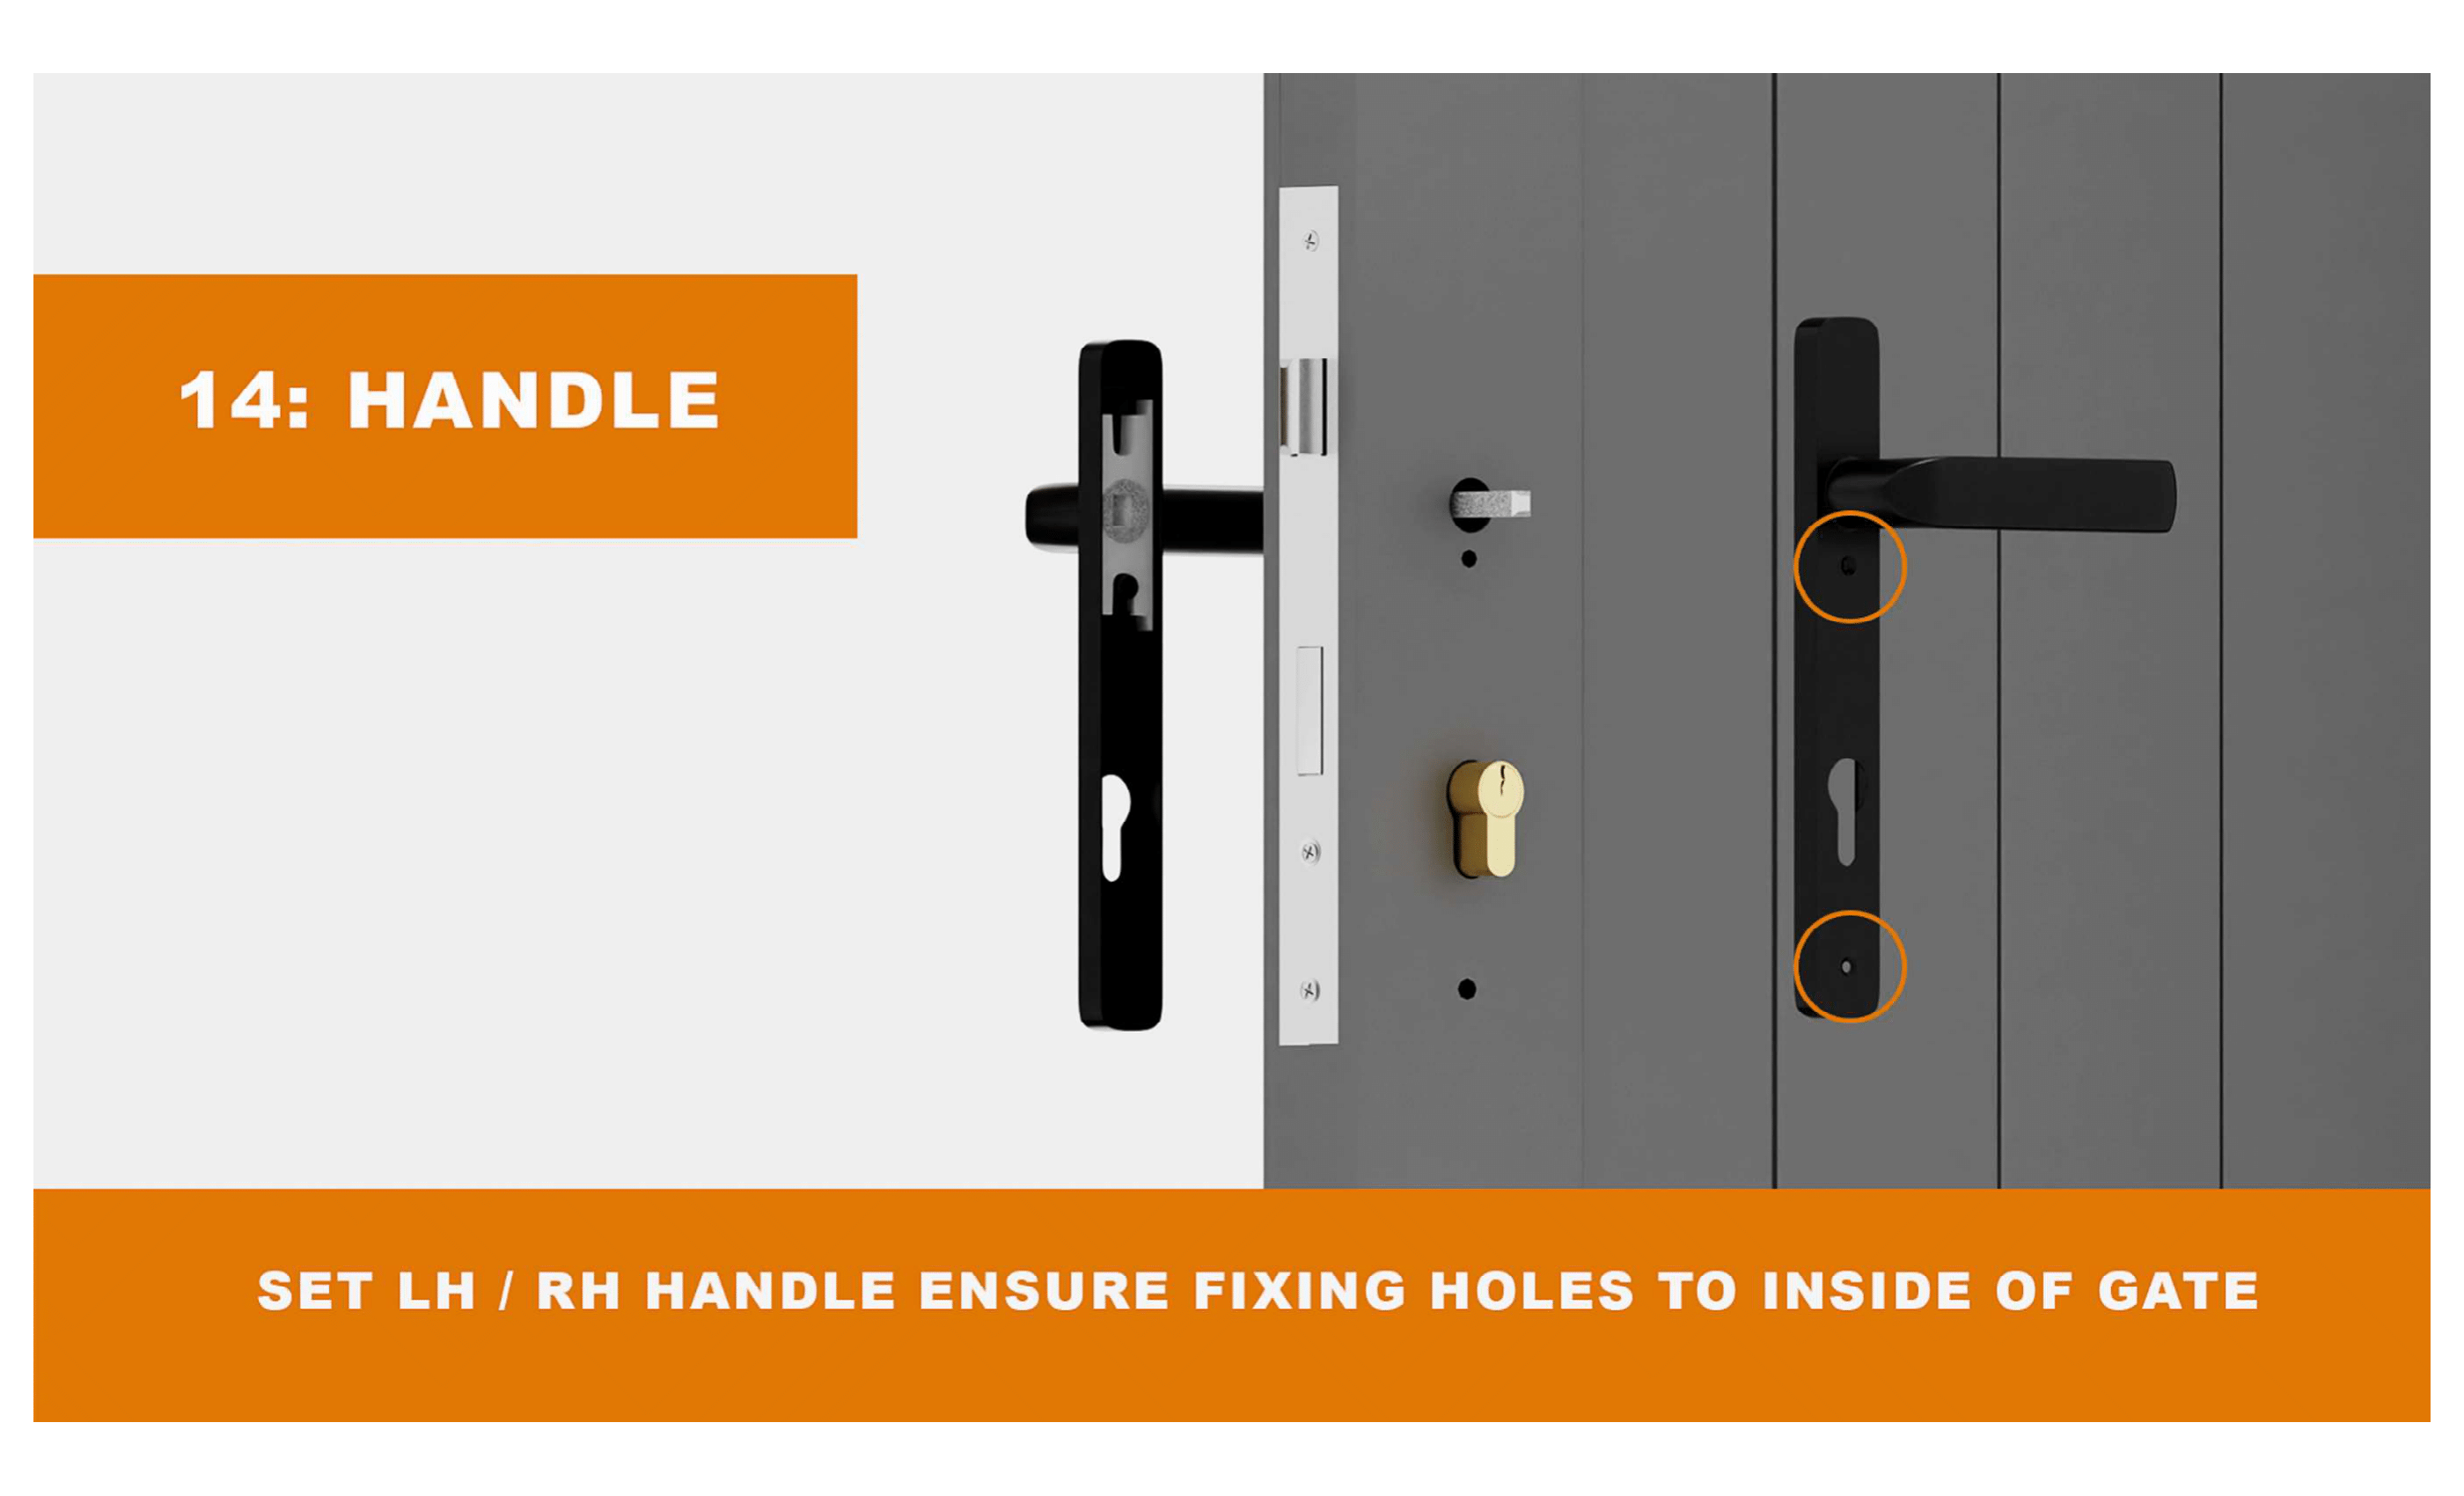
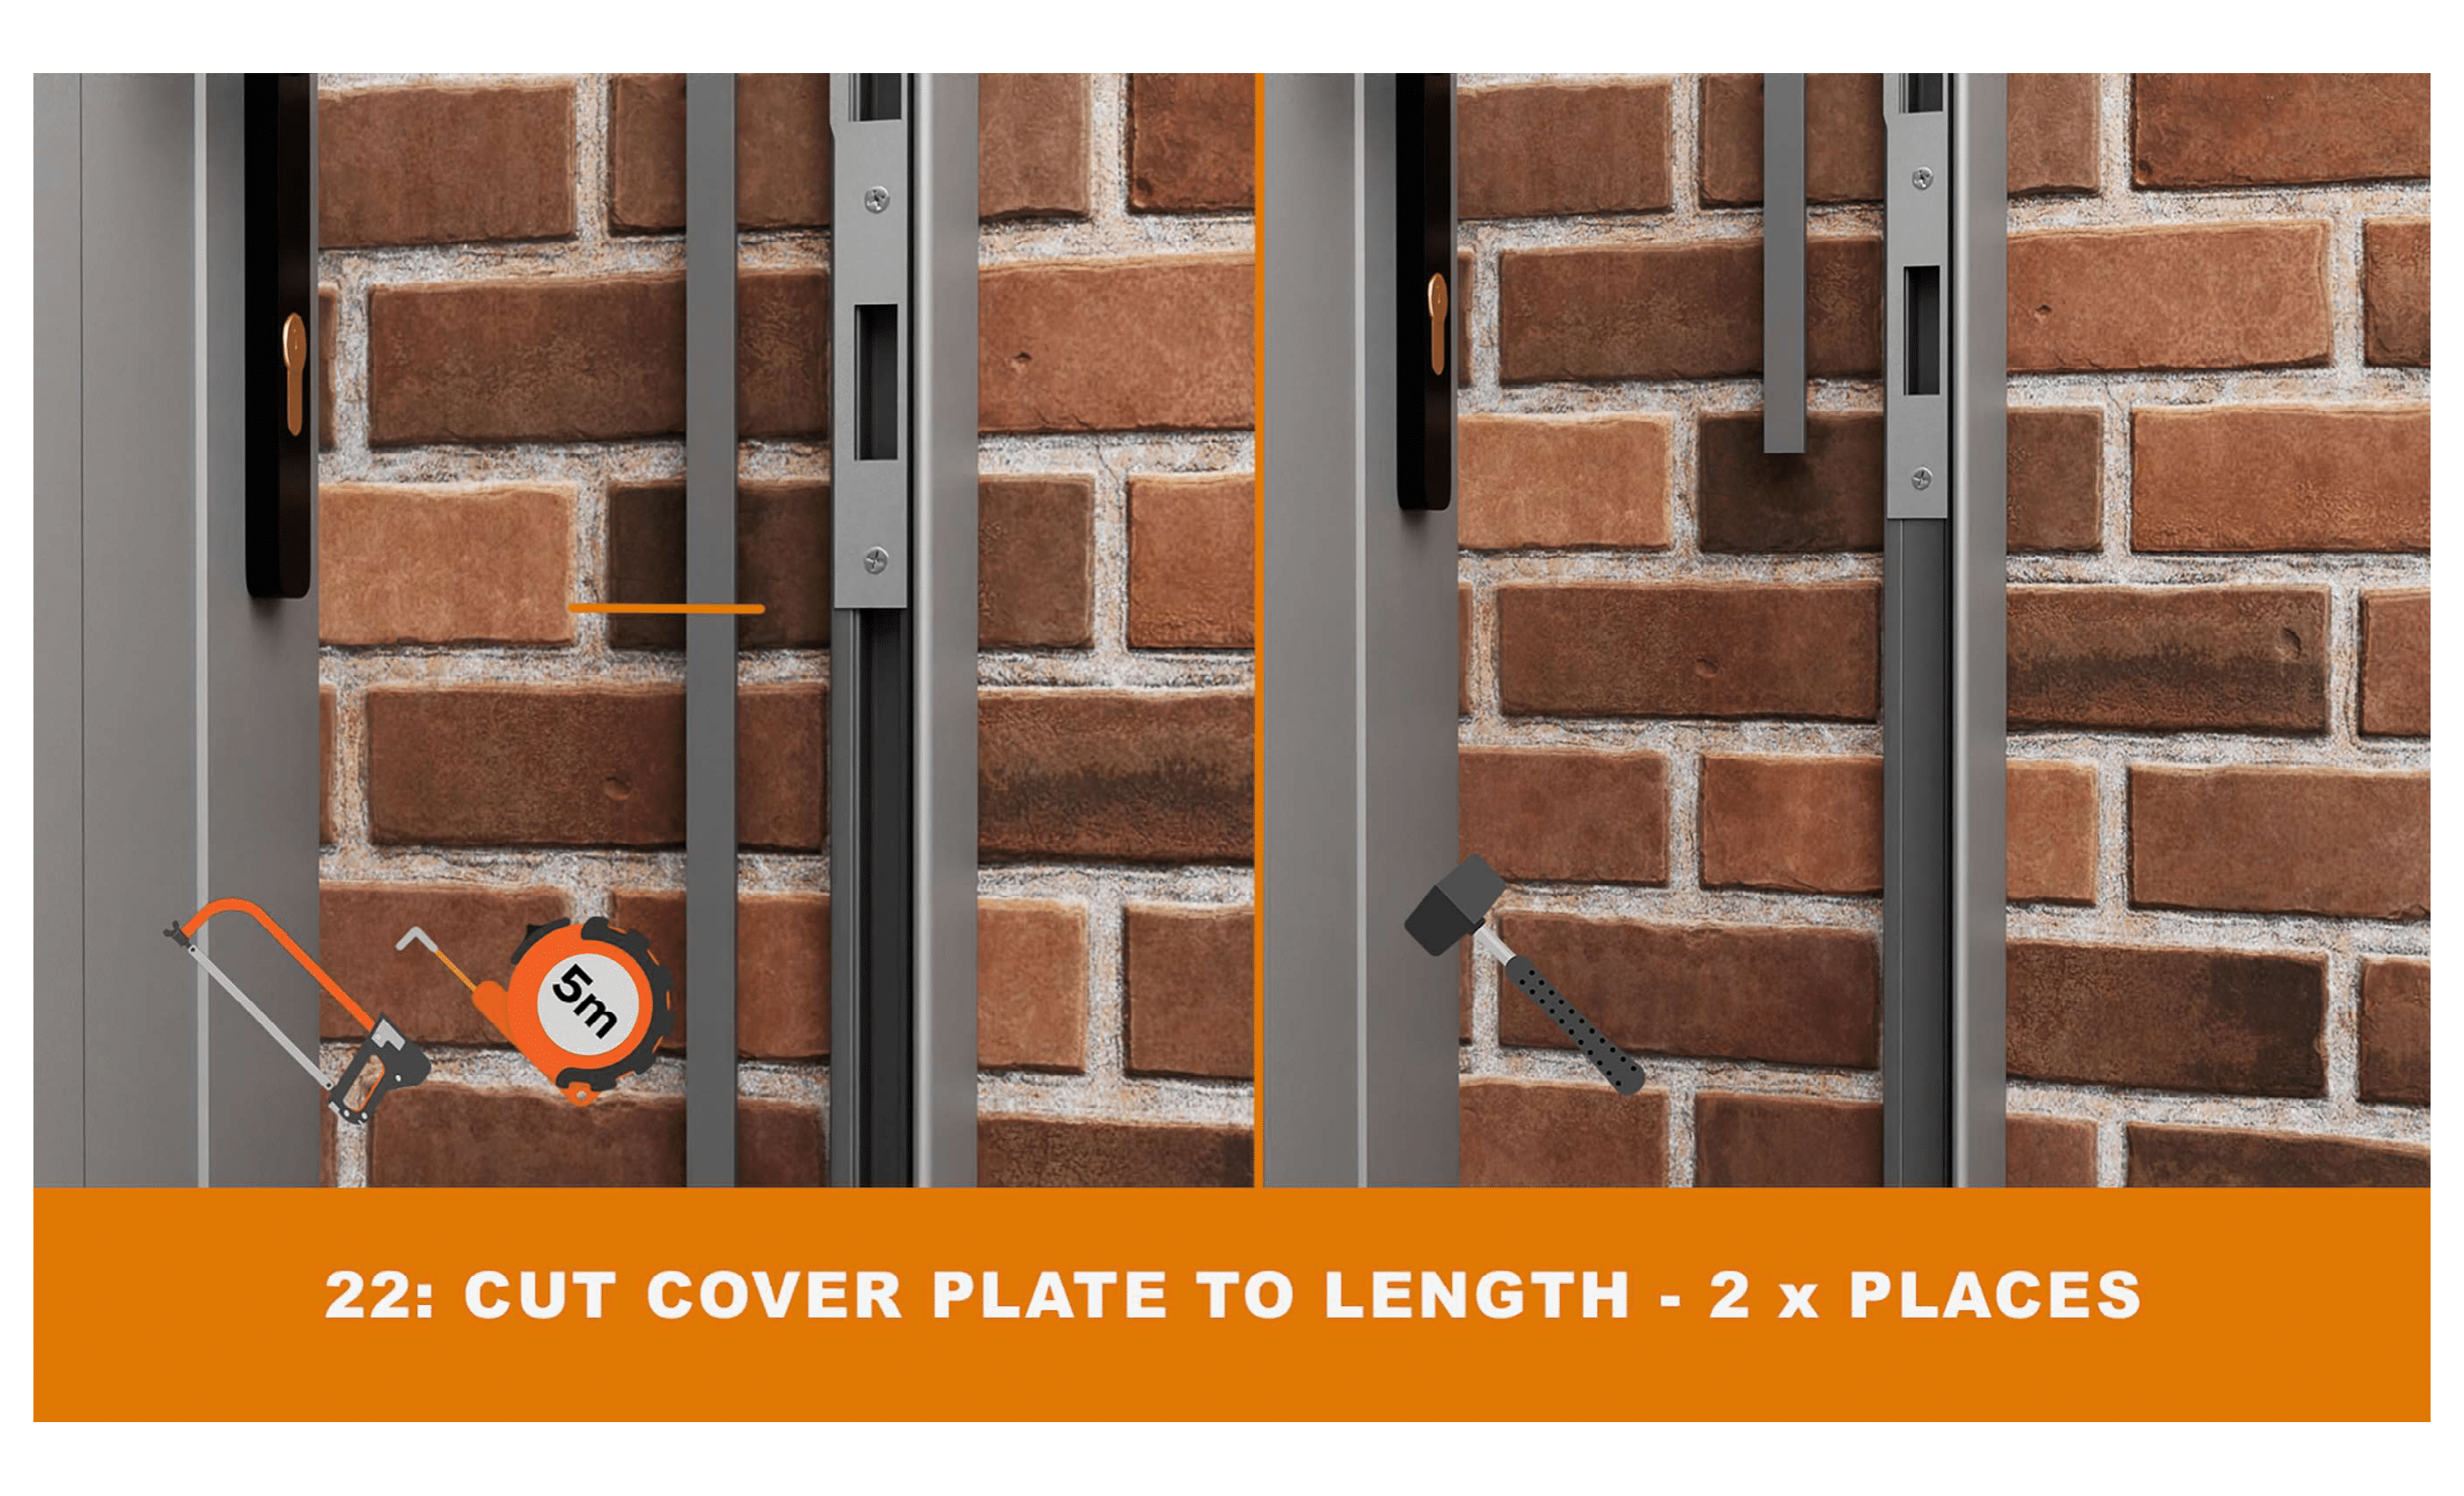
Step 11 to 24
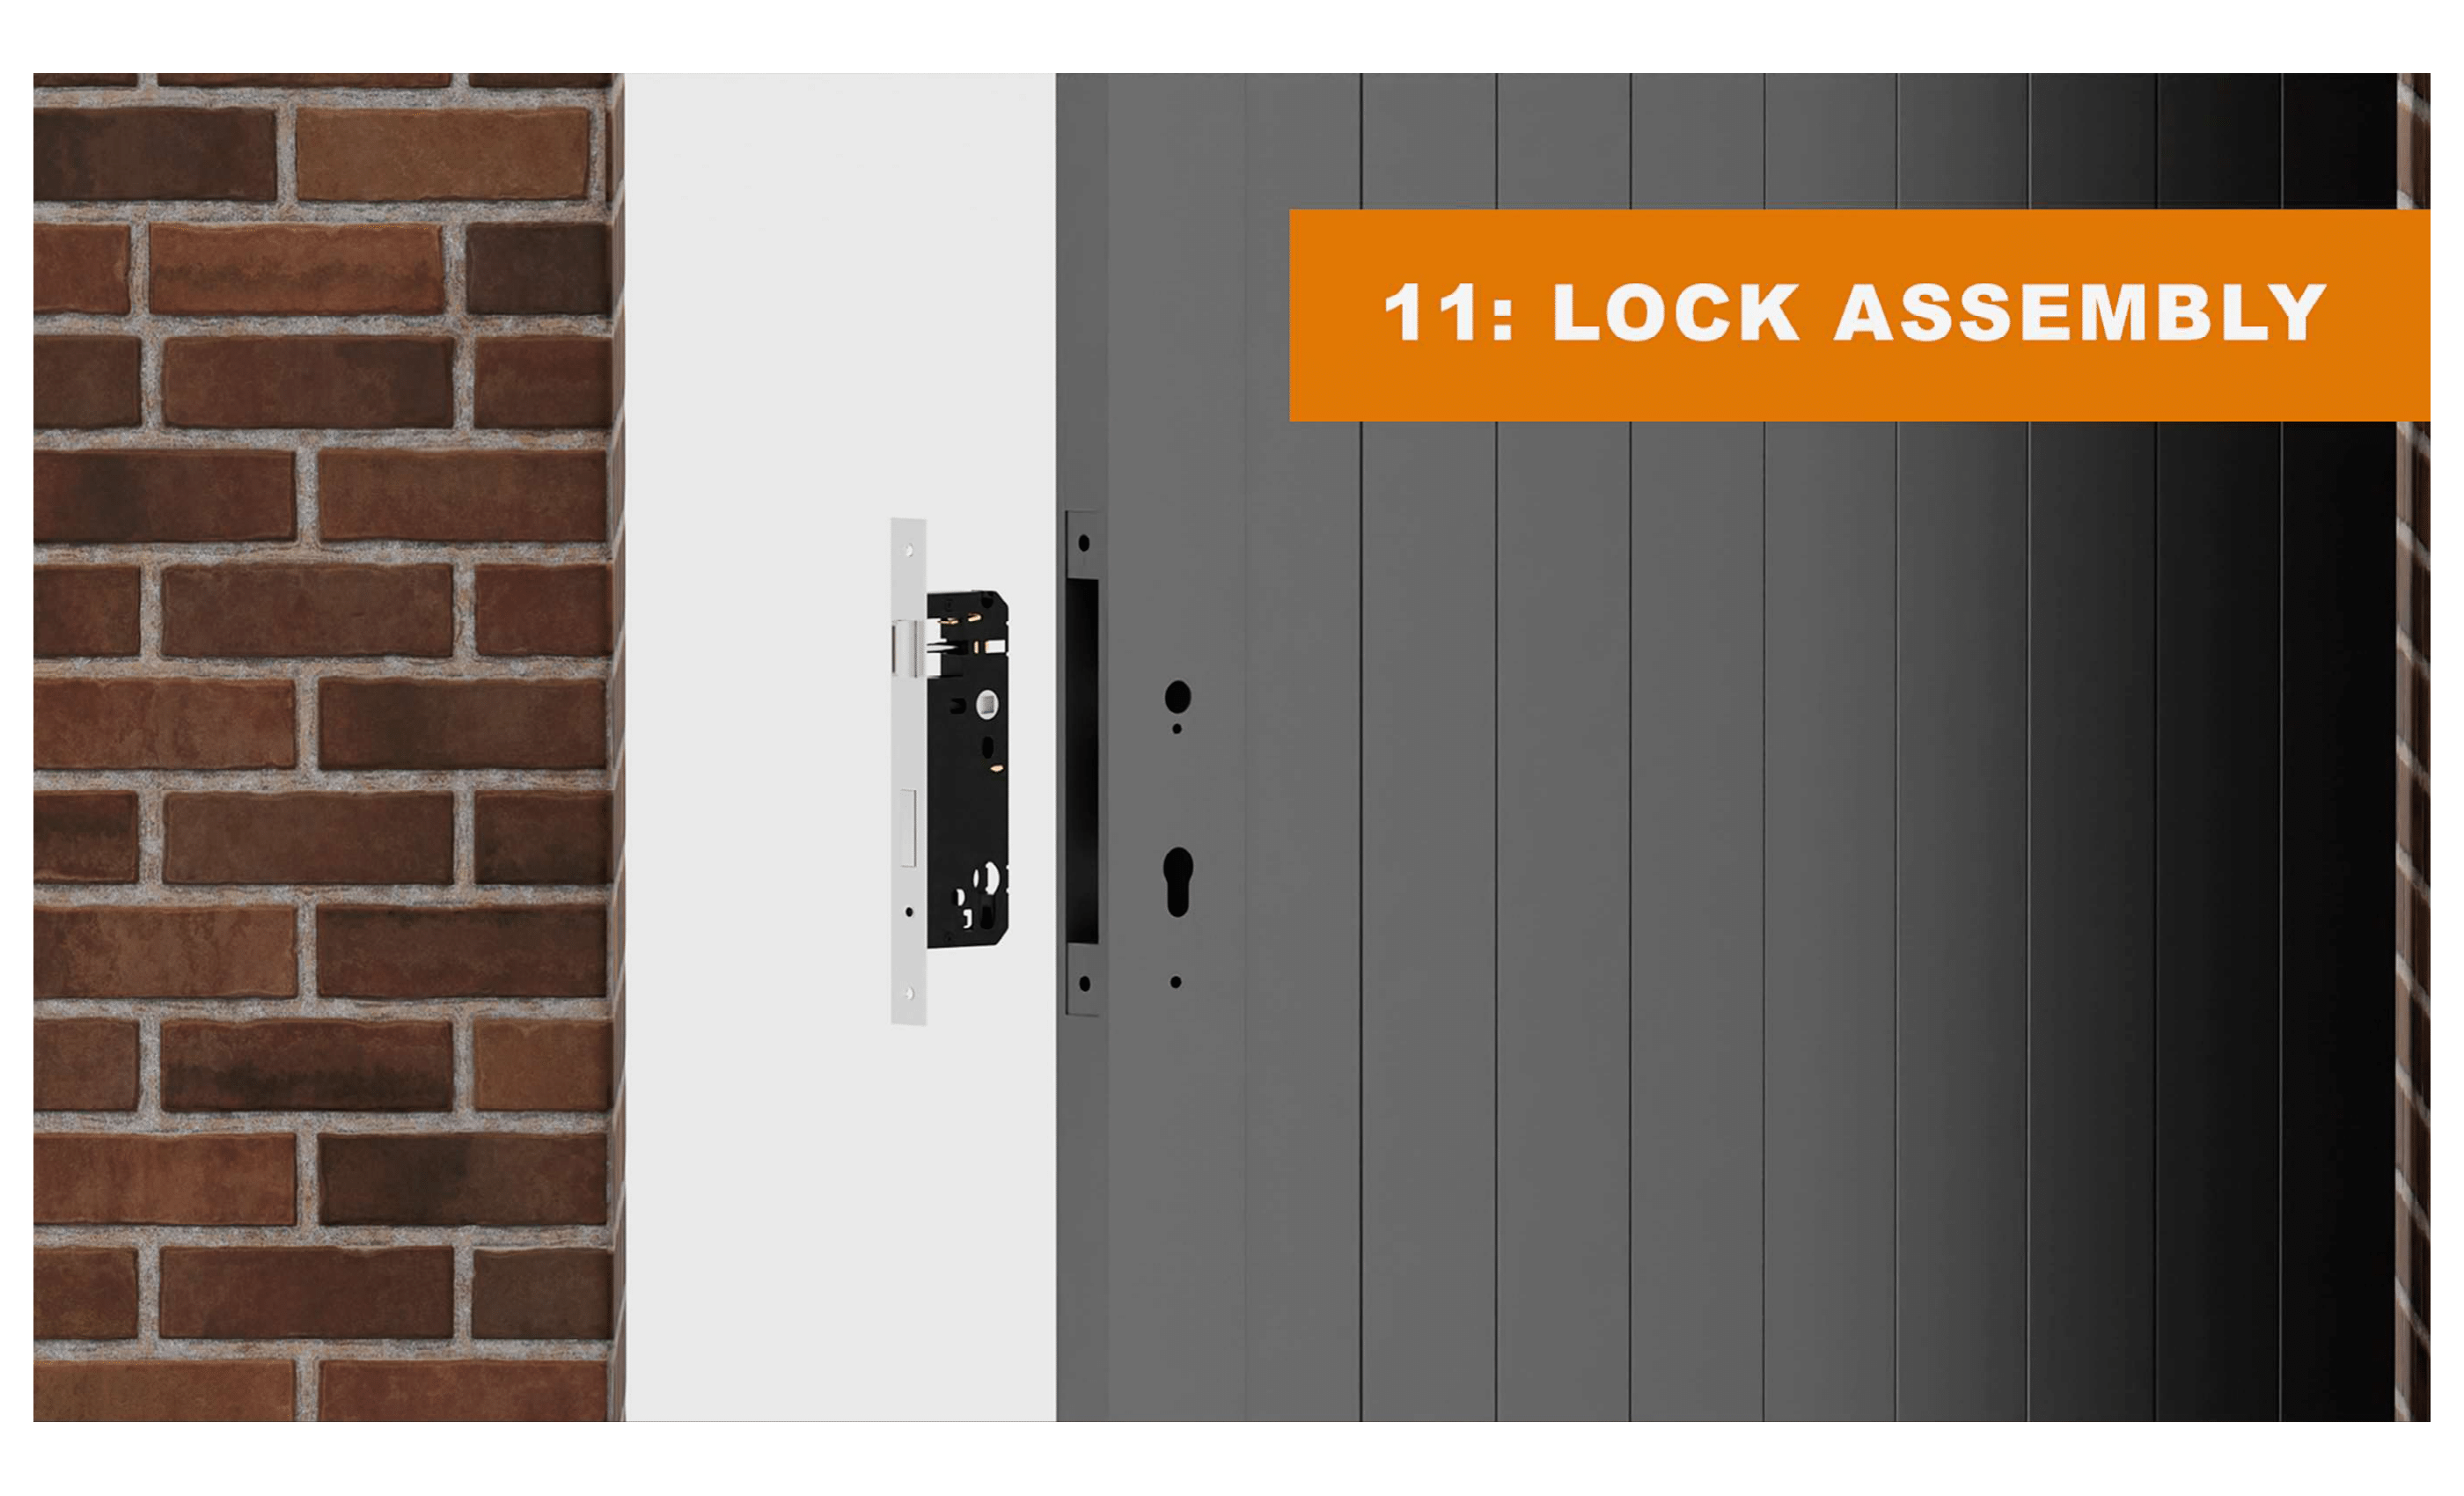
Fit the Lock & Handle Mechanism
Install the lock body and handle set provided. Mark the positions for the handle screws, then drill a pilot hole at each mark to ensure accurate alignment. Enlarge the pilot holes as needed for the final fitting. Insert the spindle bar through the lock mechanism and attach the handles on both sides. Secure with handle screws. Fit the euro cylinder lock and test that the key turns freely.
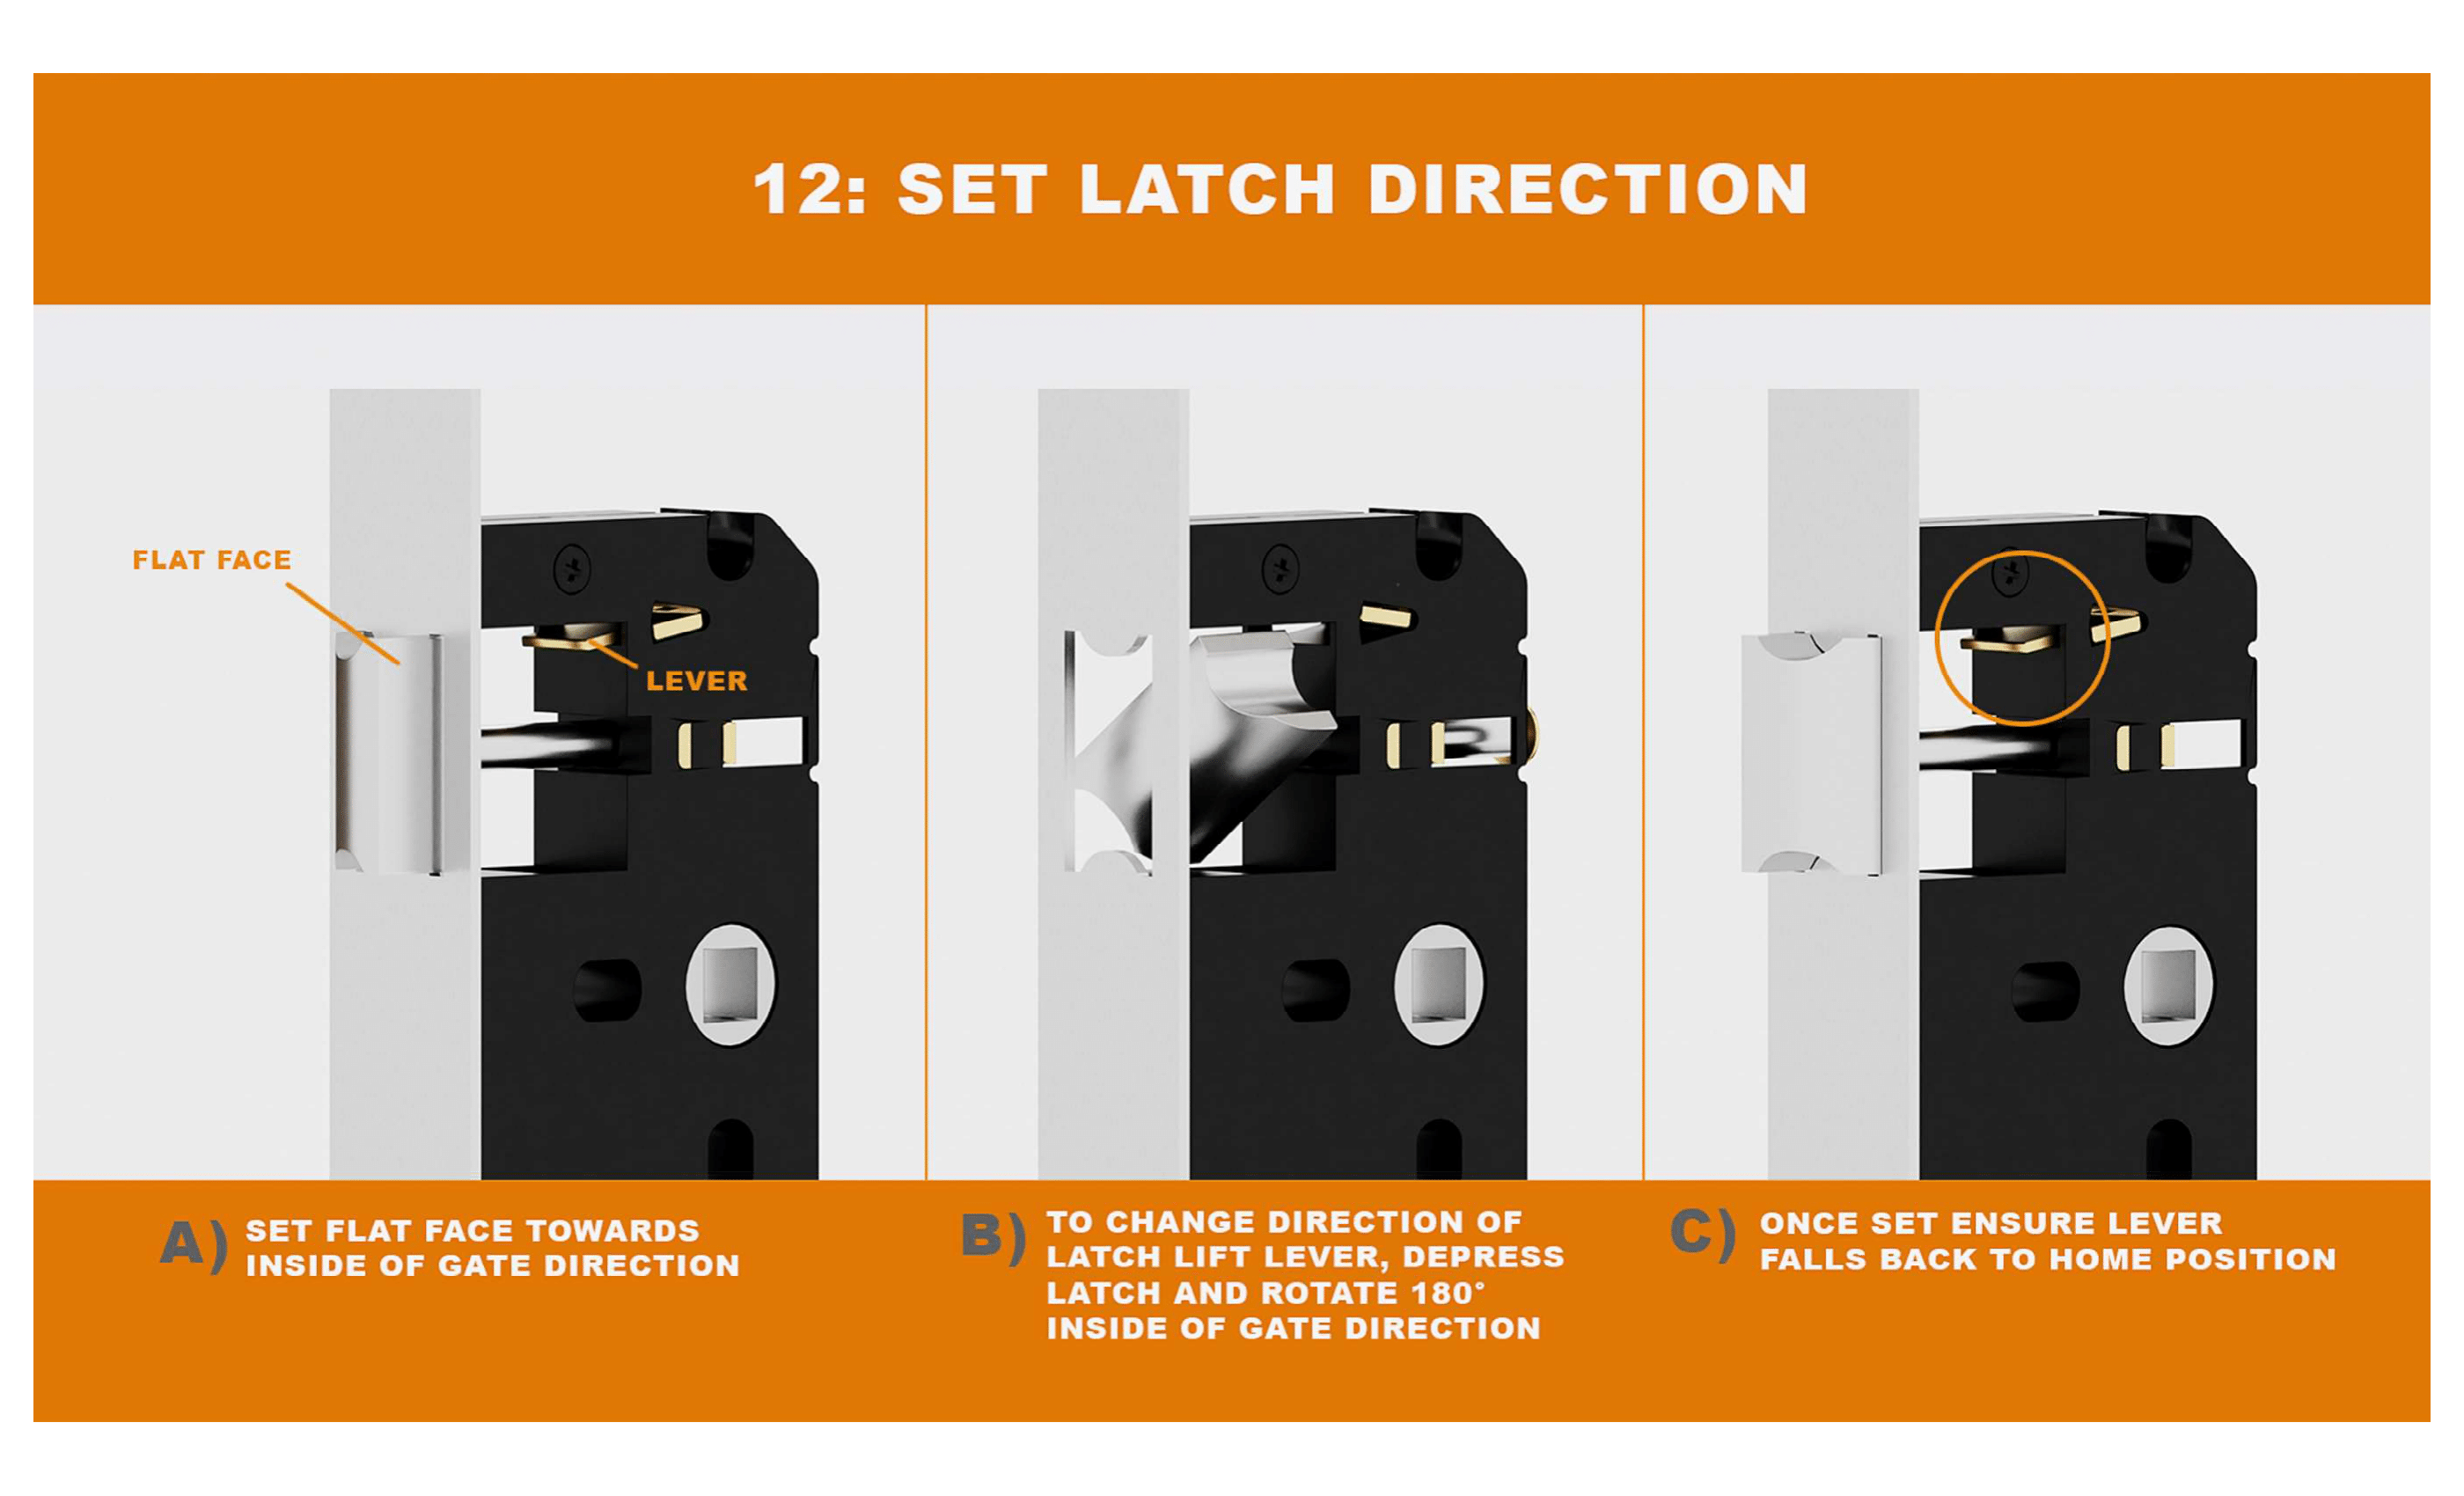
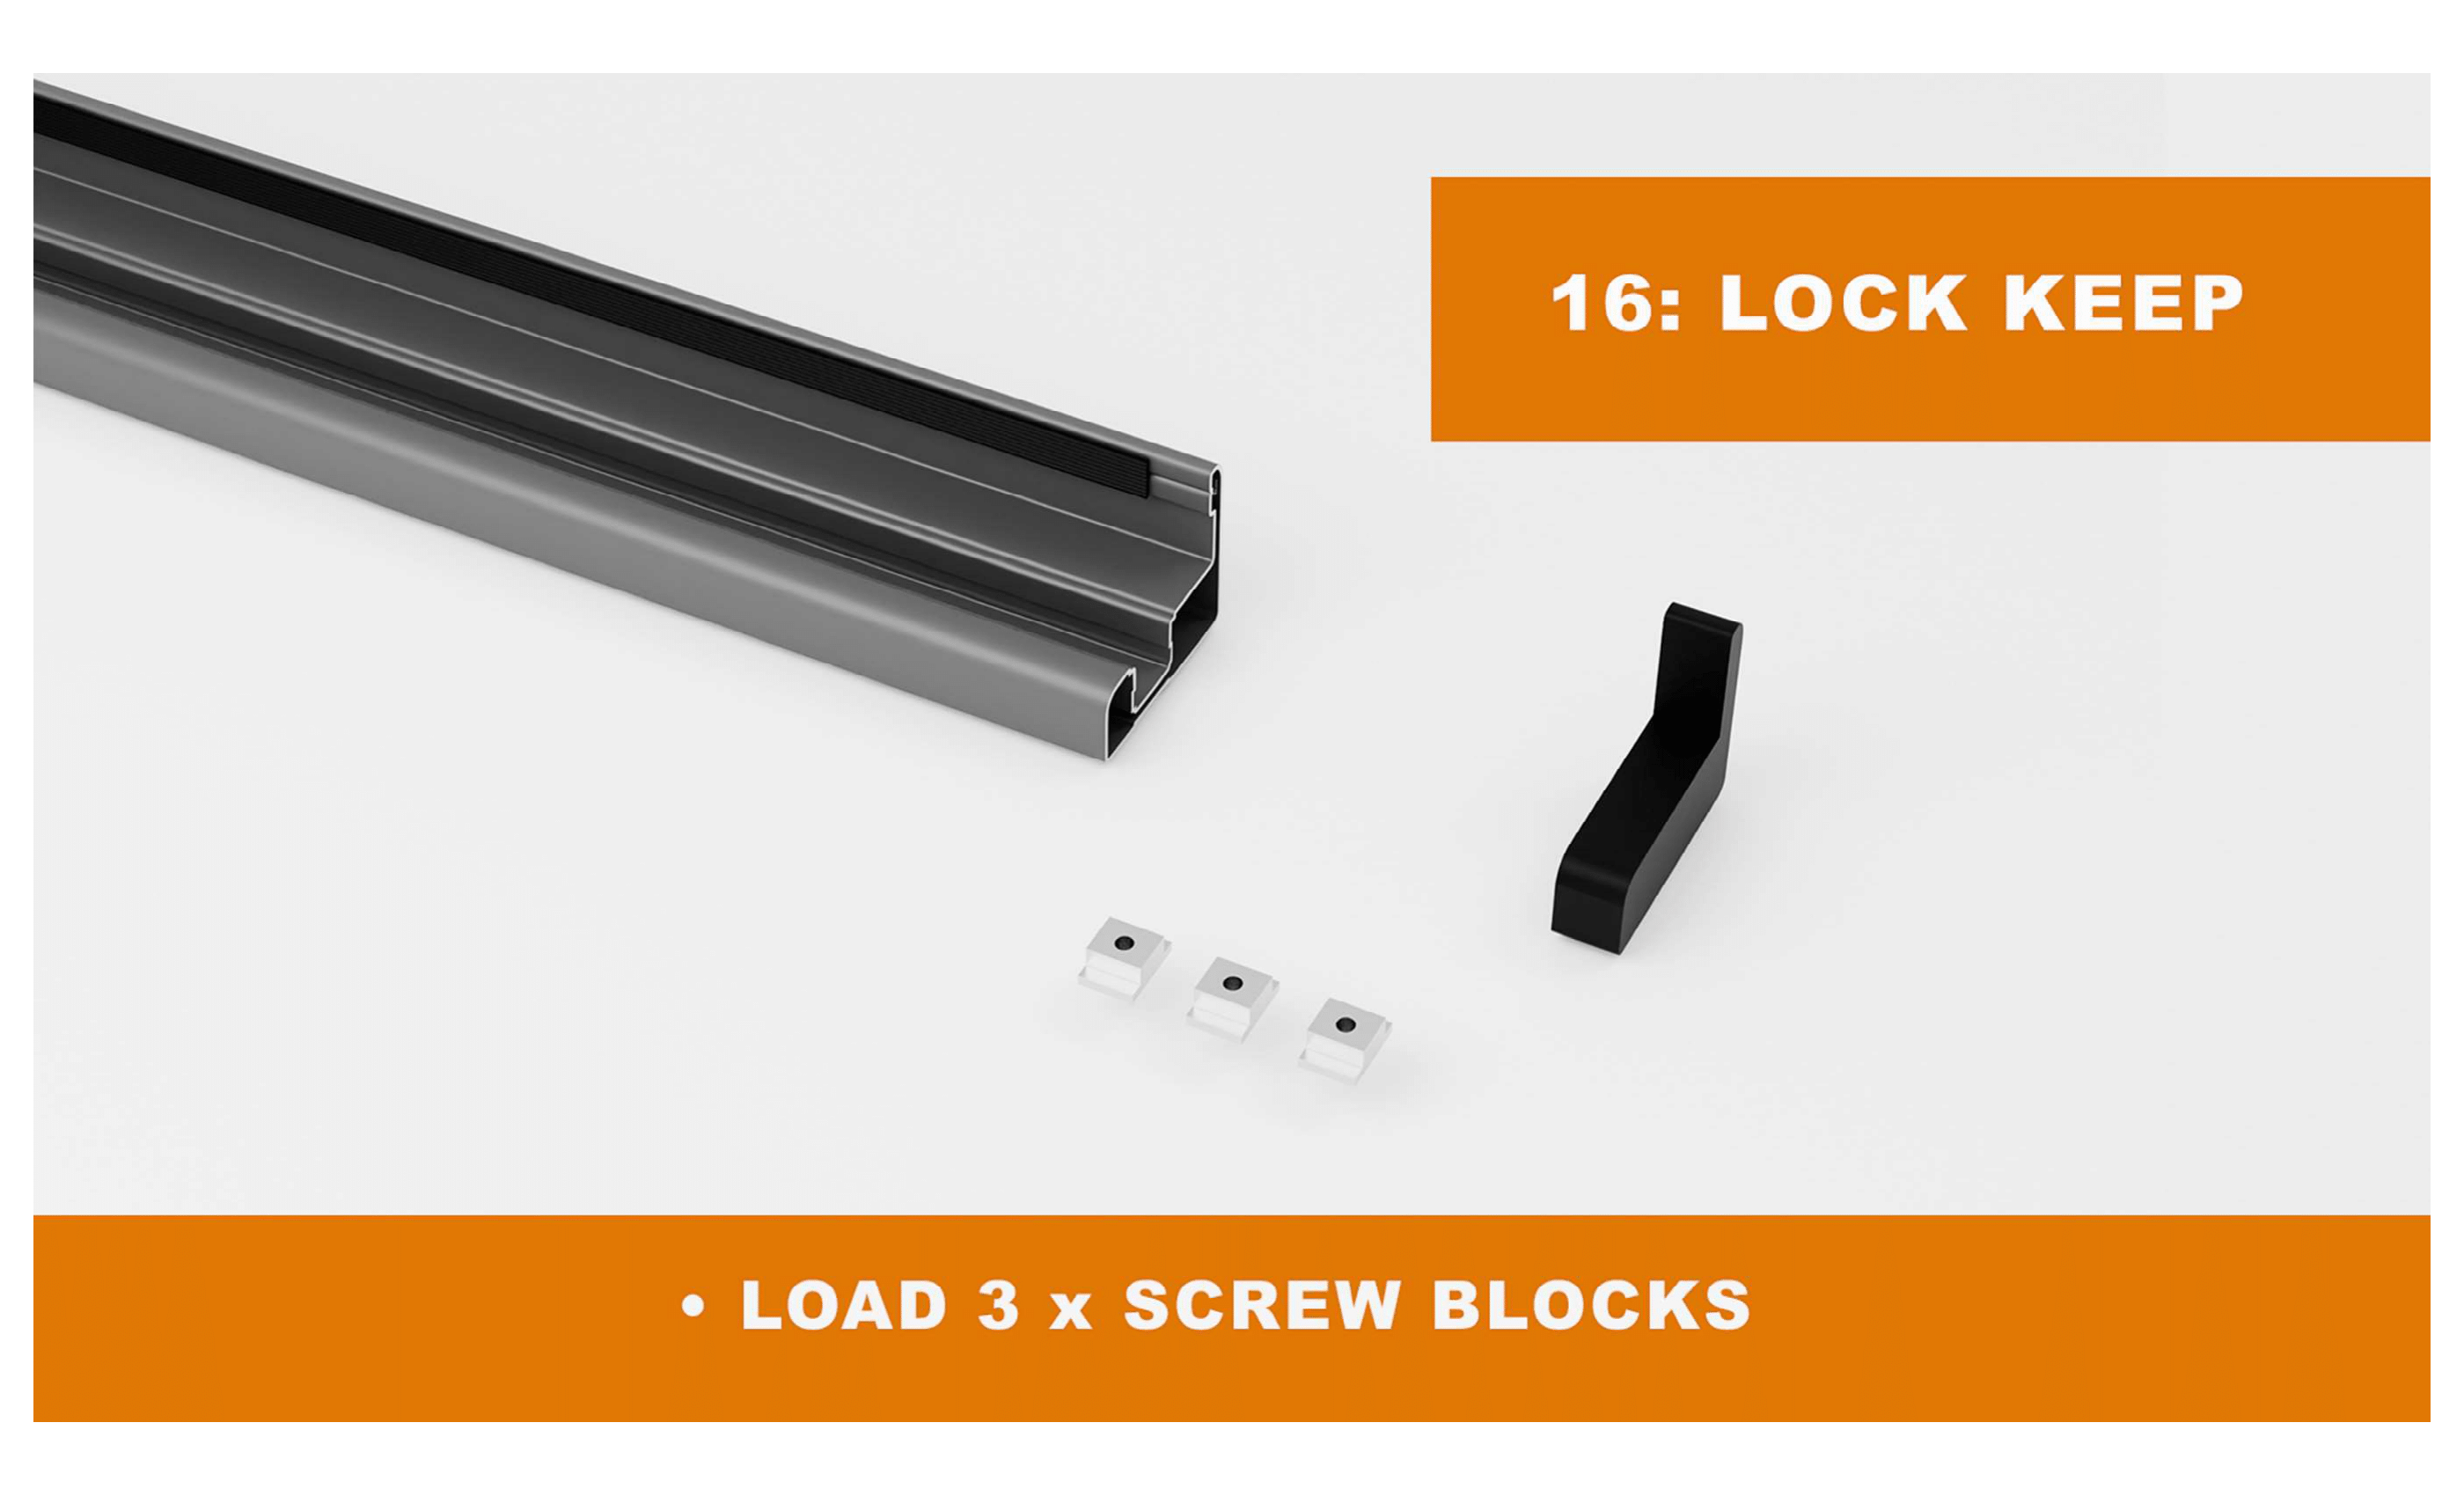
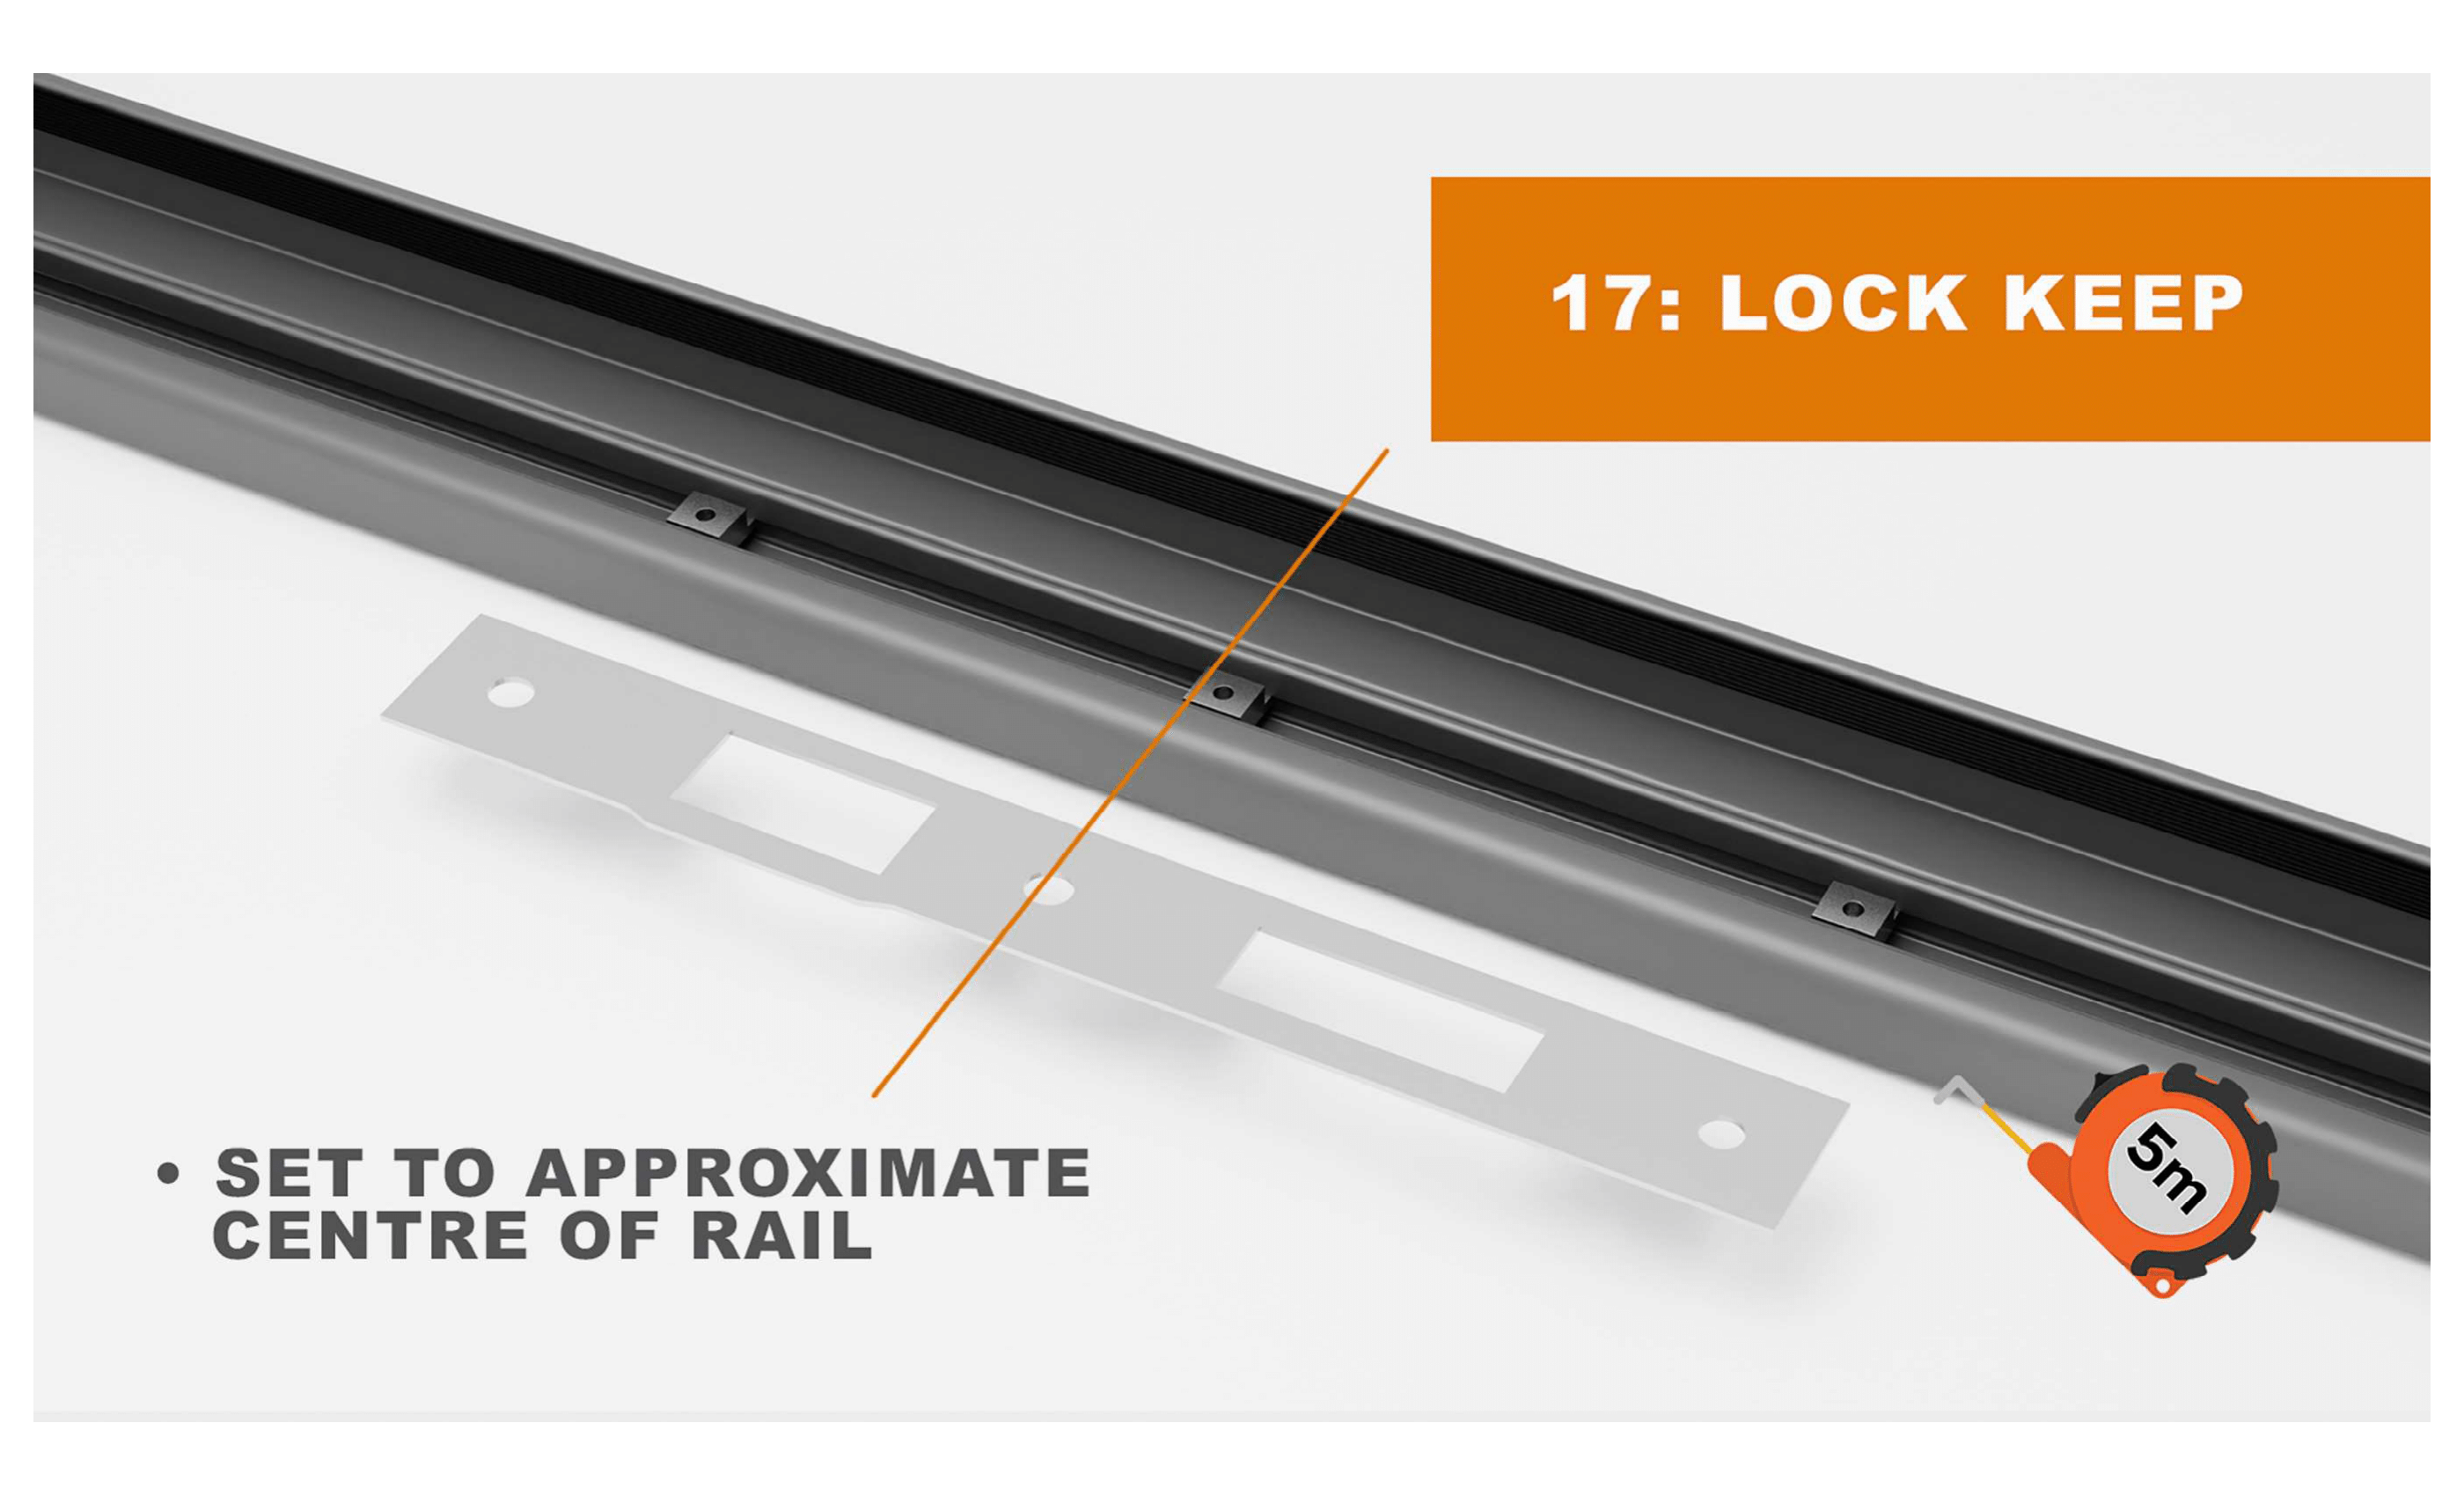
Install the Latch/Receiver
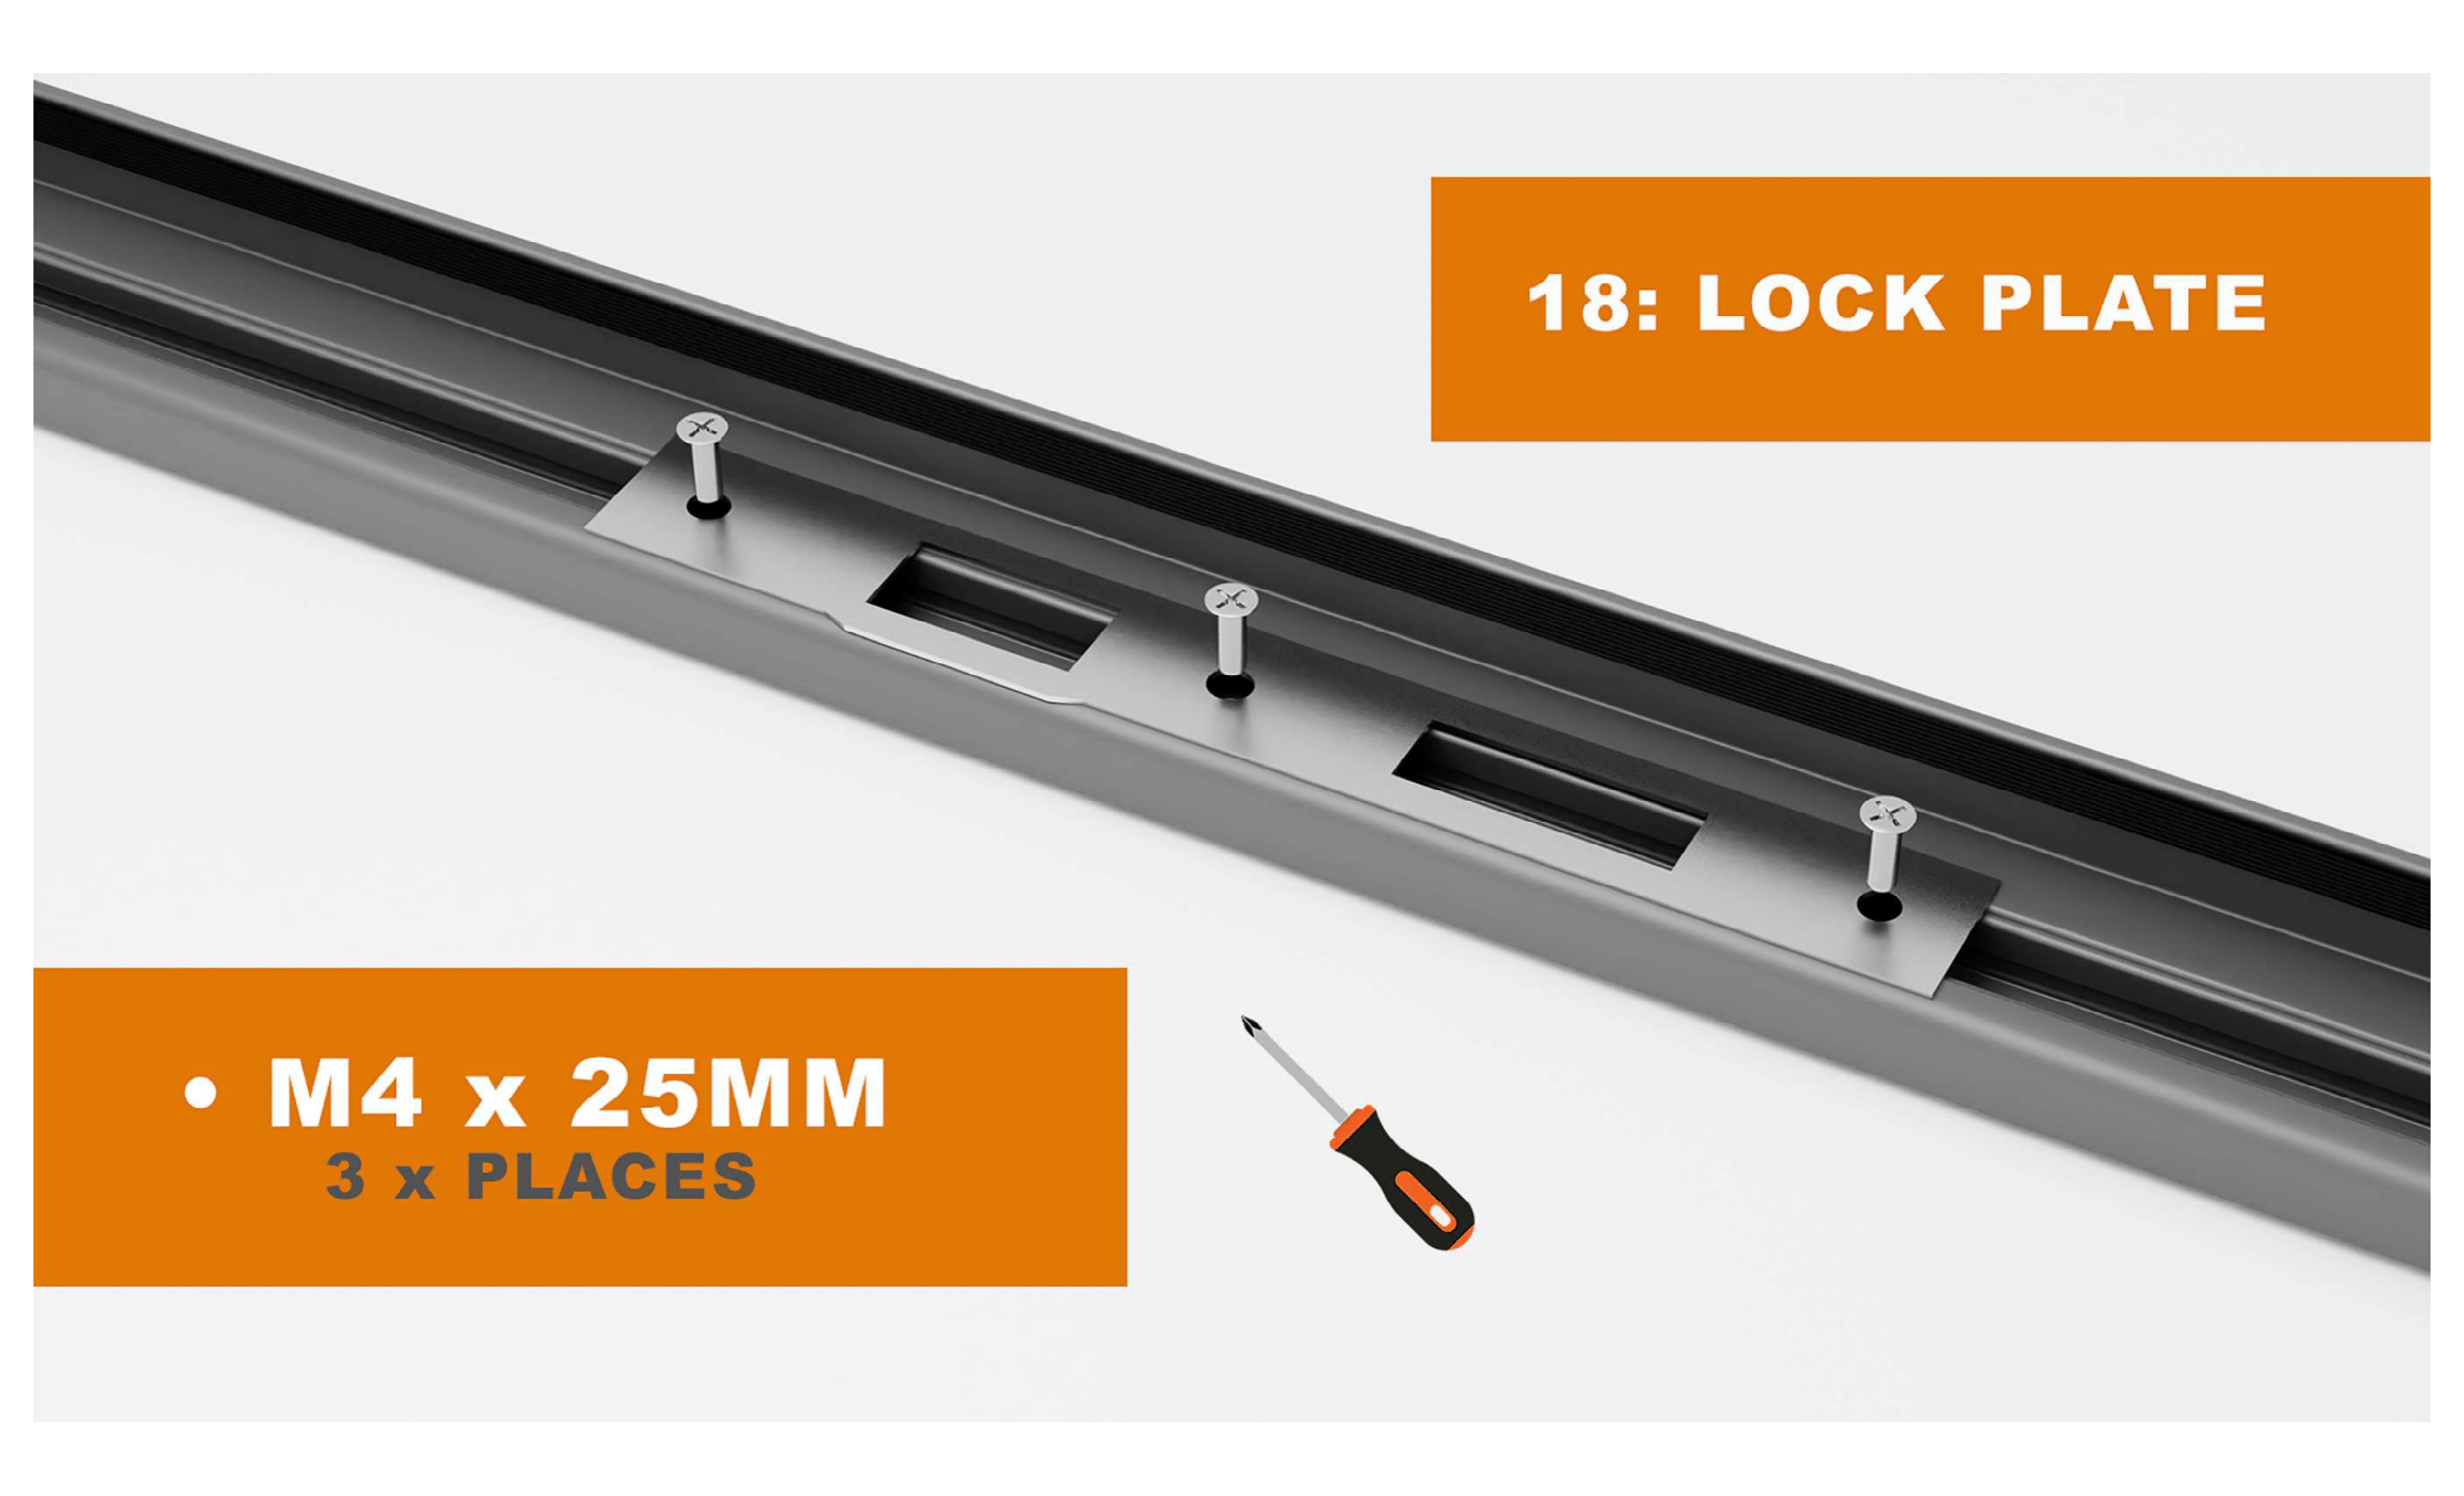
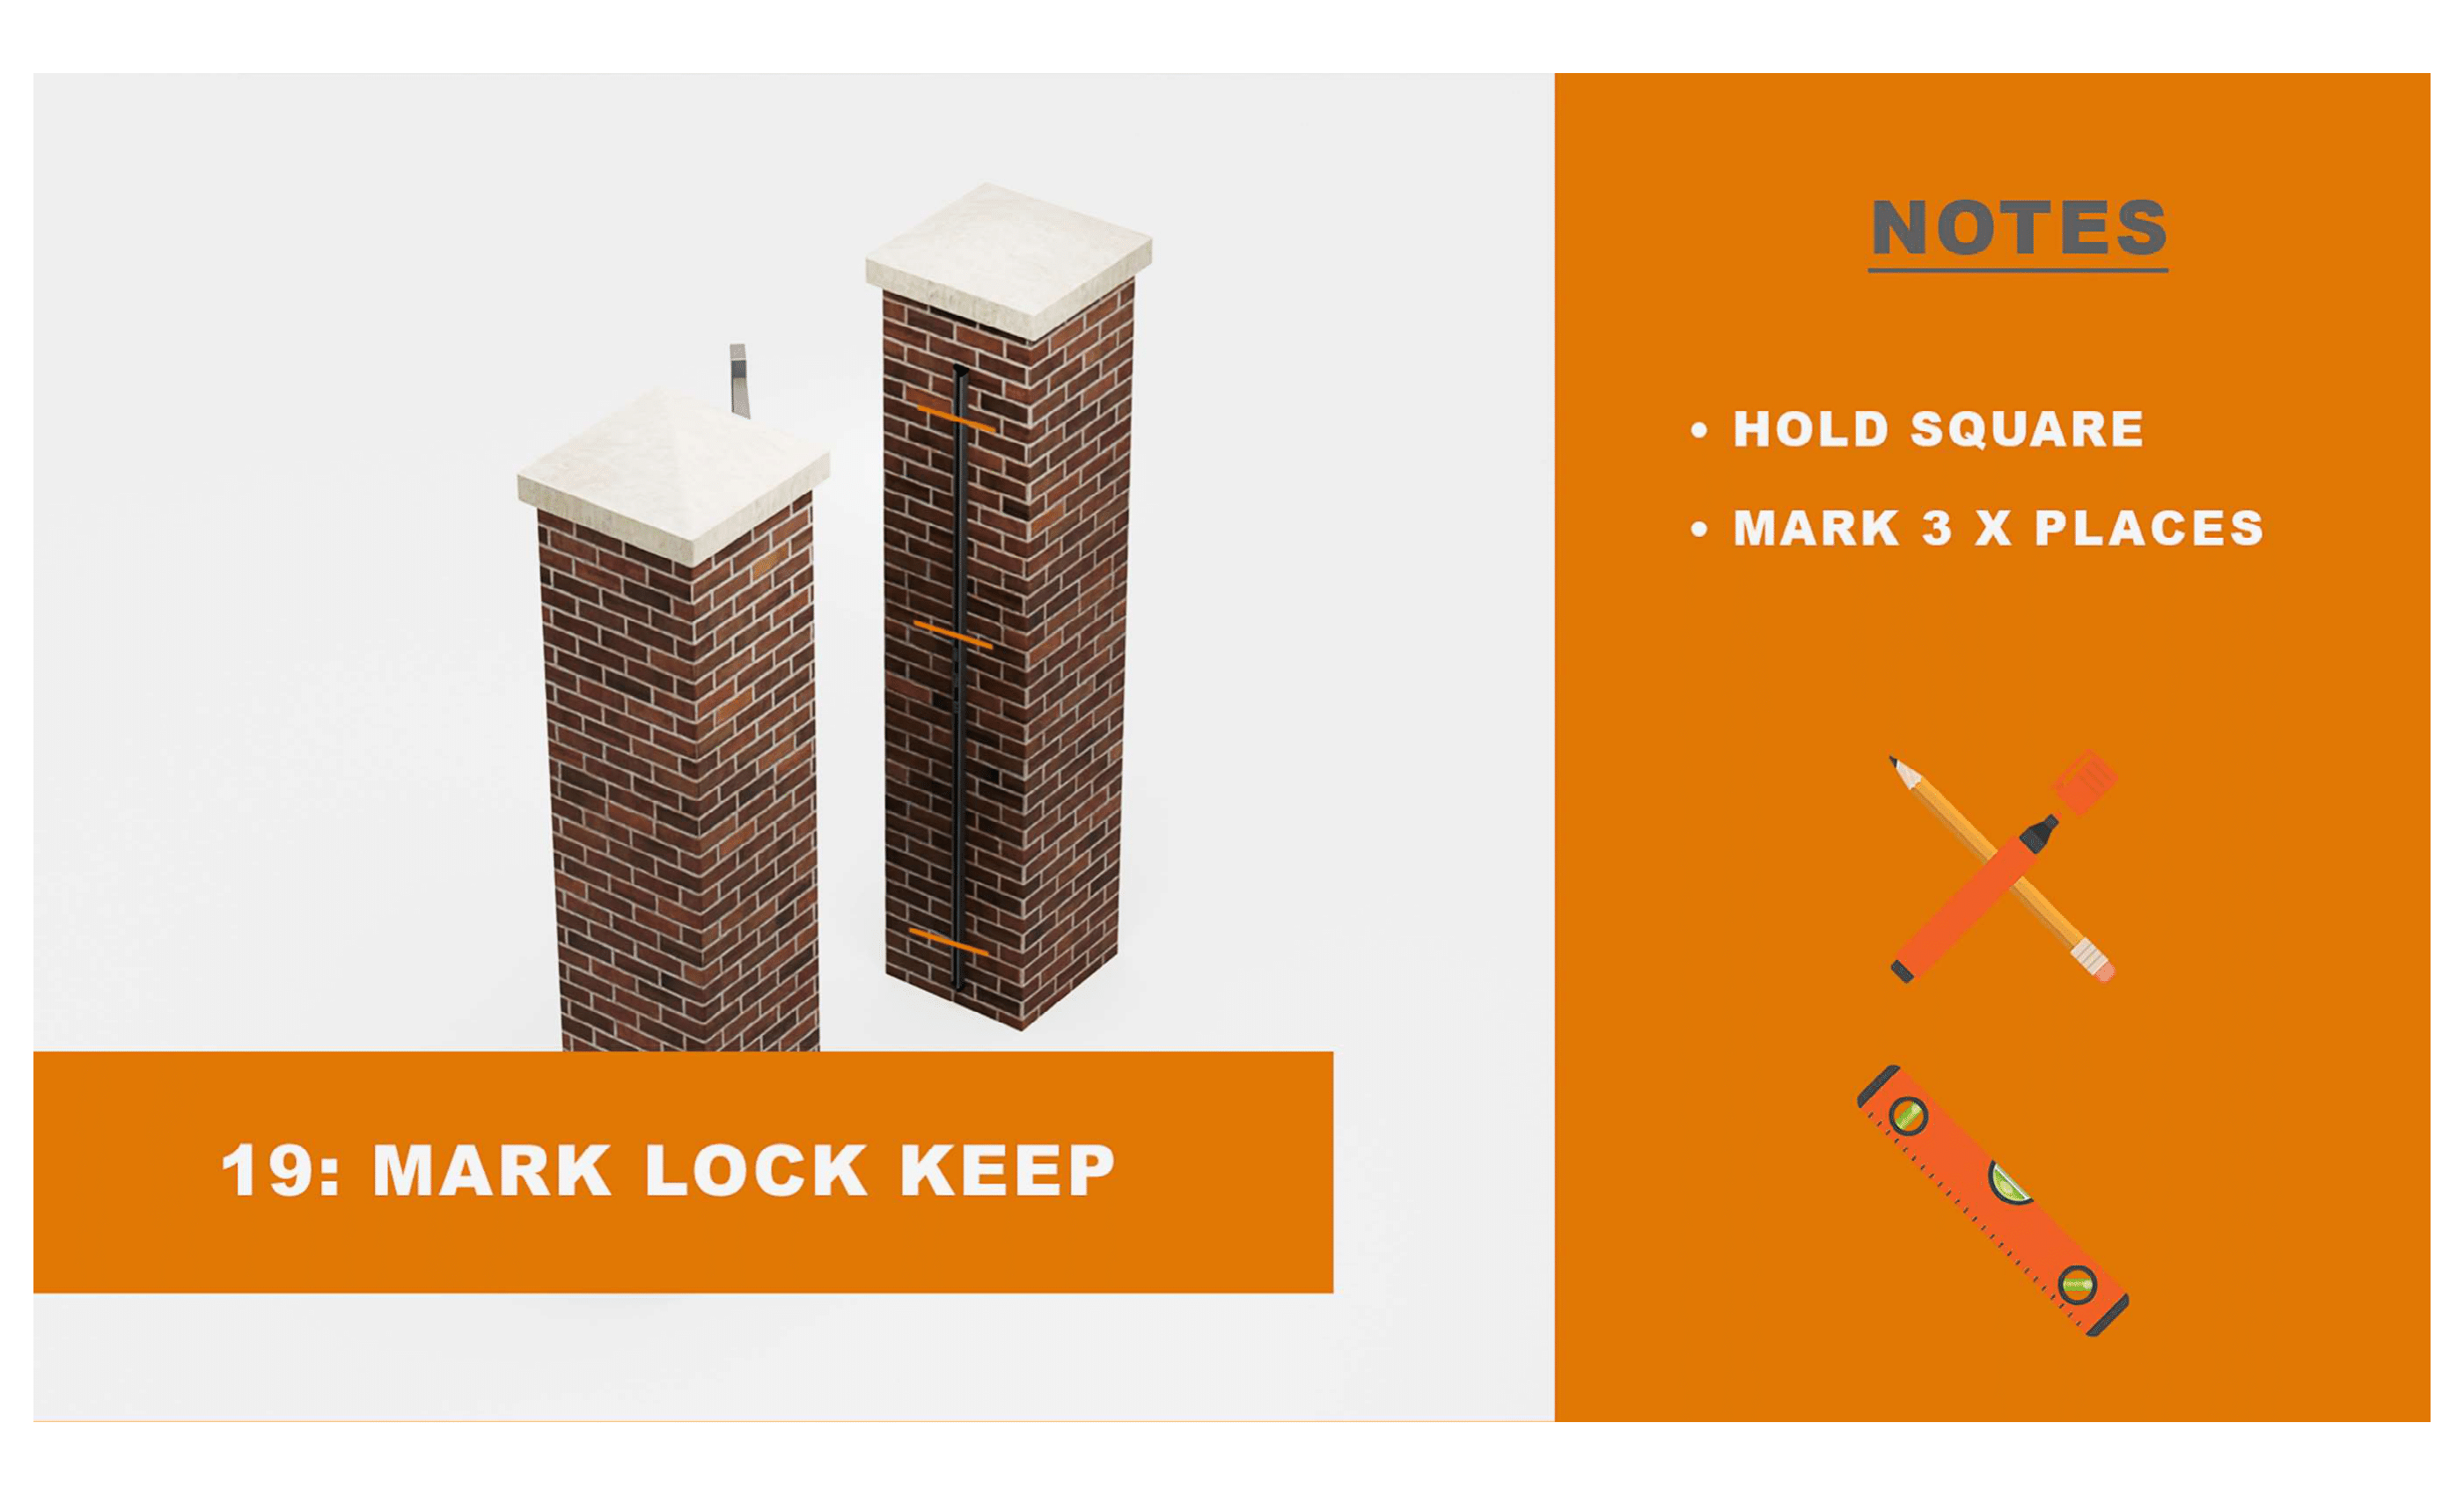
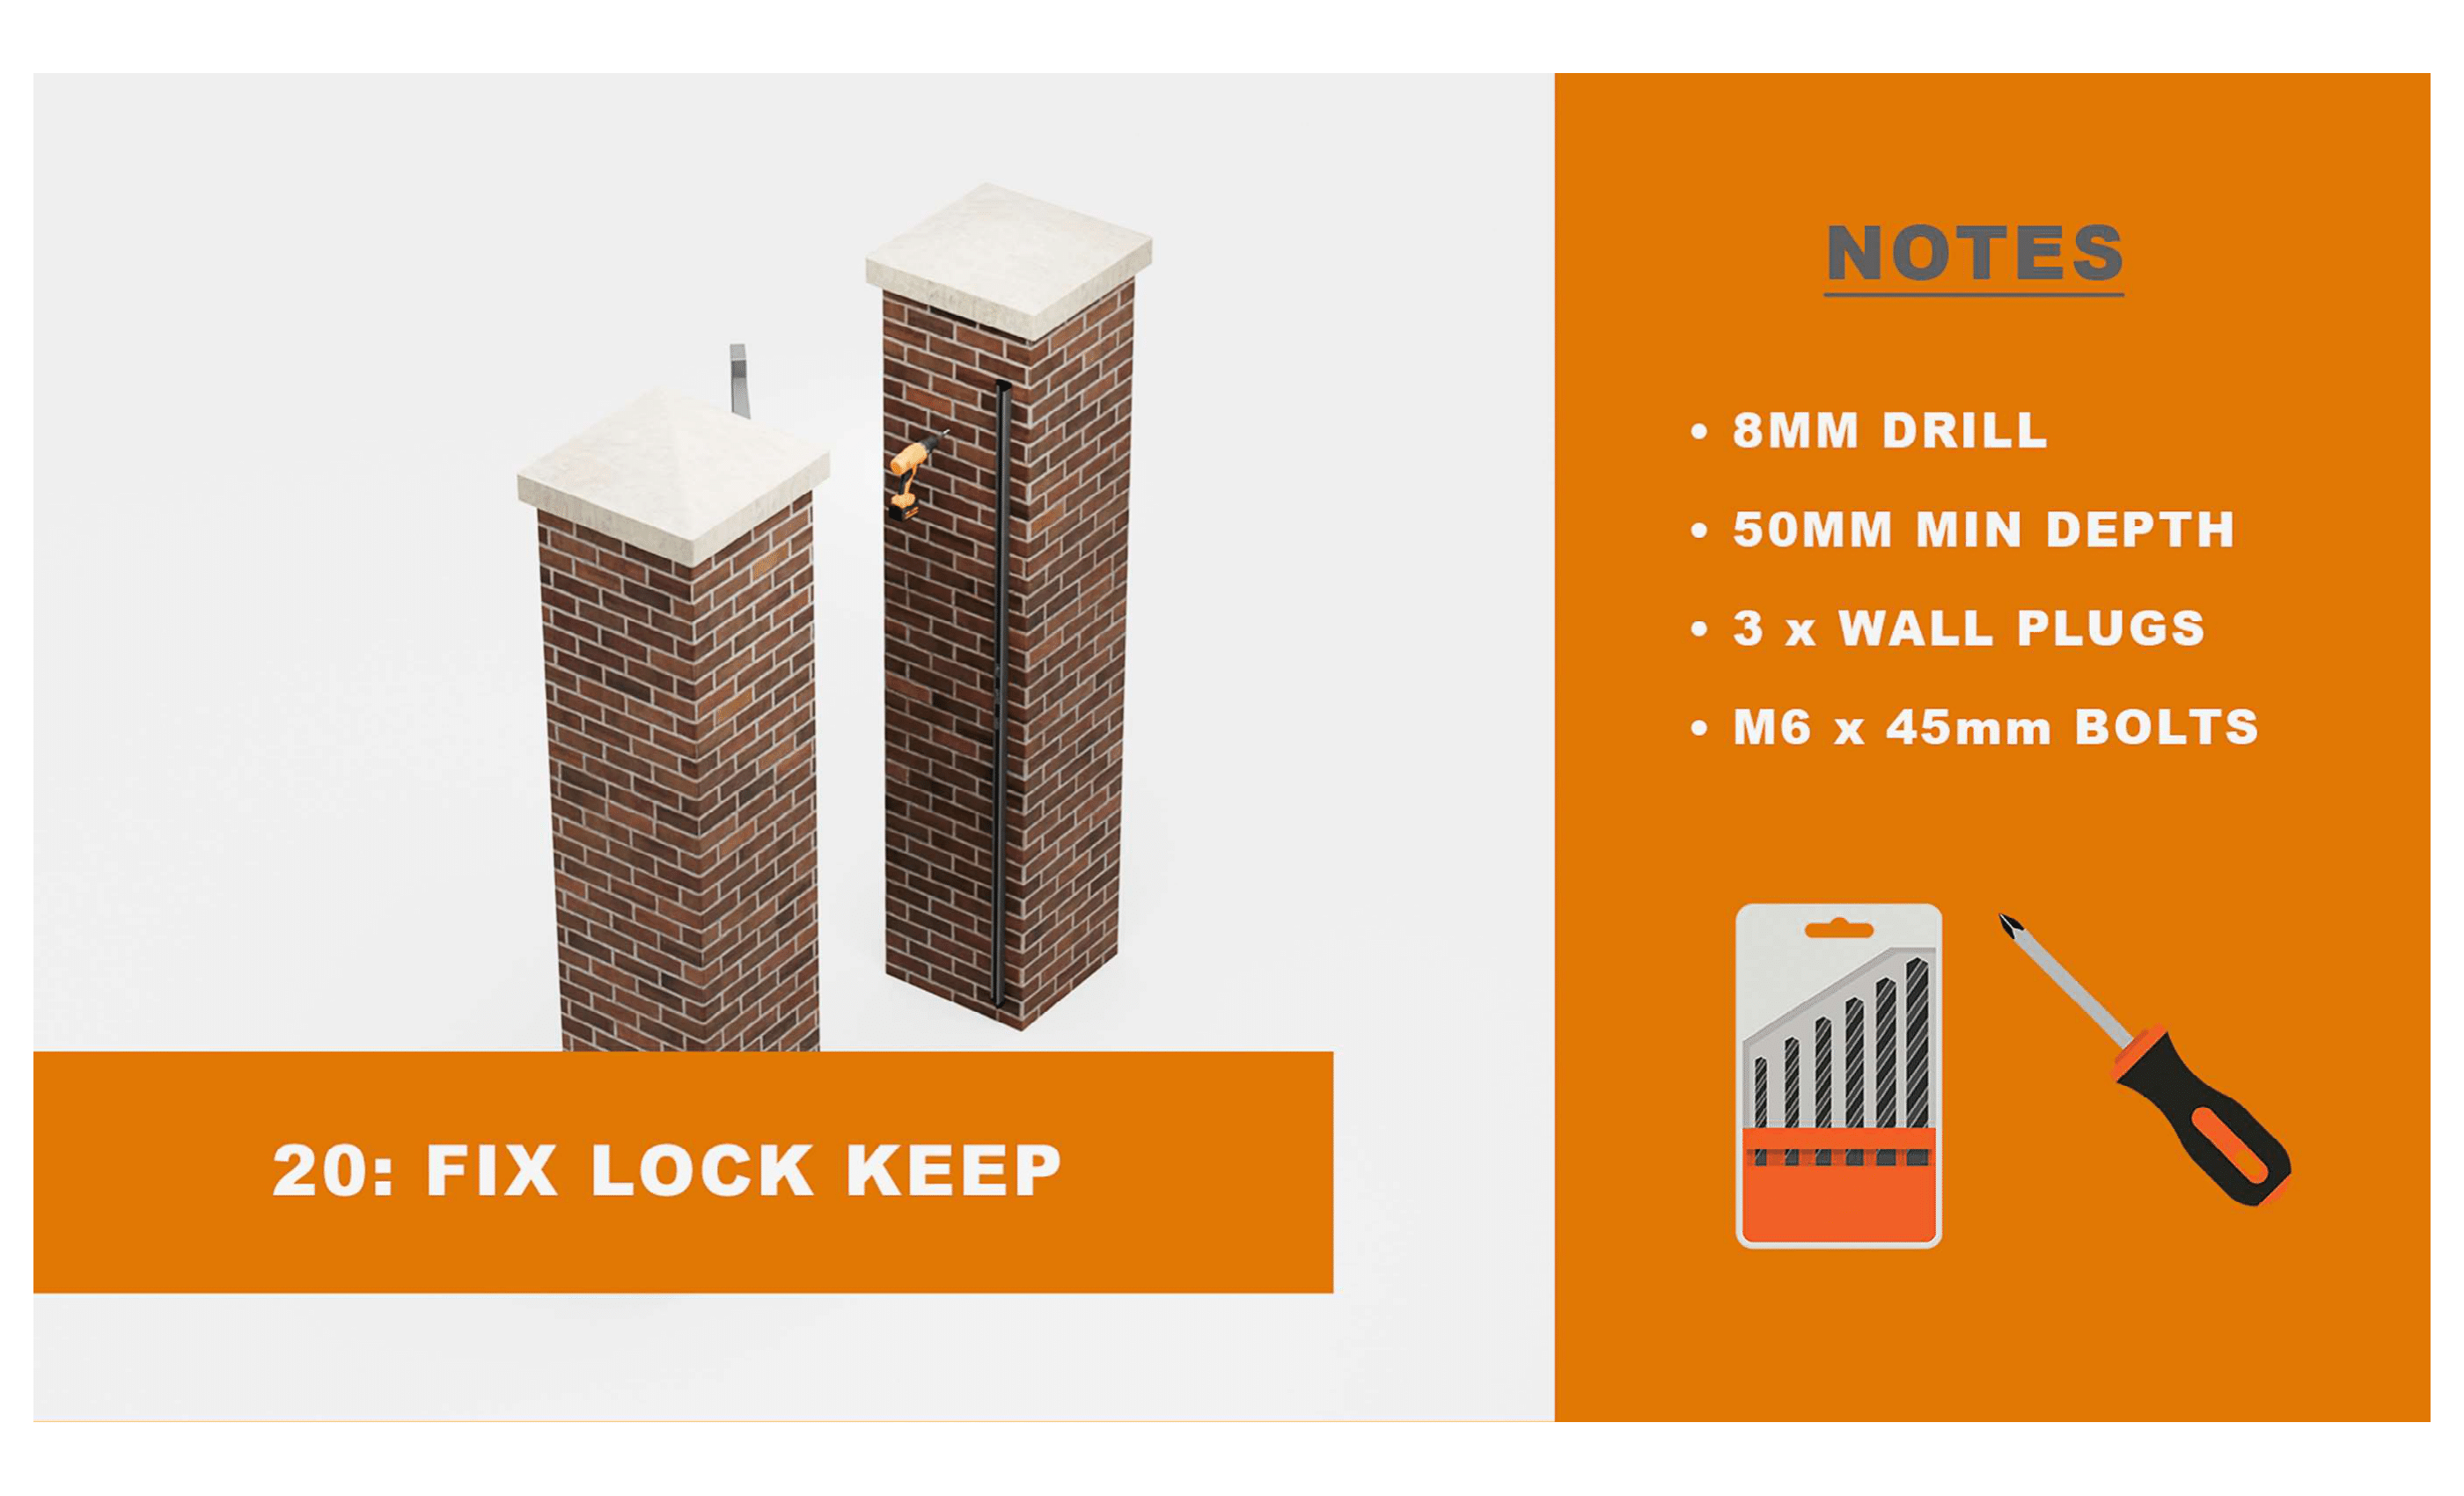
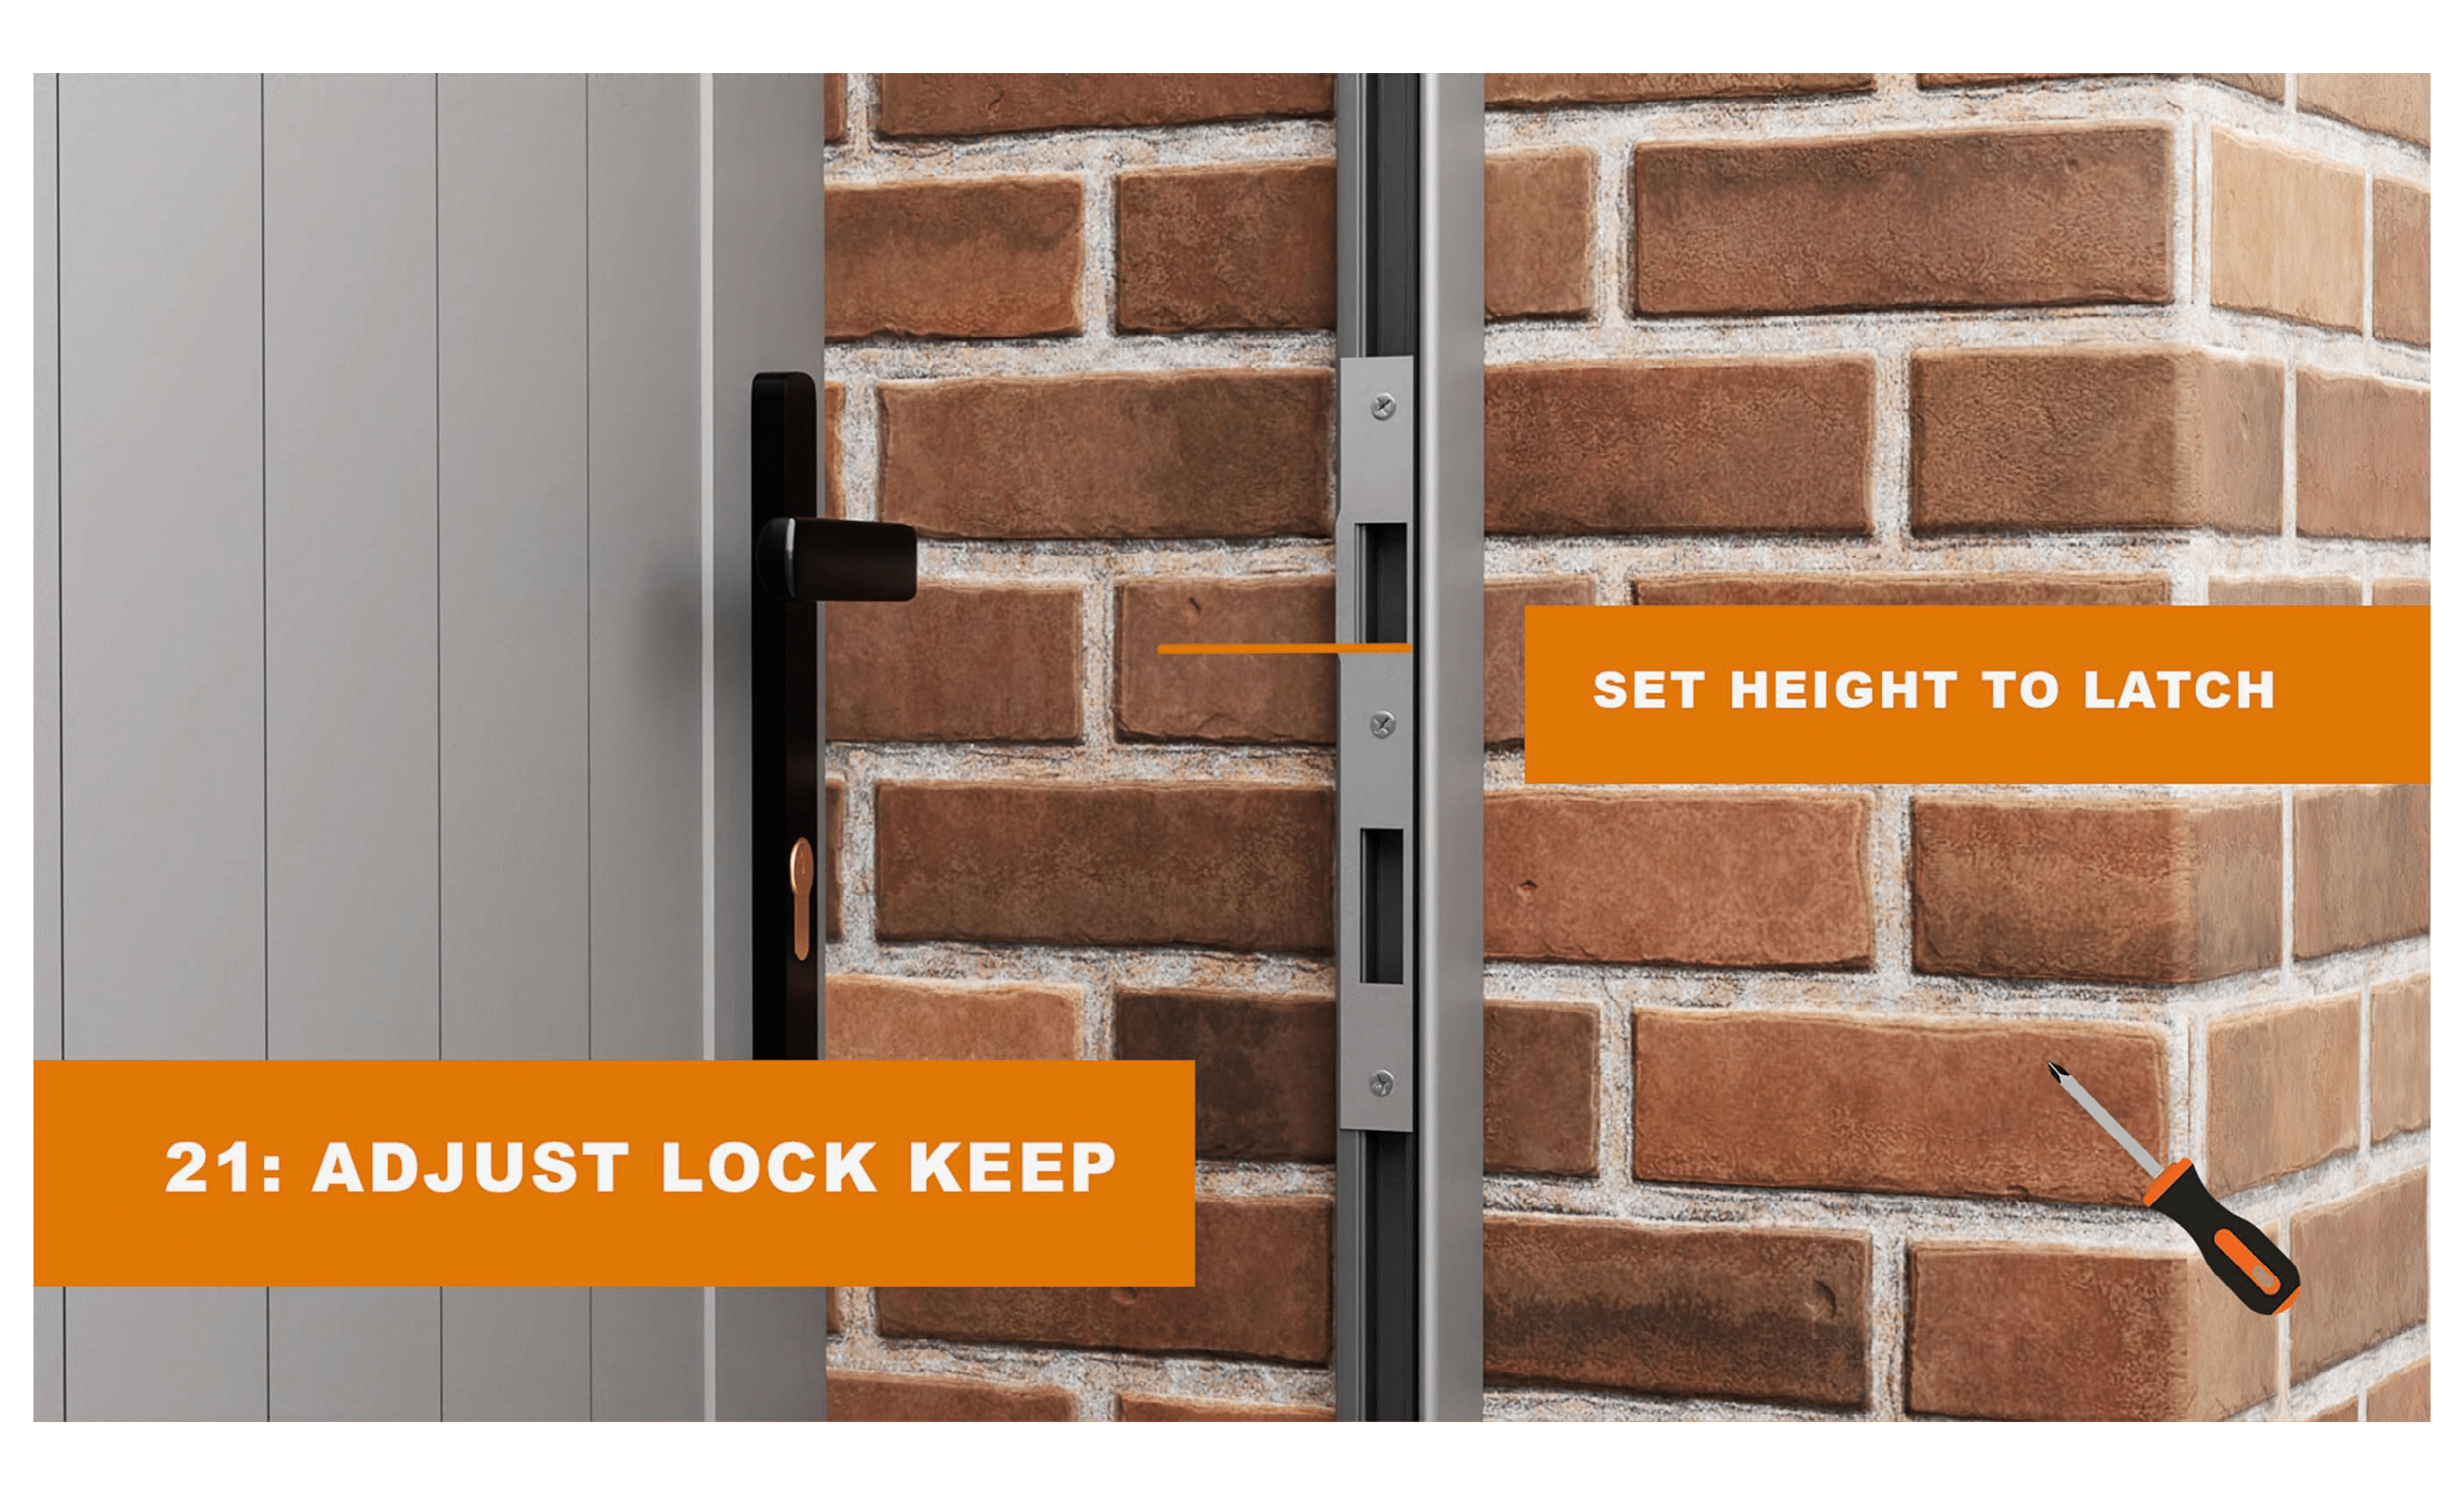
Close the gate and mark where the latch meets the opposite wall or post. For accurate drilling, use a pencil to mark a small cross at the exact point where the latch will be installed. Drill and fix the lock keep channel and cover strip. Ensure the gate latches securely without resistance.

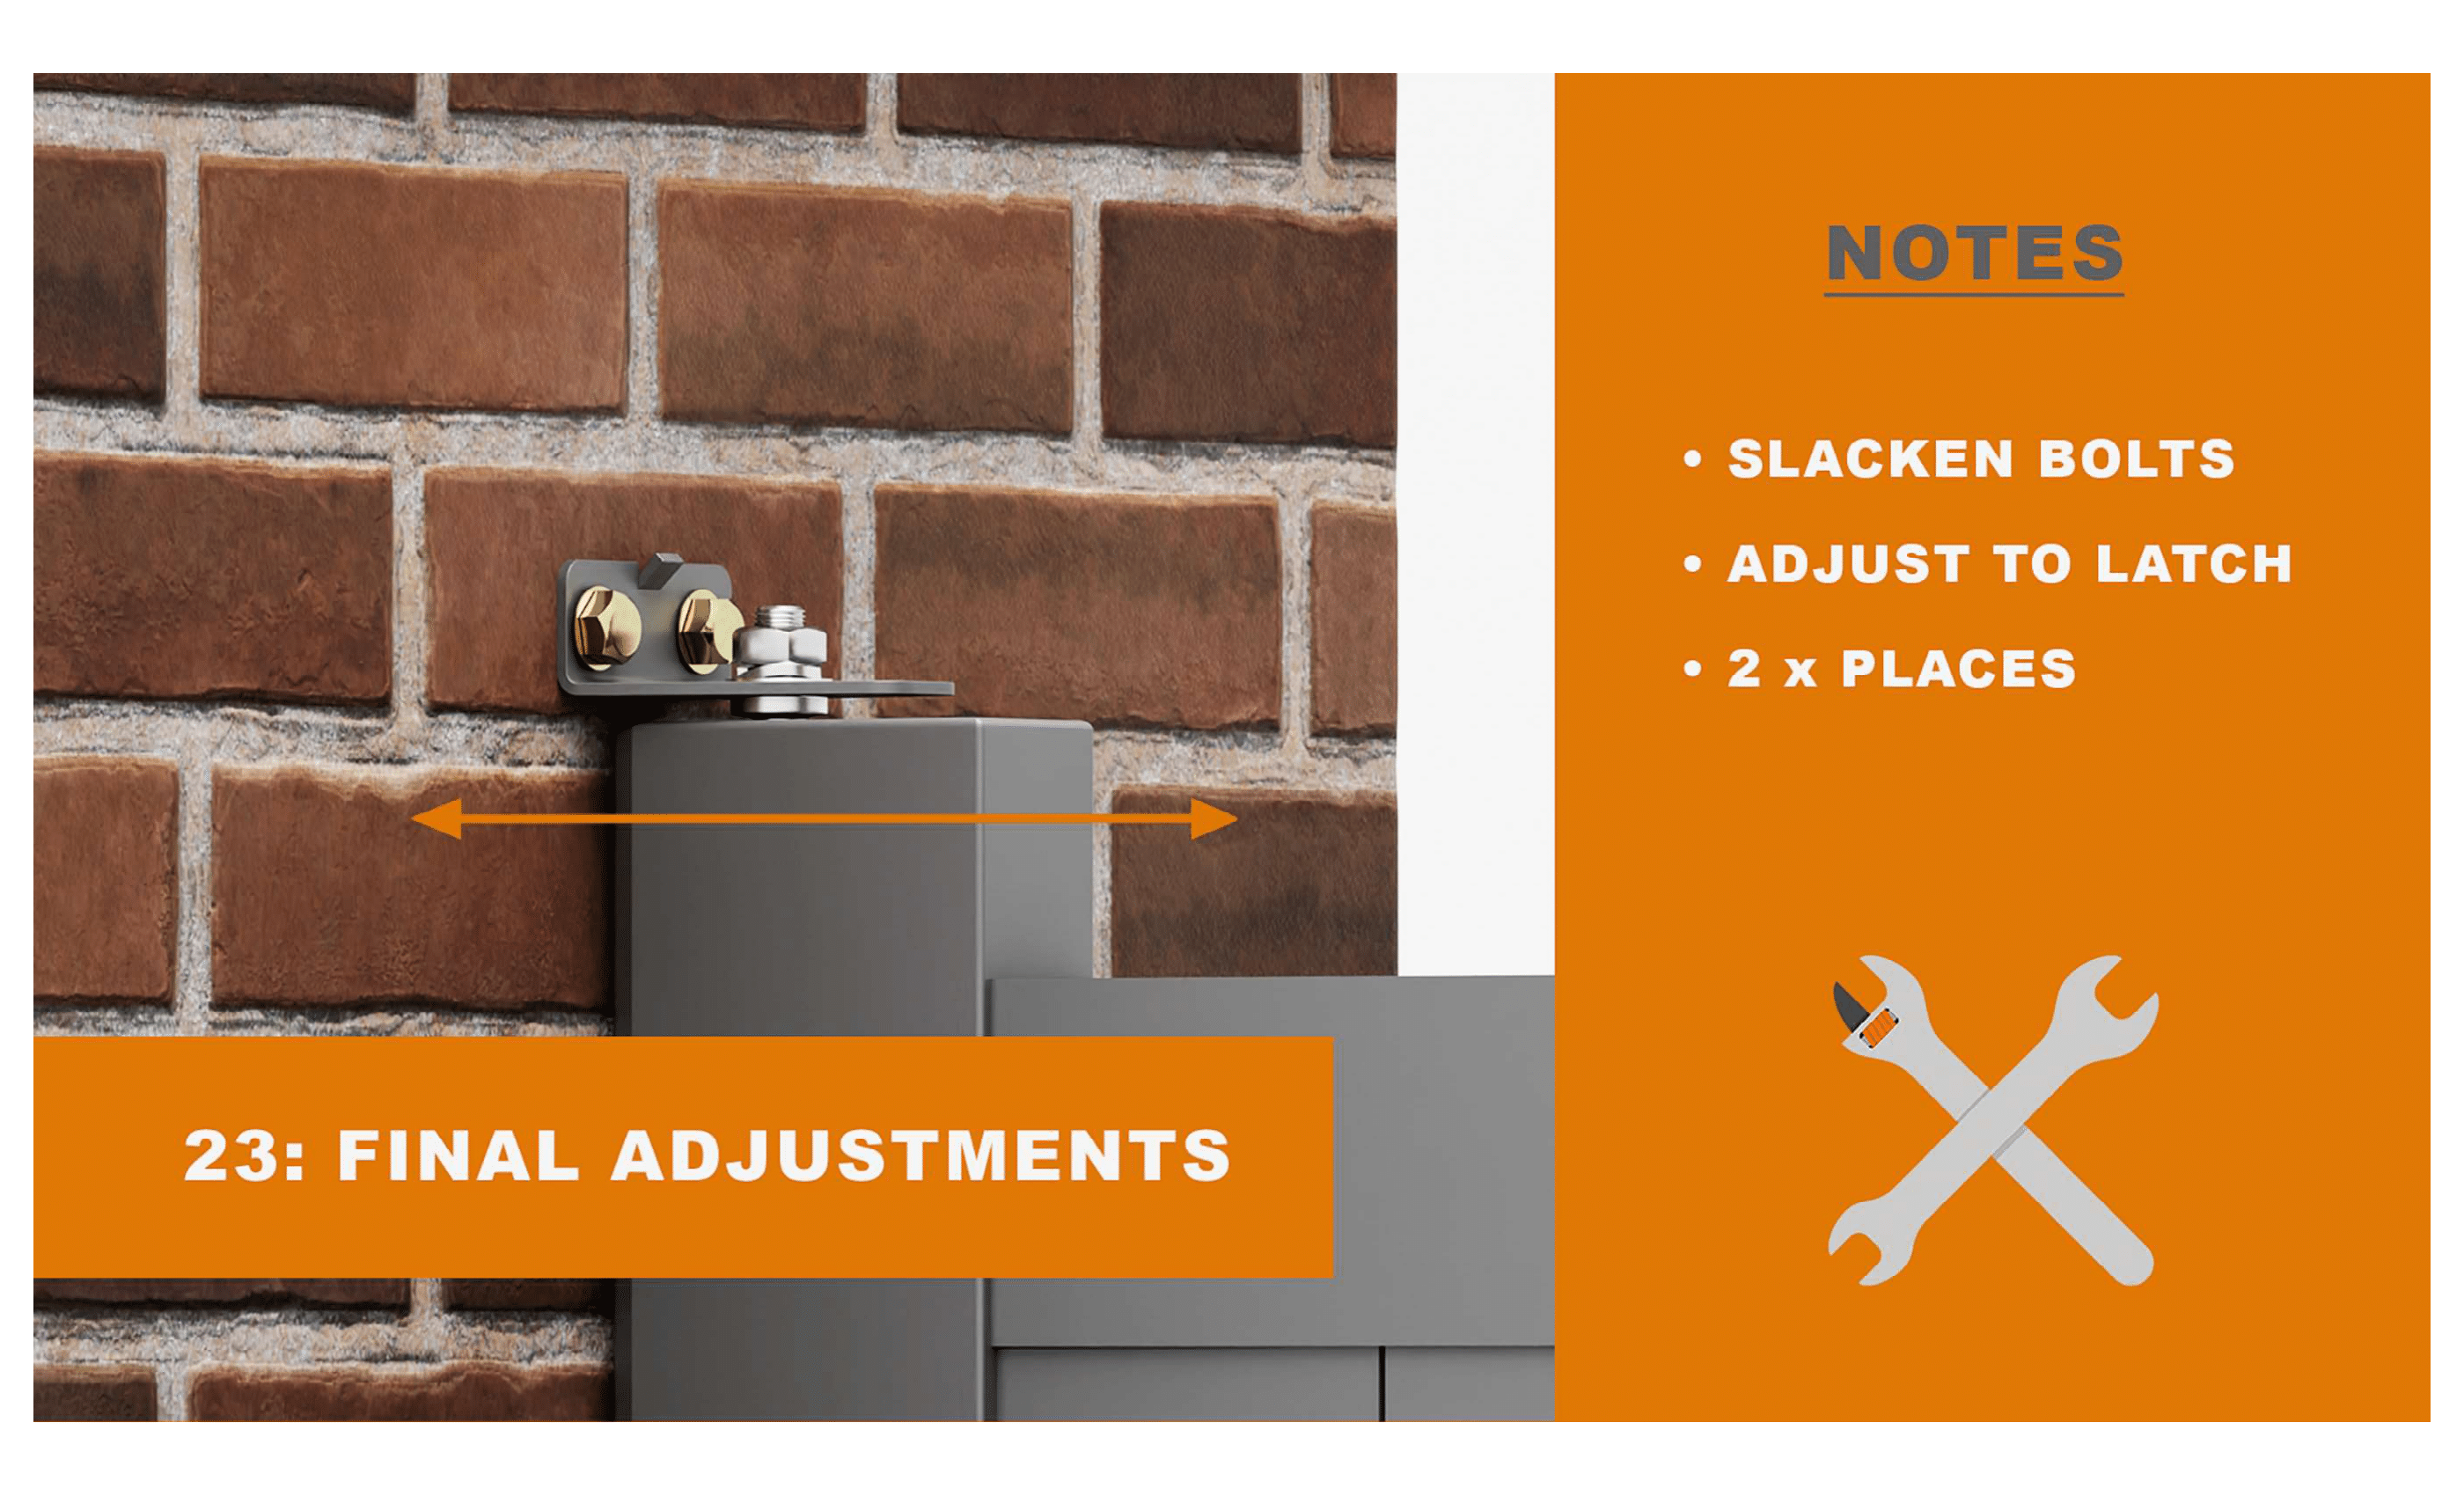
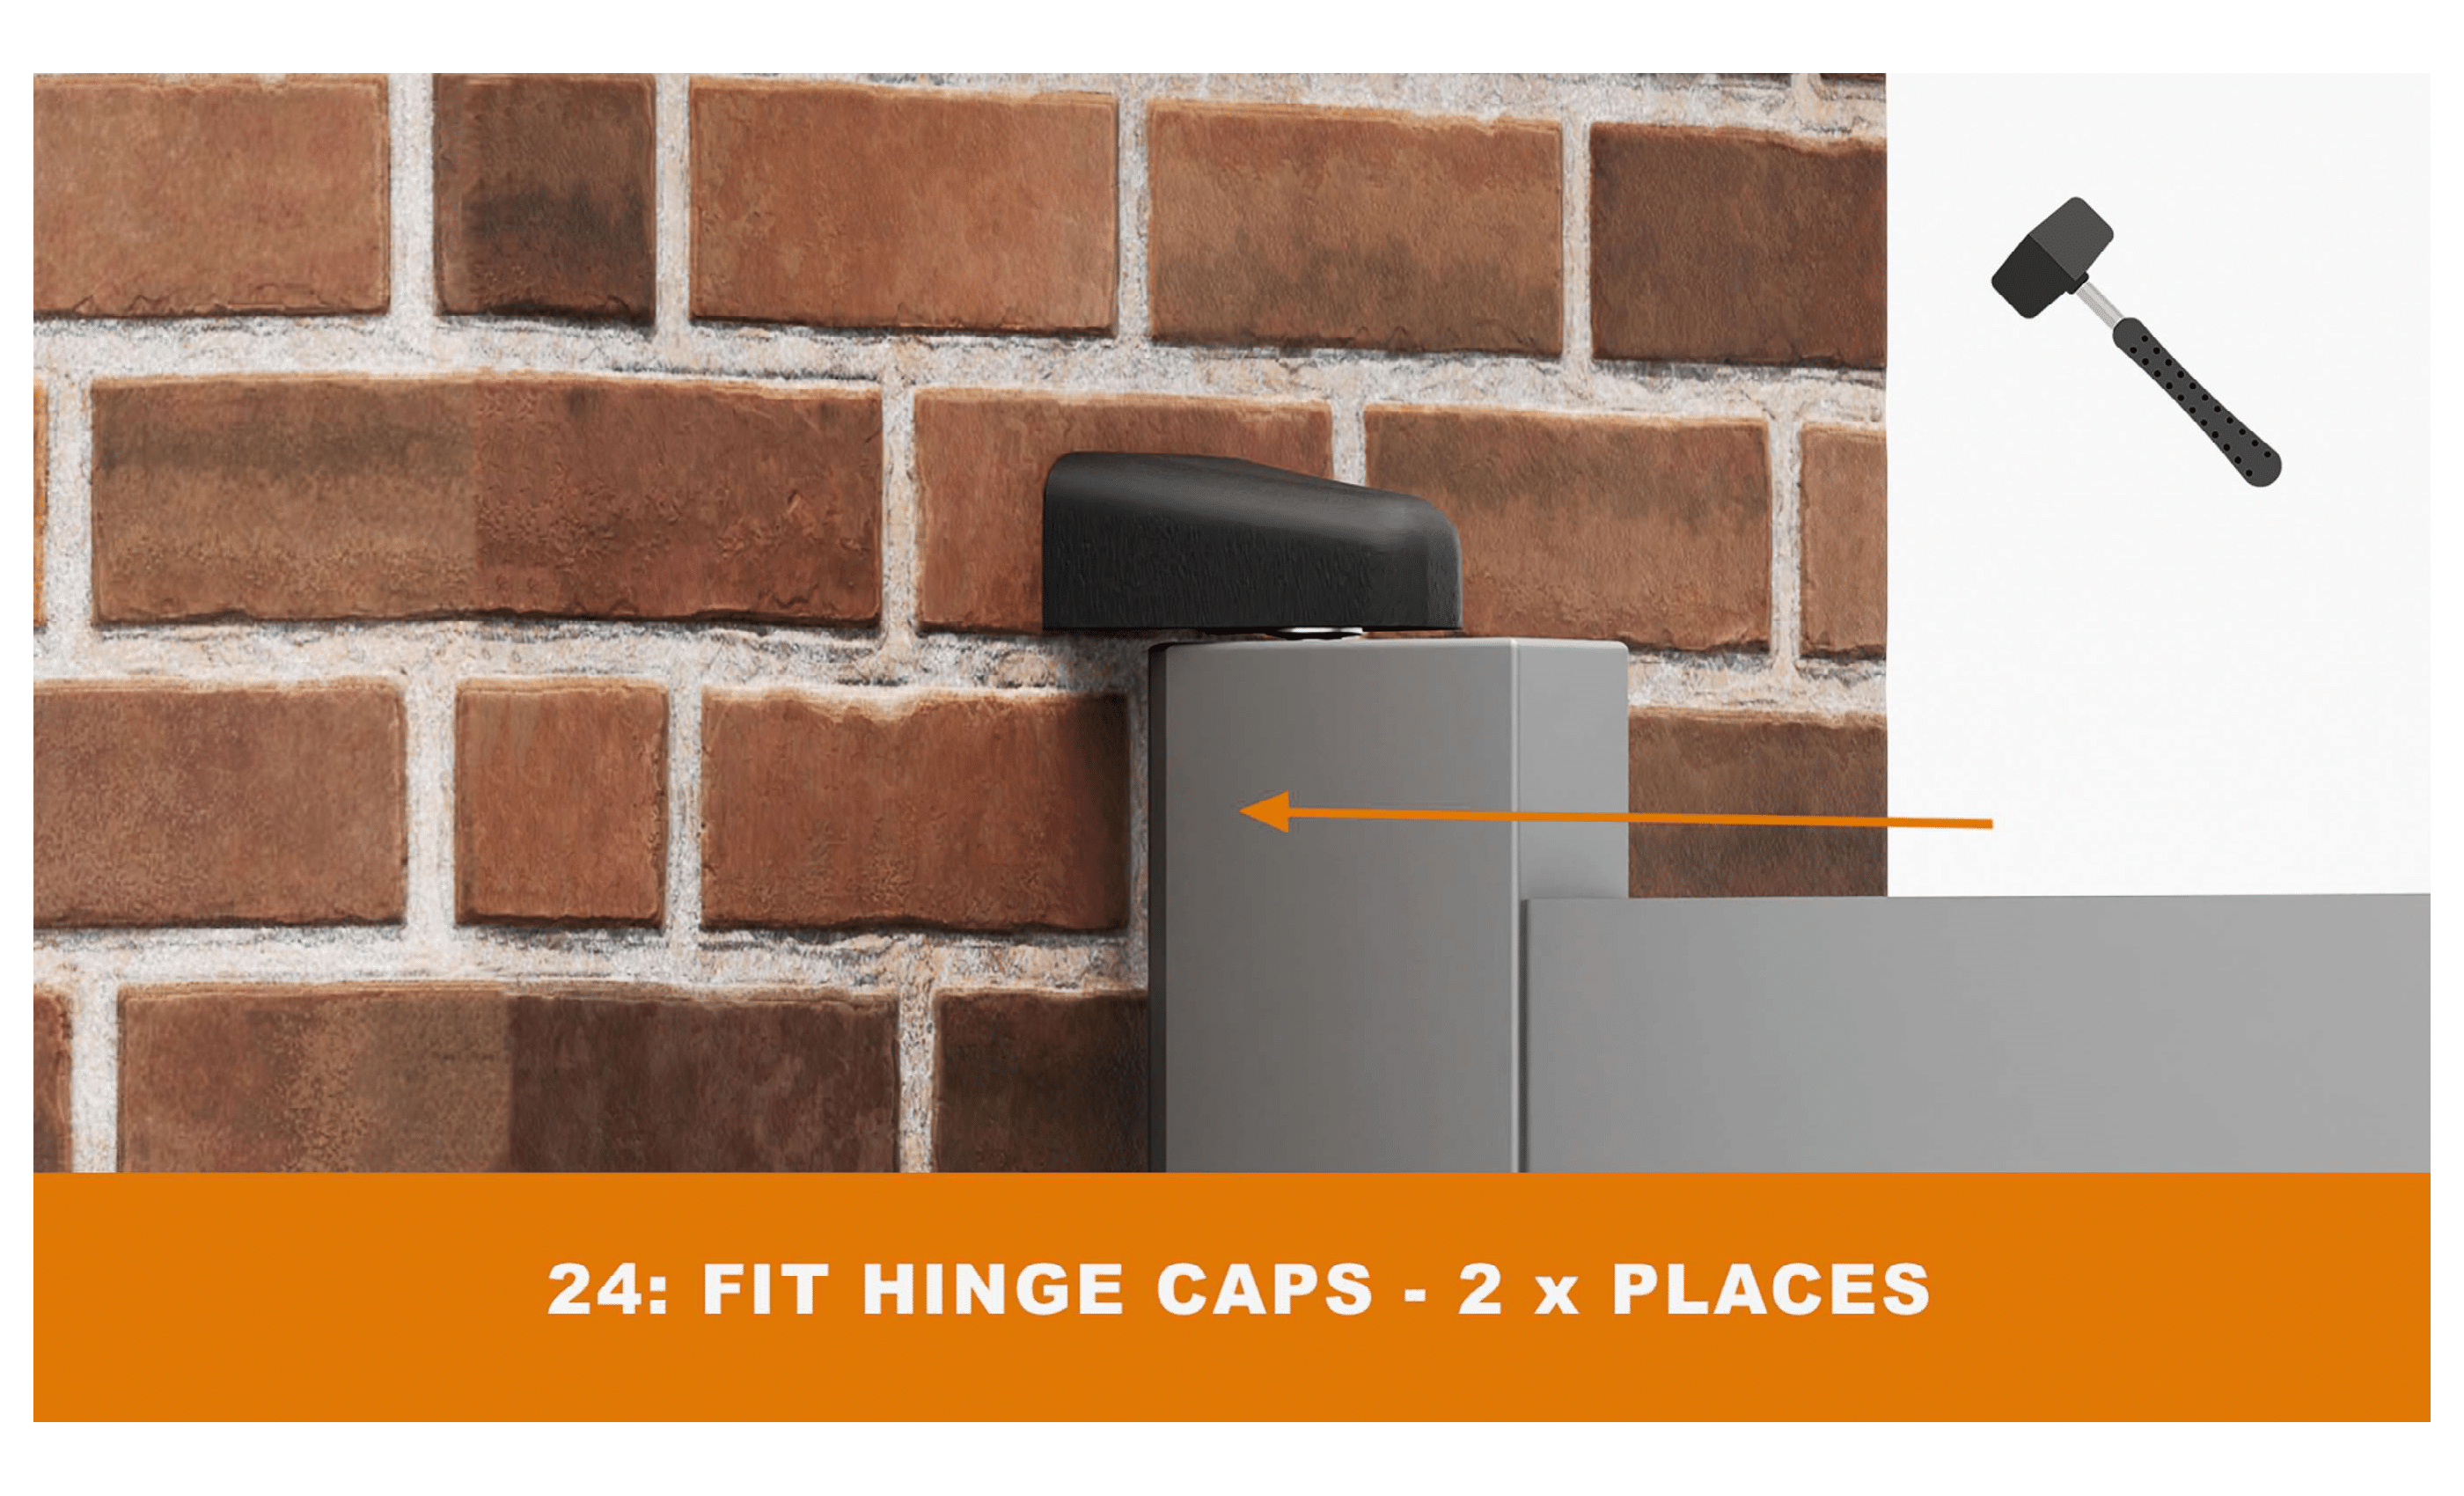
Test & Secure All Fixings
Open and close the gate several times to ensure smooth movement and secure latching. Tighten all hinge nuts, washers, and screws. Make final adjustments so the gate is straight and aligned.
Maintenance Tips
-
Oil hinges and lock mechanism once or twice per year
-
Wash aluminium/composite surfaces with warm soapy water
-
Check fixings annually and re-tighten if needed
-
No painting or staining is required
-
Regular maintenance helps keep your gate protected from weather and environmental damage, ensuring long-lasting durability
Installation Scenarios Covered
This method works for:
-
Between two walls (brick to brick)
-
Wall to existing post
-
Existing post to existing post
All follow the same process: secure the hinges on one side, install the latch on the opposite side, then align and adjust the gate.
See our complete full pdf step-by-step Garden Gate Installation Guide.
👉 Looking for other installation options? Need posts? Check out our other installation guides:
-
***Installing a Garden Gate with Surface Posts***
- Installing a Garden Gate with 100mm or 150mm Aluminium Posts
Why Buy Your Gate from Residential Gates?
At Residential Gates, we make installation simple by supplying premium aluminium and composite garden gates with full fitting kits. Our gates are crafted from high-quality materials, ensuring exceptional durability and longevity in the UK climate. We take pride in the quality of our gates, using only the best materials to deliver superior strength and a premium finish.
✅ Available in Jet Black (RAL 9005) and Anthracite Grey (RAL 7016)
✅ Option for bespoke RAL colours
✅ Composite infill designs for a timber-style look without the maintenance
✅ 5-year manufacturer’s guarantee for added peace of mind
✅ Free mainland UK delivery on all orders
For personalised advice, installation guidance, or to request a quote, please contact our knowledgeable team today.
Final Thoughts
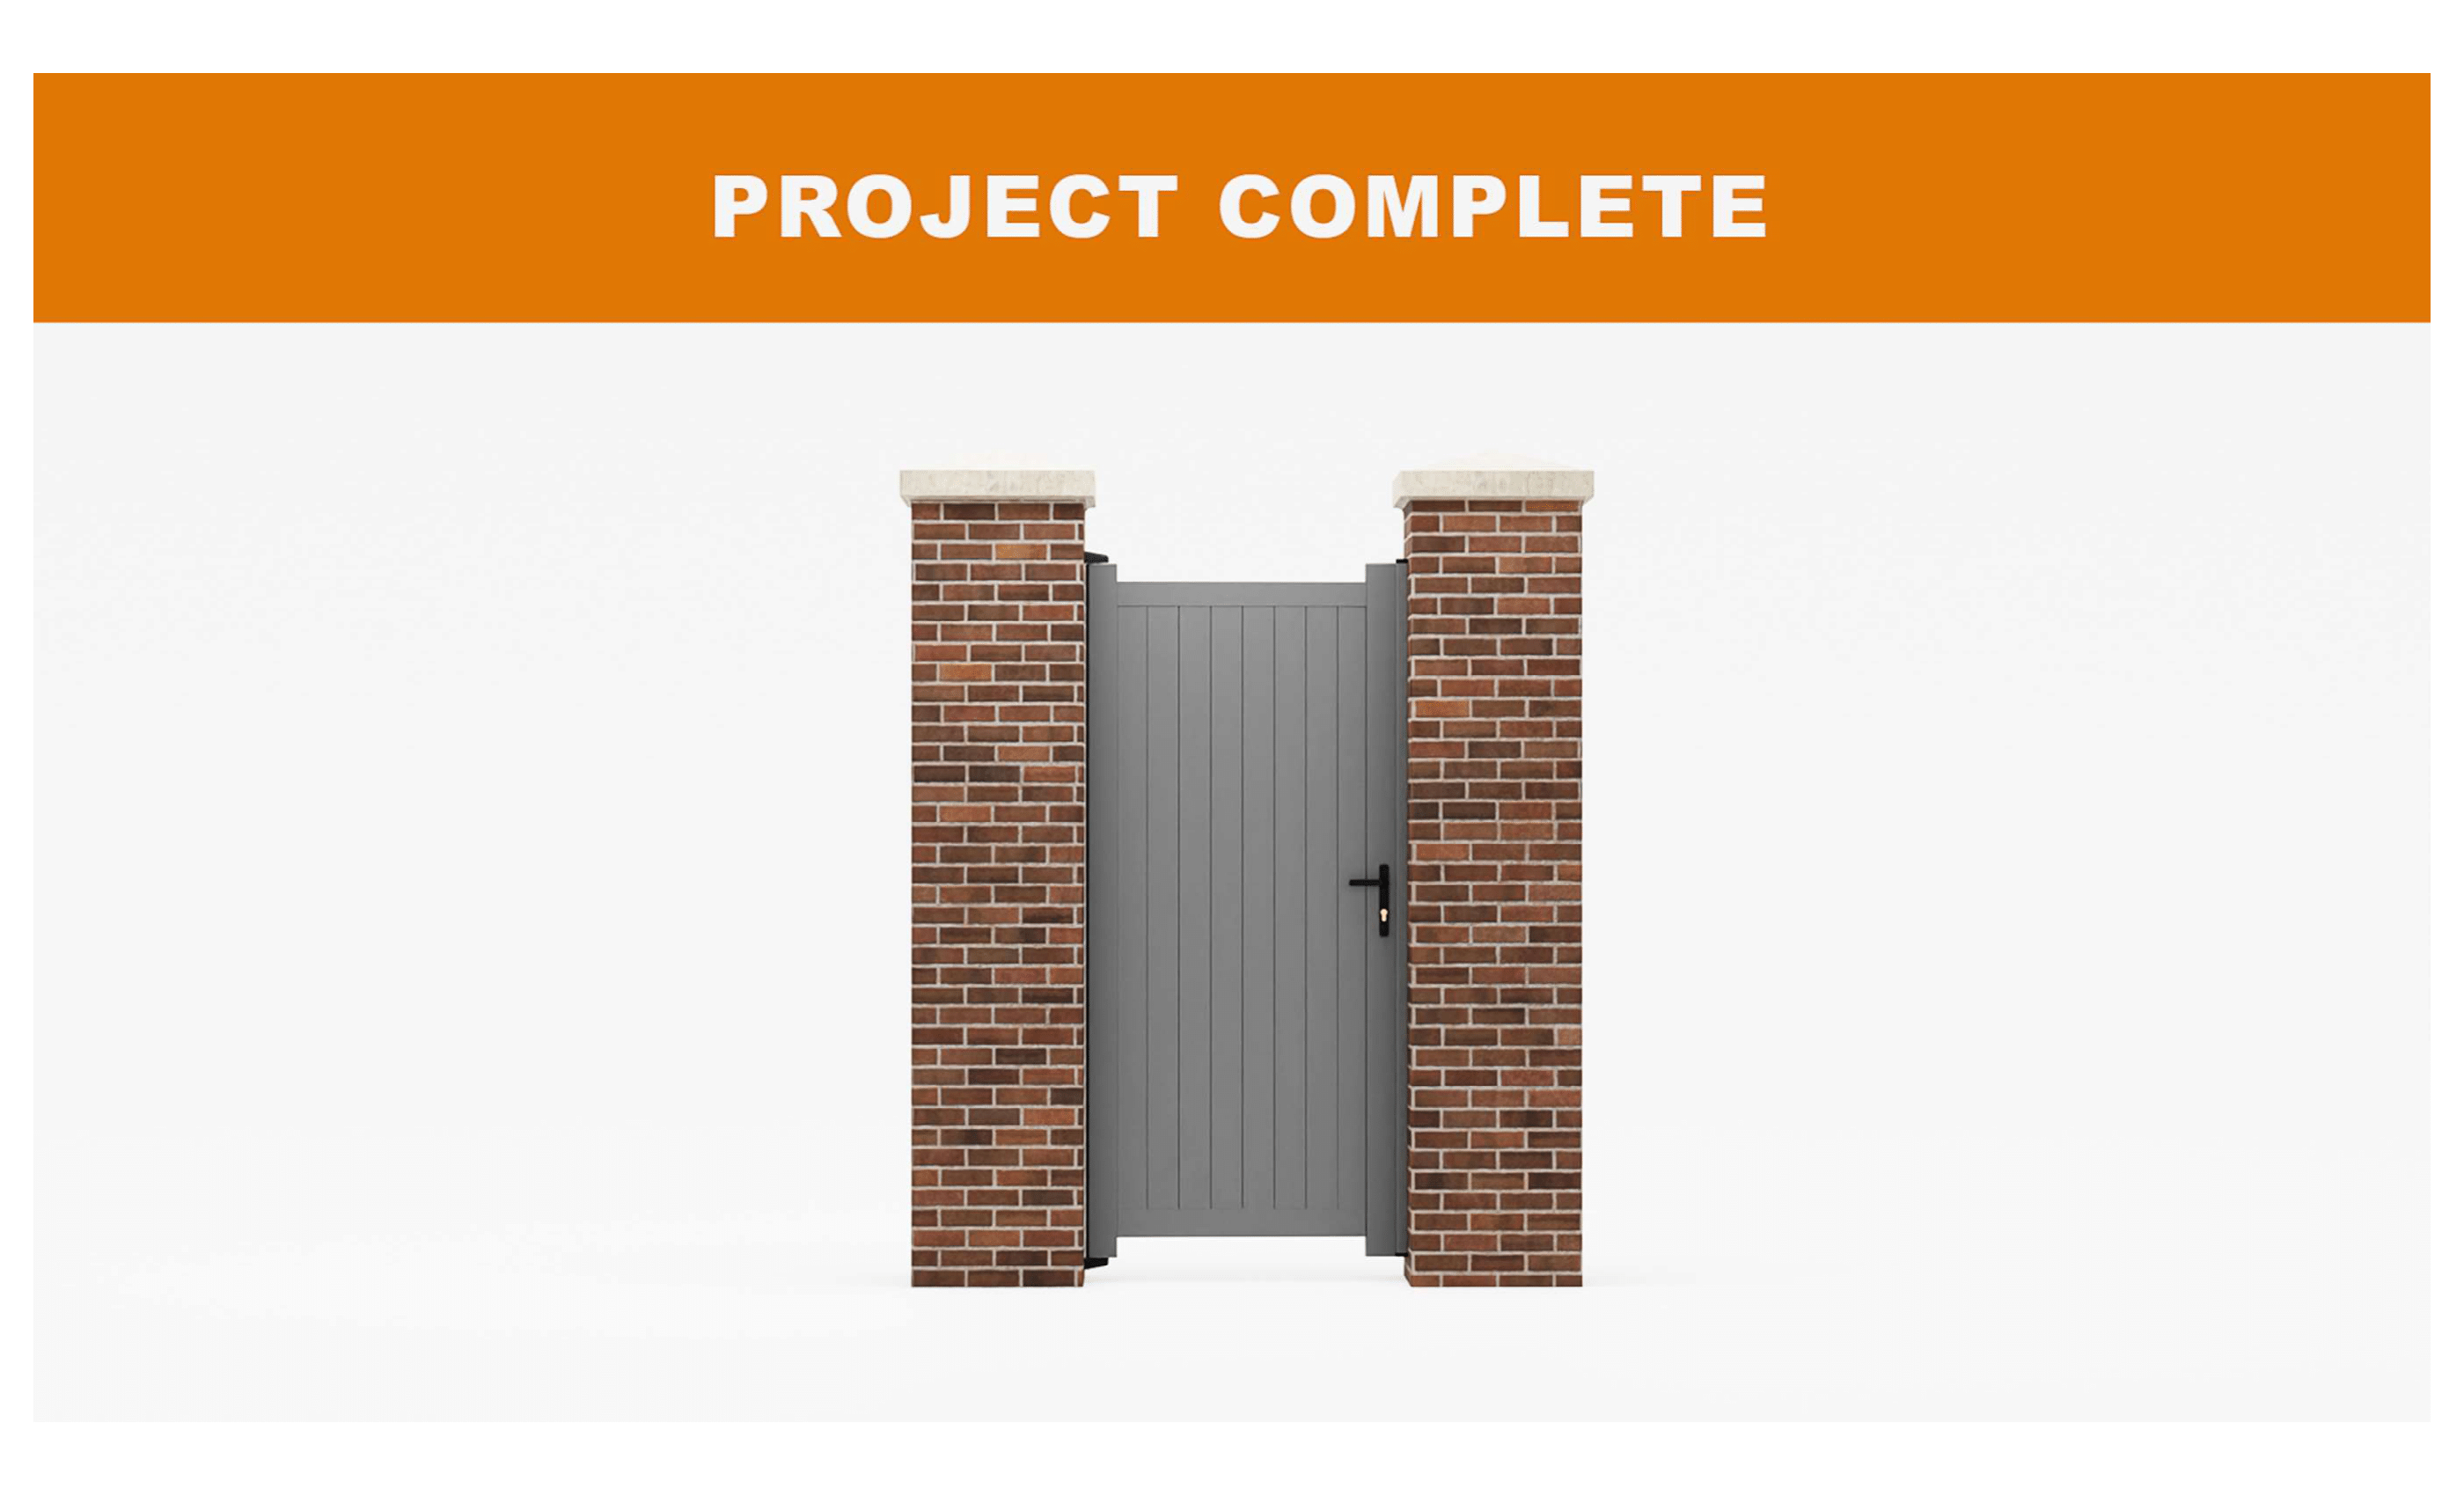
Installing a garden gate between walls, between a wall and existing post, or between two existing posts is a straightforward process when you follow the steps carefully. With accurate measuring, proper fixing, and final adjustments, you’ll have a secure and stylish gate that adds value and convenience to your home.